
Before and After...a Refresh and Update Project on a '93 s13 Hatch

Thread Starter
Because race car�
Joined: May 2005
Posts: 960
Likes: 0
Picked up a nice set of headlight trim from Brett (Bullitt_s13). Thanks man!! I'll post up a few pics of them once they're on...just because its been a while since i've updated the progress on the car.


Its the little thing i guess. Nice to look out the windshield and see the trim there rather than something that might poke someone's eye out.
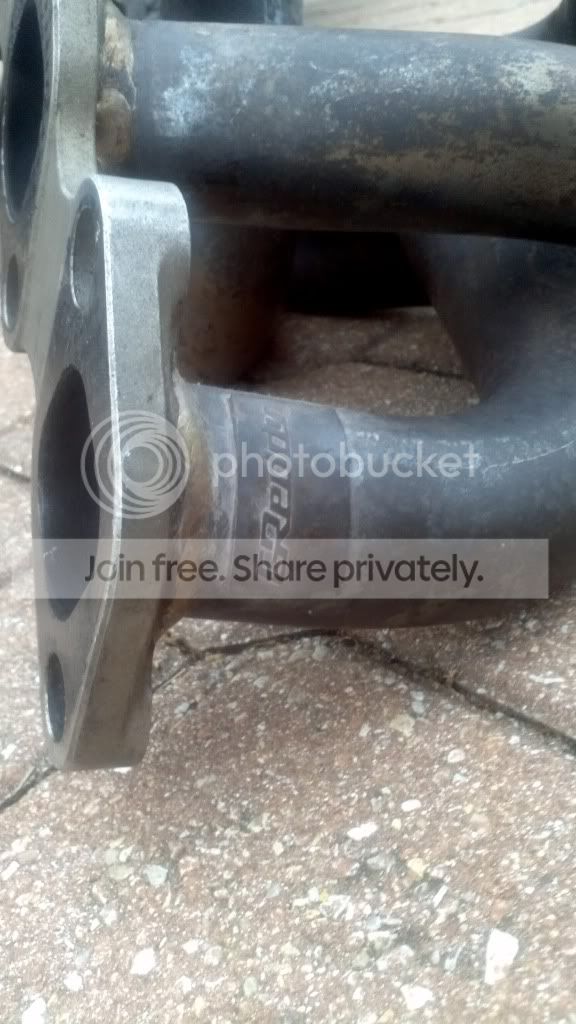
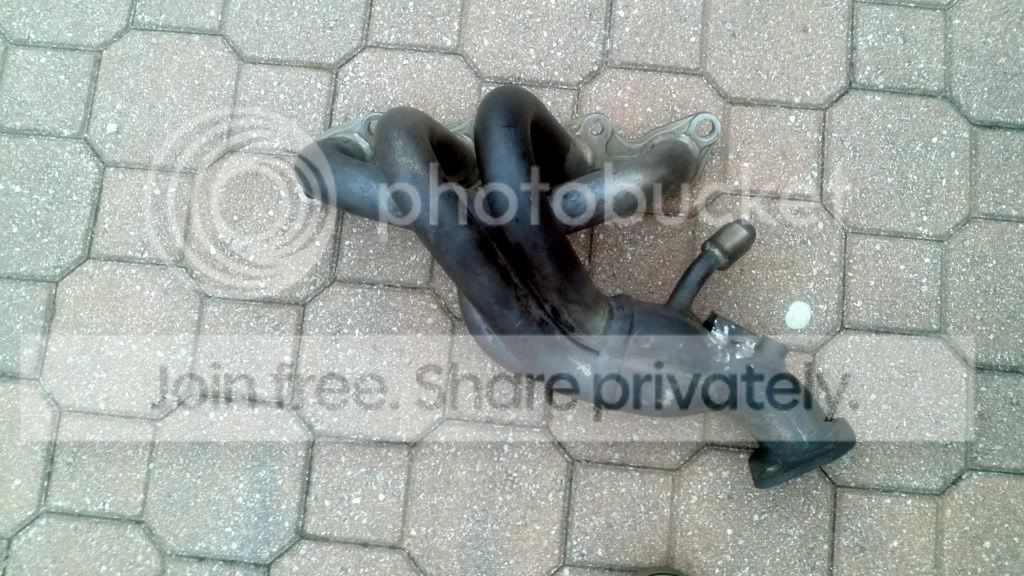
Also picked up this thing. I'm somewhat sceptical of how it may work. Though the primaries are decent size the collector exit is only 2". It may work well for torque and not so good for higher HP gains. It will help the velocity of the exhaust gases as they exits and it thearoy that may be somewhat an improvement over stock. And will dump into 2.5" for somewhat better folow. Plus these headers are notorious for cracking due to stress...i'm hoping that a decently bent down pipe with a flex section will help that. The complete exhaust have been done relatively inexpensively so if I need to upgrade to 3" i wont cry over it.
I currently run an ebay class 4-2-1 on the car that I will keep just in case the GReddy sucks.
Its the little thing i guess. Nice to look out the windshield and see the trim there rather than something that might poke someone's eye out.
Also picked up this thing. I'm somewhat sceptical of how it may work. Though the primaries are decent size the collector exit is only 2". It may work well for torque and not so good for higher HP gains. It will help the velocity of the exhaust gases as they exits and it thearoy that may be somewhat an improvement over stock. And will dump into 2.5" for somewhat better folow. Plus these headers are notorious for cracking due to stress...i'm hoping that a decently bent down pipe with a flex section will help that. The complete exhaust have been done relatively inexpensively so if I need to upgrade to 3" i wont cry over it.
I currently run an ebay class 4-2-1 on the car that I will keep just in case the GReddy sucks.
__________________
If it has tires or boobs it's going to cost you money...
If it has tires or boobs it's going to cost you money...
Last edited by rhart; Mar 7, 2012 at 02:41 PM. Reason: pix added

buildin' it
Joined: Aug 2006
Posts: 4,565
Likes: 0
eh. I favor the long tube headers more myself. I don't know that the short tube ones give you any sort of scavenging effect. But, that's all debatable since header design is such a "black magic" kind of art.
It is going to flow a lot better than the stock one, thats for sure. Don't know that you'll notice a whole lot of difference between the greddy one and the one you have now. Might make for a touch better low end torque, but I wouldn't expect any high rpm gains.
You're on the right track with the flex pipe.
I have also seen where people have cut the flange in between each runner to give it some flex relief. And also reinforce the welds, especially the collector since that is the key area to crack.
The general masses are split between the greddy and the hotshot headers. Some really like the greddy one, and others say the hot shot is better and made more power.
I'm thinking I would more than likely keep the little section of down pipe you would need at 2 inches. I think. Maybe 2.25. too much larger and you run the risk of letting the exhaust gases slow down. That downpipe is supposed to go where the stock cat is located. If you have a cat, that would be the best place to step up to the larger exhaust pipe.
I don't know how I feel about a 3 inch exhaust. I personally would not go that big for a NA build. Maybe for a turbo built. Depending on the size of the turbo. 2.5 might be too restricting for the turbo to spool up nicely if it is a decent size. But even for your supercharger, I don't know that I would go 3 inch. Just feels like overkill to me. For me, if you're using an off the shelf header, then I wouldn't go over 2.5 since all of the off the shelf headers I've seen have collectors either 2 or 2.5 inches. If you are going to go the custom header route, then I would say it depends on what the ideal runner diameter is. Crunch the numbers, get the ideal diameter of the runners, and the collector and base the rest of your exhaust on that.
Too big of an exhaust allows the gases to slow down more, which can actually create more resistance than a pipe that is a little bit too small.
Thread Starter
Because race car�
Joined: May 2005
Posts: 960
Likes: 0
I understand exactly what you refering to. Most header design theory I read expresses the need to keep velocity up on the escaping gases and the scavaging affect. It is a whole lot of voodoo if you ask me. Fluid dynamics... all that jazz. Add a custom ported head to the mix and you can change everyting. I do understand the basics though. No 3" inch for this car. 2.5 after the CAT. Because it will be supercharged the exhaust side will need to breath free, but not like a big dump for a turbo outlet.
I may eventually have a custom N1 Dual type cat back on the car...but thats down the road. For now I just hope this header does its job and stays whole until the plate for the SC is finsihed.
This weekend will be devoted to pulling a subframe. Next weekend the header will go on...I hope.
I may eventually have a custom N1 Dual type cat back on the car...but thats down the road. For now I just hope this header does its job and stays whole until the plate for the SC is finsihed.
This weekend will be devoted to pulling a subframe. Next weekend the header will go on...I hope.
__________________
If it has tires or boobs it's going to cost you money...
If it has tires or boobs it's going to cost you money...
Thread Starter
Because race car�
Joined: May 2005
Posts: 960
Likes: 0
PhotoReflect - Powerhead Productions - killboy.com - Deals Gap - Friday - June 17, 2011-killboy.com
I miss you car.
I miss you car.
__________________
If it has tires or boobs it's going to cost you money...
If it has tires or boobs it's going to cost you money...
Thread Starter
Because race car�
Joined: May 2005
Posts: 960
Likes: 0
Subframe swap...
I asked about it in the tech section and here are the results. I finally swapped my z32 knuckle, 4.36 180sx vlsd equipped subframe into the gold car from the blue shell. It was much easier than I anticipated. Considering that i do not have a lift and did the majority of the work by myself I thought 6 hours (including a lunch break) wasnt too bad. Keep in mind that I also repacked the bearings in the axles and installed a new transmission tail shaft seal while I was at it. Here are the pix...
Positioning the jack under the blue shell...thankfully this jack is a monster. Working on the ground/sand is for the birds...but I improvised.

For tools I used the following:
1/2" Breaker Bar: w/ 17mm(for the subframe bolts adn brakes), 19mm(for your wheel lugs)
3/8" socket wrench: w/ 10mm(for e-brake line brackets on the subframe), 12mm(for front subframe brackets)
(optional - 14mm to seperate the input shafts and axles to repack bearings since its easy access)
Large Flat head screwdriver (for the e-brake retaining clips on the rear calipers)
17mm wrench for removing the rear brake calipers
i bet there are a few I missed...but yeah. Surprisingly small tools list.

First off...
My subframe as it appeared in the blue hatch: Cross drilled s13 rotors, stock brakes, though I do have the z32 rear calipers ready to install (just need the z32 rear rotors). Z32 knuckles, and the background a 5 bolt axled 180sx vlsd, and 180sx rear swap-bar (not pictured)...

The shocks are just Monroe's for a z32 w/ Megan springs. Also running 15mm Ichiba spacers and extended studs.
Fast forward and i've already lowered the jack after removing the four(4) subframe nuts...still need to remove the brackets that hold the e-brake lines to the subframe.

All pulled out of the way. PLease note the blue hatch does not have a gas tank in it so there was more room to work with that in your standard s13. Plus the exhaust was already removed too.

Here is the subframe in all its glory.

The bushing were not completely shot...but they are on their way out. I could get by with aluminium colars. I wonder if the same method for motor mounts would work on the subframe mounts. polyurethane window weld inside the bushing...then capped with the aluminum colars? FTW or FTL?? I might try it... this one below was the worst of the bunch. still centered and not free floating, but still noticably warn.

You can see where the axles have been slinging white lithium grease out of the assembly (white stuff above the cap in the picture). So, I took this opportunity to re-pack the bearings while it was out and easy.

Lifted the gold hatch (higher due to less clearance from exhaust and gas tank) to repeat the process with the other sub frame...

I know I could have been more thorough with the pictures but here it is all up under the gold hatch. I still needed to install the rear shocks and brakes but all in all this was a slick swap. Tons easier swapping the assembly as a whole than it could have been piece by piece.

So...whats next?
Power and Paint...
This thing now is a blast to drive again!!
Thanks for looking...
I asked about it in the tech section and here are the results. I finally swapped my z32 knuckle, 4.36 180sx vlsd equipped subframe into the gold car from the blue shell. It was much easier than I anticipated. Considering that i do not have a lift and did the majority of the work by myself I thought 6 hours (including a lunch break) wasnt too bad. Keep in mind that I also repacked the bearings in the axles and installed a new transmission tail shaft seal while I was at it. Here are the pix...
Positioning the jack under the blue shell...thankfully this jack is a monster. Working on the ground/sand is for the birds...but I improvised.
For tools I used the following:
1/2" Breaker Bar: w/ 17mm(for the subframe bolts adn brakes), 19mm(for your wheel lugs)
3/8" socket wrench: w/ 10mm(for e-brake line brackets on the subframe), 12mm(for front subframe brackets)
(optional - 14mm to seperate the input shafts and axles to repack bearings since its easy access)
Large Flat head screwdriver (for the e-brake retaining clips on the rear calipers)
17mm wrench for removing the rear brake calipers
i bet there are a few I missed...but yeah. Surprisingly small tools list.
First off...
My subframe as it appeared in the blue hatch: Cross drilled s13 rotors, stock brakes, though I do have the z32 rear calipers ready to install (just need the z32 rear rotors). Z32 knuckles, and the background a 5 bolt axled 180sx vlsd, and 180sx rear swap-bar (not pictured)...
The shocks are just Monroe's for a z32 w/ Megan springs. Also running 15mm Ichiba spacers and extended studs.
Fast forward and i've already lowered the jack after removing the four(4) subframe nuts...still need to remove the brackets that hold the e-brake lines to the subframe.
All pulled out of the way. PLease note the blue hatch does not have a gas tank in it so there was more room to work with that in your standard s13. Plus the exhaust was already removed too.
Here is the subframe in all its glory.
The bushing were not completely shot...but they are on their way out. I could get by with aluminium colars. I wonder if the same method for motor mounts would work on the subframe mounts. polyurethane window weld inside the bushing...then capped with the aluminum colars? FTW or FTL?? I might try it... this one below was the worst of the bunch. still centered and not free floating, but still noticably warn.
You can see where the axles have been slinging white lithium grease out of the assembly (white stuff above the cap in the picture). So, I took this opportunity to re-pack the bearings while it was out and easy.
Lifted the gold hatch (higher due to less clearance from exhaust and gas tank) to repeat the process with the other sub frame...
I know I could have been more thorough with the pictures but here it is all up under the gold hatch. I still needed to install the rear shocks and brakes but all in all this was a slick swap. Tons easier swapping the assembly as a whole than it could have been piece by piece.
So...whats next?
Power and Paint...
This thing now is a blast to drive again!!
Thanks for looking...
__________________
If it has tires or boobs it's going to cost you money...
If it has tires or boobs it's going to cost you money...
Last edited by rhart; Mar 6, 2012 at 03:36 PM.


Thread Starter
Because race car�
Joined: May 2005
Posts: 960
Likes: 0
Since gold hatch had an open diff before, installing this makes the car feel much more planted in all situations. The 4.36 gearing makes better use of the KA's power band. the need to shift comes much quicker and it takes advantage of a KA's torque. There isnt a huge difference in gas mileage either. Though I would stick with a 4.08 if all i did was highway driving, I've been to the NC with it in the blue hatch and the mileage was around 25mpg...about 4mpg less than what i saw in with 4.08s on the same trip in the same car the previous year.
It increases the cars grin factor...lol.
It increases the cars grin factor...lol.
__________________
If it has tires or boobs it's going to cost you money...
If it has tires or boobs it's going to cost you money...
Last edited by rhart; Mar 8, 2012 at 05:02 AM.
buildin' it
Joined: Aug 2006
Posts: 4,565
Likes: 0
glad to see the swap went so easily.
I think it would have been much more of a pain to try to do everything a piece at a time.
You're right about the bushings, you could do the window weld stuff if you wanted to.
Since I started really researching how to build a 240sx "rat rod" style, I have had quite a few guys tell me that they did similar things like that to their cars Not that they really had subframes in those kinds of cars, but the concept is still the same. Had one guy tell me he used polyurethane and heavy zinc washers to make his own bushings. It is really neat to see how people did/do things when there isn't aftermarket parts to buy. It is a lot of the same stuff that we have all learned over the years with "budget builds" and all of that, figuring out what parts from others cars to use (like 300zx brake and diff swaps) but taken a bit further.
I'm planning, when I finally get another 240 down the road, to do pretty much that same thing, A drill and polyurethane, and see how far I can get with all of the bushings on the car, including the subframe.
How does the driving impression compare to the blue car? Feel the same yet?
speaking of gearing and gas mileage and all of that, you know what someone should do? get the gearing of the 6 speed transmission they used in the camaros. the T-56 tranny i think. and compare that to the stock KA tranny and see how the 1-5 gears compare. If they are similar, then you would get the same kind of performance out of it with the 4.36 diff, but then be able to drop it into that 6th gear and have nice low rpms for highway cruising. Then you would have the best of both worlds.
hows the supercharger set up coming along?


