
FS: MK3 Shaved front bumper


Thread Starter
AKA: jgti
Joined: Apr 2007
Posts: 298
Likes: 0
NEW PICTURES ADDED
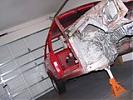
I have a shaved MK3 front bumper. All the plastic welding has been done, on both sides. (front & back) I burned in 3 coats of poly plastic, and smacked the welded spots with a rubber mallet, to make sure nothing would crack or break lose. The body line gap is perfectly smooth, and in line.
To make this bumper complete it will need poly fill (bondo for plastic bumpers) sand, and paint.
Just to make note. The blinkers, fogs, and lower air ducts have been shaved. The side indicators are not.
I will throw in the rear donor bumper with it.
$150 firm.
Pictures:


If there is any interest, I will take more pictures.
I have a shaved MK3 front bumper. All the plastic welding has been done, on both sides. (front & back) I burned in 3 coats of poly plastic, and smacked the welded spots with a rubber mallet, to make sure nothing would crack or break lose. The body line gap is perfectly smooth, and in line.
To make this bumper complete it will need poly fill (bondo for plastic bumpers) sand, and paint.
Just to make note. The blinkers, fogs, and lower air ducts have been shaved. The side indicators are not.
I will throw in the rear donor bumper with it.
$150 firm.
Pictures:
If there is any interest, I will take more pictures.
__________________
DA BUCKET
 http://i84.photobucket.com/albums/k2...100_3052-2.jpg" border="0" />
DA BUCKET
http://i84.photobucket.com/albums/k2...100_3052-2.jpg" border="0" />
Last edited by jgti1; May 4, 2010 at 07:13 AM.


Hooligan
Joined: Jul 2006
Posts: 5,362
Likes: 0


stay badgless
Joined: Jun 2007
Posts: 536
Likes: 0
so all that needs to be done to this is a nice sanding and paint? i might be interested kind sir.
__________________
03 Chevy Tracker-Sold
98 vw GTI Vr6-Sold
95 vw Cabby 2.0T-stolen
95 vw Jetta 2.hellaslow-sold
03 Chevy Tracker-Sold
98 vw GTI Vr6-Sold
95 vw Cabby 2.0T-stolen
95 vw Jetta 2.hellaslow-sold
stay badgless
Joined: Jun 2007
Posts: 536
Likes: 0
over the welds? or till fill the side markers? i really want this like within the next week. i just want to know everything that still needs to be done.
__________________
03 Chevy Tracker-Sold
98 vw GTI Vr6-Sold
95 vw Cabby 2.0T-stolen
95 vw Jetta 2.hellaslow-sold
03 Chevy Tracker-Sold
98 vw GTI Vr6-Sold
95 vw Cabby 2.0T-stolen
95 vw Jetta 2.hellaslow-sold
Thread Starter
AKA: jgti
Joined: Apr 2007
Posts: 298
Likes: 0
Here is the lay down.
First off do not poly fill anything that is a open hole. Like the side markers, Big mistake.
Poly fill should only be used in skim coats. (super thin)
If you want to fill the side markers (I was going to use them as blinkers) you will have to cut a pattren out the extra bumper I have. Place the pattren flush in the hole, and burn it in place with a soldering iron. Once you've done this you will need to cut small strips of plastic from the donor bumper, and burn those into your weld marks. This creates a strong bond between the bumper, and the filler piece. Plastic welding is a long , smoke choking process.
If you like the bumper the way it is. here is the finishing lay down to complete it.
Finish sanding the entire bumper with 80grt sandpaper.
Smooth out all the heavy 80grt scratch lines with 120grt sandpaper.
Once the 120grt process is complete, apply the poly fill in all the low spots.
Once the poly fill is completely dry, use a sanding block with 120grt sandpaper to knock it down. Do not press the sanding block down hard. Be light with the block, and let the sandpaper do it's job. If you press down hard, this is how you cause a waves in level areas.
Once you sand out the first coat of poly filler, there might be a few spots that will need the process repeated.
When you think all the filled areas look good, then sand the entire bumper with 220grt sandpaper(keep using the sanding block lightly). Workout all the heavier sand marks from the 120grt paper.
Once you've finished all the 220 sanding, use a grey sandable spray bomb primer.
Once the primer has dried you will see if the work you've done is right. Scratch marks, low spots, and even high spots will show through. If you see them through the primer, they will 100% for sure show through paint work.
If there is anything that needs to be fixed sand the area out with 120grt again, and repeat your process in those areas until it's right.
Once the bumper is where you want it, put a good coat of sandable primer on it.
Then wet sand it with 330grt paper, until the bumper looks like glass.
Now it's ready for paint.
Then I'd break out a bottle of Jameson, and admire my great work!!
Remember never take short cuts when doing bodywork. This will only lead to crappy quality in the end, or something that wont last long from every day use.
__________________
DA BUCKET
http://i84.photobucket.com/albums/k2...100_3052-2.jpg" border="0" />
DA BUCKET
http://i84.photobucket.com/albums/k2...100_3052-2.jpg" border="0" />
Last edited by jgti1; May 5, 2010 at 07:35 AM.


