
D16 valve cover mods

Thread Starter
Used Register
Joined: Apr 2008
Posts: 204
Likes: 0
I suppose this is the right section for this (being a project)...
Since I have two D16s, I decided to take the "crappier" engine's vc and modify it. When I do a proper build one day, I want to do my own vc work as much as possible. So this vc is my practice... I have one more D16 vc to play with after I get this one done (my original engine's).
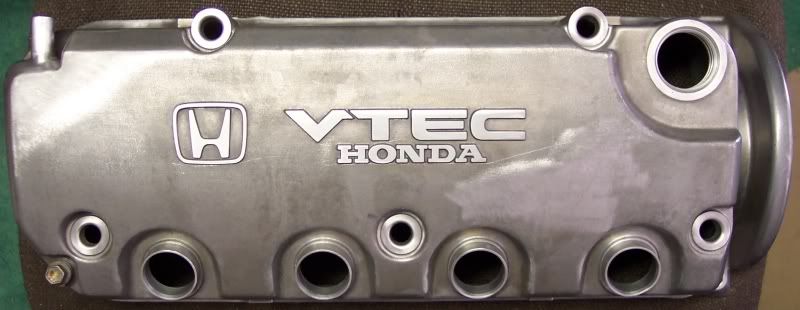
^ This thing was a nasty, spray-painted mess of red when I got it. I had to use aircraft stripper to remove all the red paint. The inside of the vc was a nasty dark brown from whoever ran the hell out of the poor D16 (maybe they didn't do regular oil changes, I don't know). I had started the cleaning of this vc earlier this year, but haven't had time until recently to finish it up. Aircraft stripper saved the day, all that dark brown crap came right off with a little encouragement.
I cleaned up the logo & lettering with my [air powered] angle grinder, and then with a buffing wheel on my Dremel. After that, hand polishing with 800, 1500, and 2000 grit sandpaper on a block of wood. The lettering etc will be taped off when this gets painted. Also used the Dremel to clean up where the valve cover bolts' grommets touch down, the oil filler hole, and around the spark plug tubes.
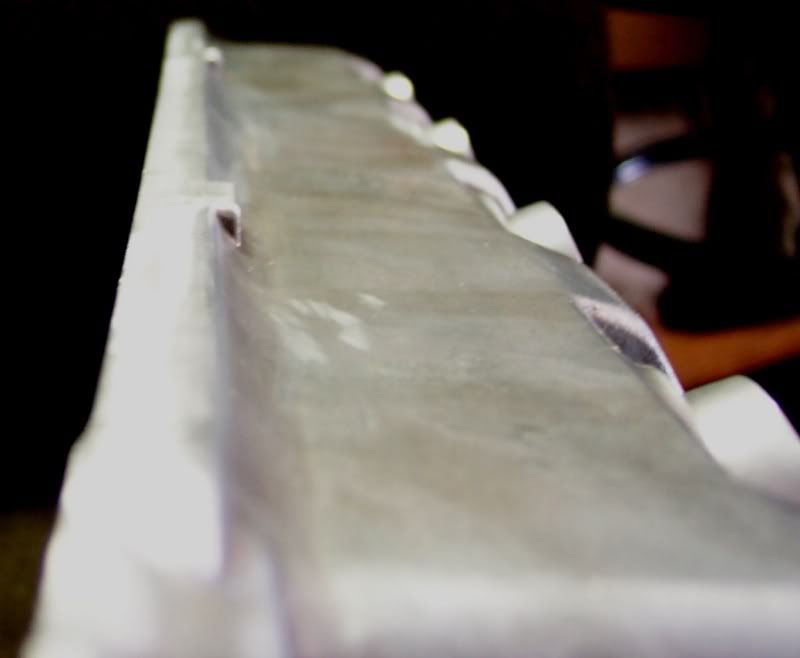
^ Not a very good pic, but I cleaned up the casting lines all around the edges.
^ There used to be a sort of ridge / casting line going up and around this corner.


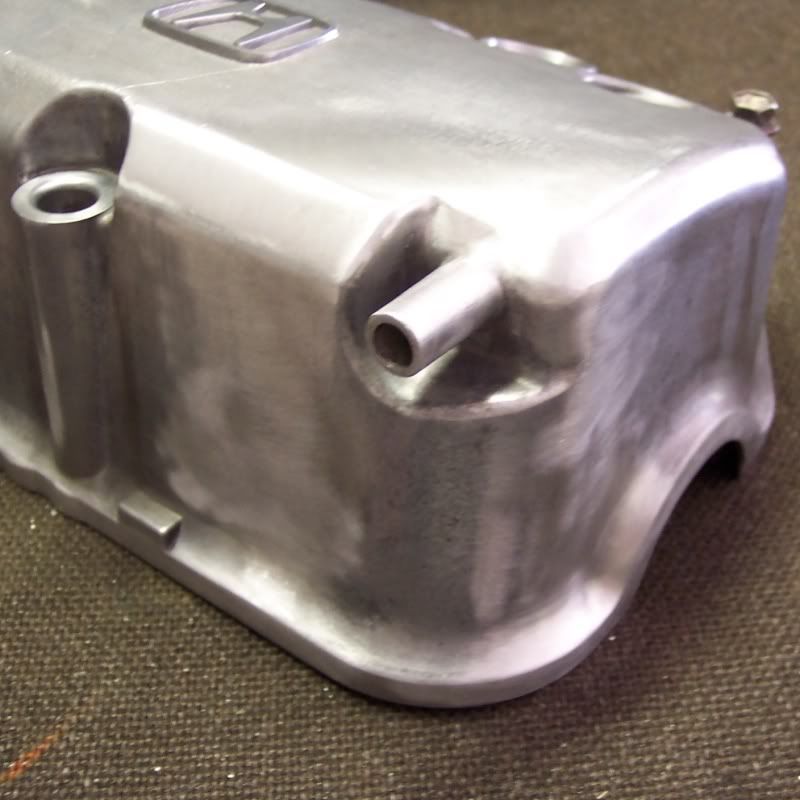
^ This was my biggest task, something I just wanted to see how well I could pull off. I removed the lip from the cam gear side so that the upper timing cover can be removed without having to take the damn vc off. I didn't actually try this out on the engine yet... but I imagine the timing cover will come off just fine. Will try this after I get the thing powdercoated.
Next is taping off all the areas I don't want painted, and hopefully tomorrow, powdercoating it in black. I'm going to do my original D16's vc in orange...
Since I have two D16s, I decided to take the "crappier" engine's vc and modify it. When I do a proper build one day, I want to do my own vc work as much as possible. So this vc is my practice... I have one more D16 vc to play with after I get this one done (my original engine's).
^ This thing was a nasty, spray-painted mess of red when I got it. I had to use aircraft stripper to remove all the red paint. The inside of the vc was a nasty dark brown from whoever ran the hell out of the poor D16 (maybe they didn't do regular oil changes, I don't know). I had started the cleaning of this vc earlier this year, but haven't had time until recently to finish it up. Aircraft stripper saved the day, all that dark brown crap came right off with a little encouragement.
I cleaned up the logo & lettering with my [air powered] angle grinder, and then with a buffing wheel on my Dremel. After that, hand polishing with 800, 1500, and 2000 grit sandpaper on a block of wood. The lettering etc will be taped off when this gets painted. Also used the Dremel to clean up where the valve cover bolts' grommets touch down, the oil filler hole, and around the spark plug tubes.
^ Not a very good pic, but I cleaned up the casting lines all around the edges.
^ There used to be a sort of ridge / casting line going up and around this corner.
^ This was my biggest task, something I just wanted to see how well I could pull off. I removed the lip from the cam gear side so that the upper timing cover can be removed without having to take the damn vc off. I didn't actually try this out on the engine yet... but I imagine the timing cover will come off just fine. Will try this after I get the thing powdercoated.
Next is taping off all the areas I don't want painted, and hopefully tomorrow, powdercoating it in black. I'm going to do my original D16's vc in orange...
Last edited by Rogue; Aug 22, 2010 at 10:22 AM.
Thread Starter
Used Register
Joined: Apr 2008
Posts: 204
Likes: 0


^ VC ready for powdercoating. Samba Green Pearl tape!


^ Here's the only "before" pic I have of the vc. Believe me, it was terrible...


^ As it is right now. I just need to clean it up a little bit, as some of the tape I put down started coming off after it was washed, which let powder get onto areas I wanted bare. Overall the vc isn't perfect, the vc not being in great shape to begin with, but a great learning experience and it looks a hell of a lot better than it started out!

bassheadsent.net
Joined: Jul 2002
Posts: 2,281
Likes: 0
Thread Starter
Used Register
Joined: Apr 2008
Posts: 204
Likes: 0
Thanks. Few more pics of this vc, then I'll be working on the next vc.


Timing cover can come off just fine, though I couldn't get mine off fully because of the PS crap in the way. Can't wait to get rid of that and throw in a manual rack.
Also I scratched up the damn vc while I was cleaning off some of the powdercoat overspray... ah well, this was a test, and it still looks better than it did.
Budget Baller
Joined: Apr 2004
Posts: 1,594
Likes: 0
Looks pretty good, Maybe a mil or two thicker and it would have ended up even smoother. Also if you lay some clear on it you won't have to worry about the scratching the next time around.
__________________

Registered User
Joined: Sep 2006
Posts: 300
Likes: 0
Thread Starter
Used Register
Joined: Apr 2008
Posts: 204
Likes: 0
This was done at my job, so it was their oven (which is set around 450� F I think).
Thanks for the tip... when I have the next vc done I'll ask the guy to lay it on a little thicker. And with clearcoat... 
After the orange D16 cover, I'm probably going to be working on a friend's spare B series vc. I think he wants the top polished
After the orange D16 cover, I'm probably going to be working on a friend's spare B series vc. I think he wants the top polished


