
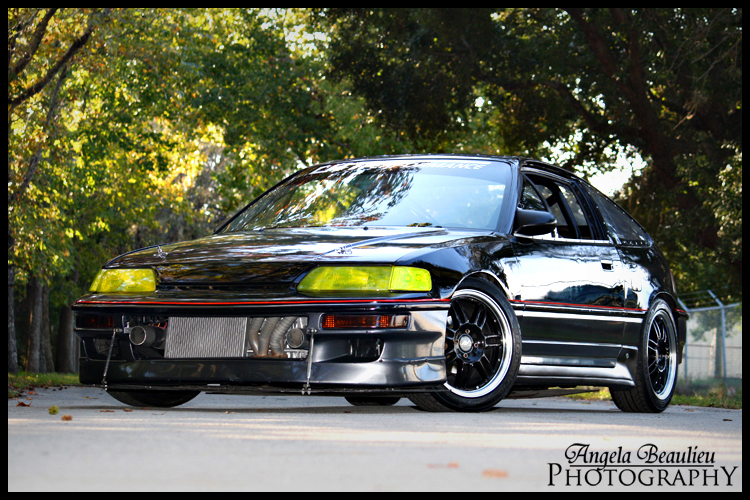
My Crx Si (Under Development)

Thread Starter
CFP was...
Joined: Jan 2004
Posts: 242
Likes: 0
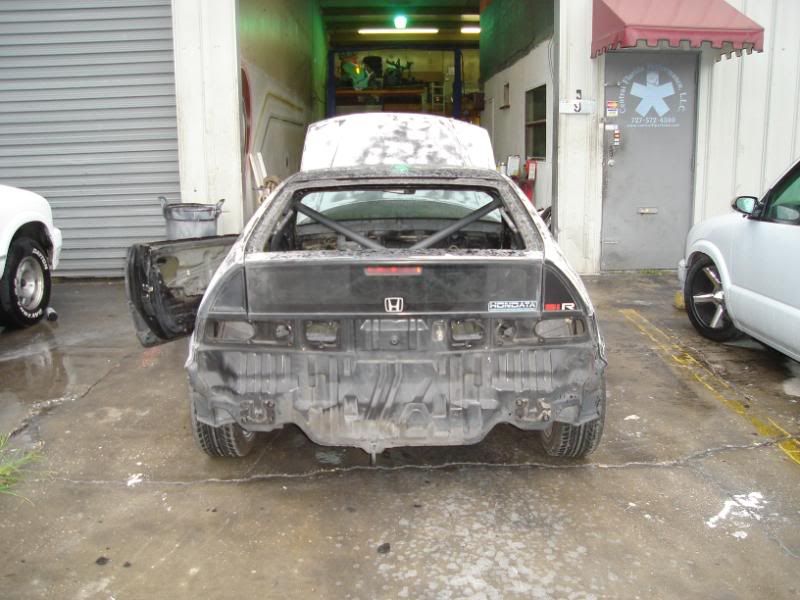
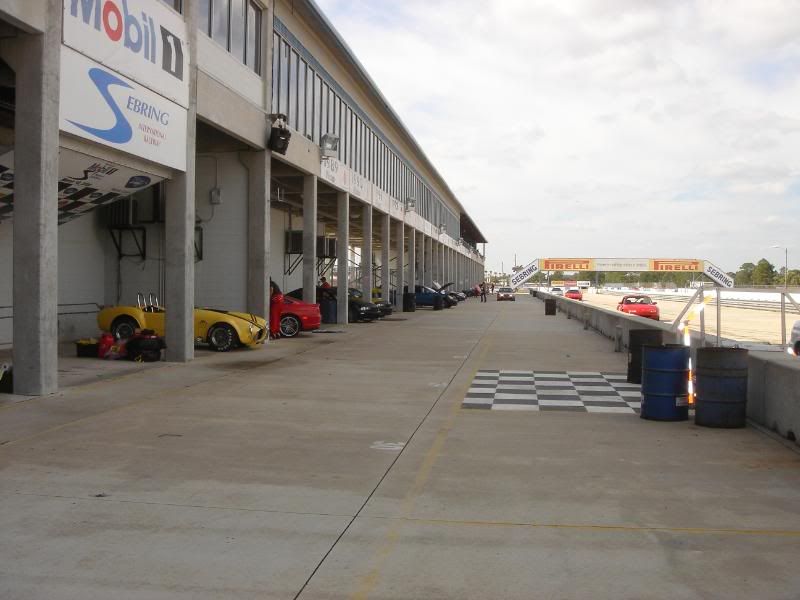
Hello, this is my 1990 CRX SI track car. I'm getting this car ready to take it to SEBRING RACEWAY to learn how to properly race on track. By signing up with events like CHIN MOTORSPORTS and SAFE, i'm able to have an instructor whom is very experienced, teach me all the things i should know to be a great driver. From turn in points to hitting the apex and exiting as well, braking, shifthing, and accelarating. I've built this car mainly betwen me and my friend Patrick, on a very strict budget.
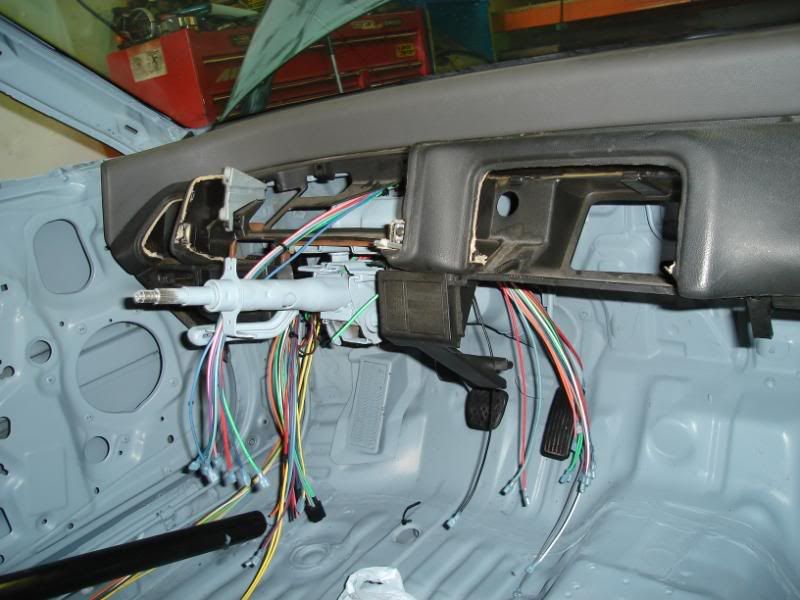
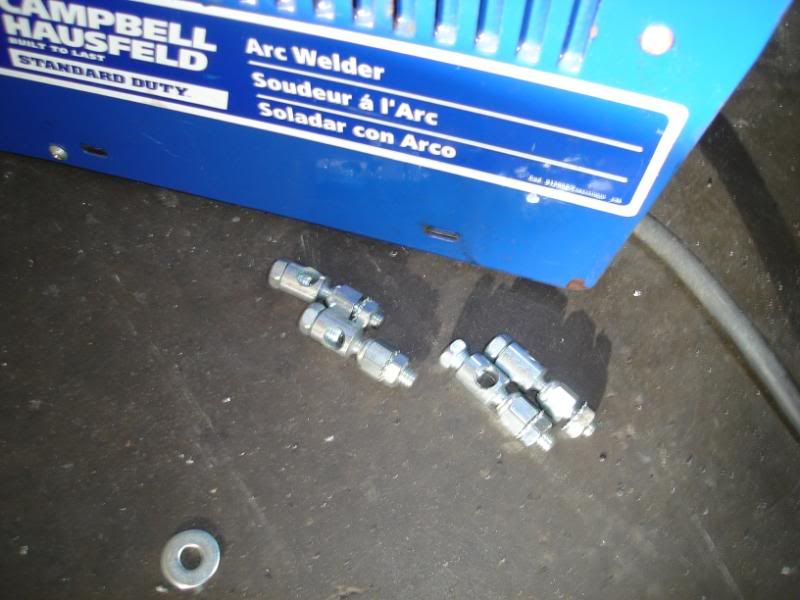
The body harness is a 20 circuit painless harness which is not really painless. lol.
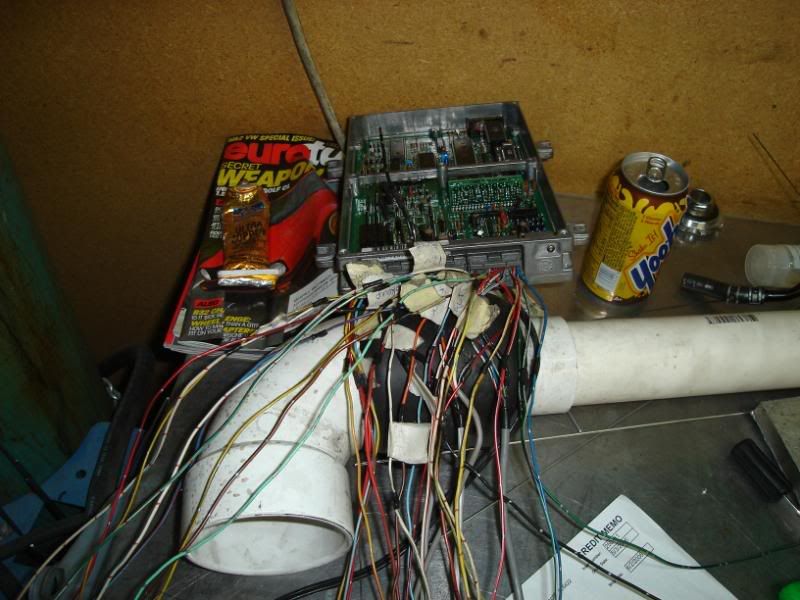
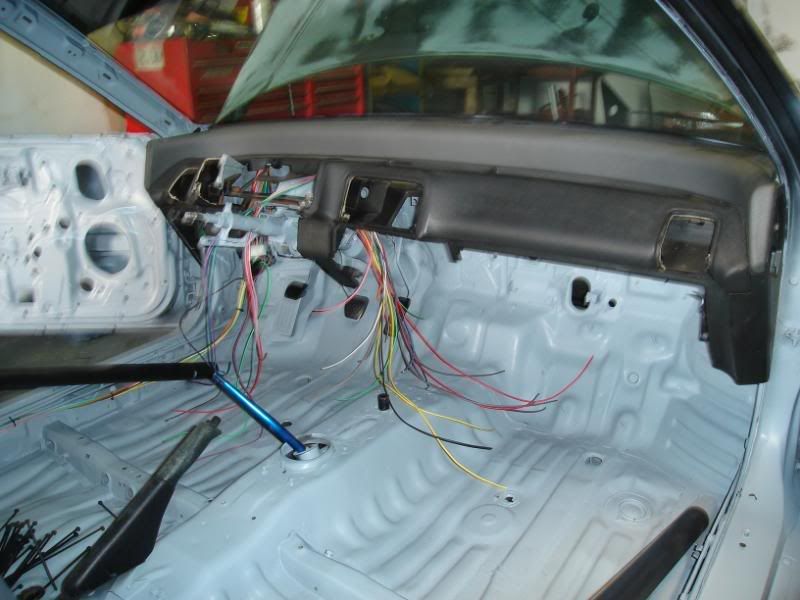
I completly removed any bit of wiring from the factory harness, even the engine harness. Then I cut all the pigtails to the body harness and engine harness that I needed for the car to run. I purchased an OBD1 ECU and had Hondata installed (S100) is what i needed but with boost, since next year I'm supercharging. After all that I went to the junkyard and purchased an OBD1 dizzy, Injectors, TB, IAC, IAT, VSS, ALT, and engine harness. Cut all the pigtails of the OBD1 Harness and I started making a one-piece engine harness. If you look at the pic with the switches, the one to the right is my self diagnostics switch, If I have a code,there's a yellow check engine light at the cluster, if it turns on, I press the yellow switch and it starts blinking the engine codes. :blah: .
The Body harness took me 8 hours to finish, blinkers, hazards, headligths and tailights, brake lighs, cooling fan, fuel pump, gauges, ignition coil, ecu, and sterter.
The Engine harness took me 17 hours to complete and lots of headakes :crazy: yes, crazy work. I happened to have had all the wiring diagrams. It's a task that requires lots of understanding on how electrics and electronics work.
Here's a listing of its mods.
ENGINE:
B16A STOCK
ARC INTAKE
DC HEADERS
ALUMINUM EXAHUST
HASSPORT MOUNTS
NEW OEM TIMING BELT
NEW LMA
NGK PLUGS AND WIRES
OBD2 INTAKE MANIFOLD
OBD2 FUEL RAIL
OBD2 INJECTORS
OBD2 T BODY
OBD2 DIZZY
DRIVETRAIN:
ACT STAGE II CLUTCH
6 LBS ALUMINUM FLYWHEEL
B16A TRANNY
SKUNK2 SHORT SHIFTER AND KNOB
POLY LINKAGE BUSHINGS
NEW OEM AXLES
NEW AXLE SEALS
SYNCROMESH
BRAKES:
OVERSIZED MASTER CYLINDER
RUSSELL SS BRAKE LINES
BREMBO BLANK ROTORS
MOTUL RBF FLUID
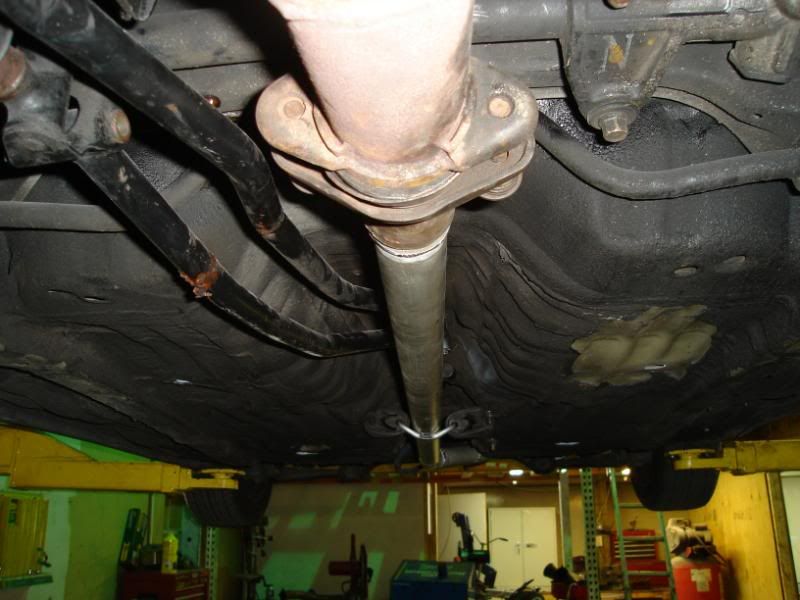
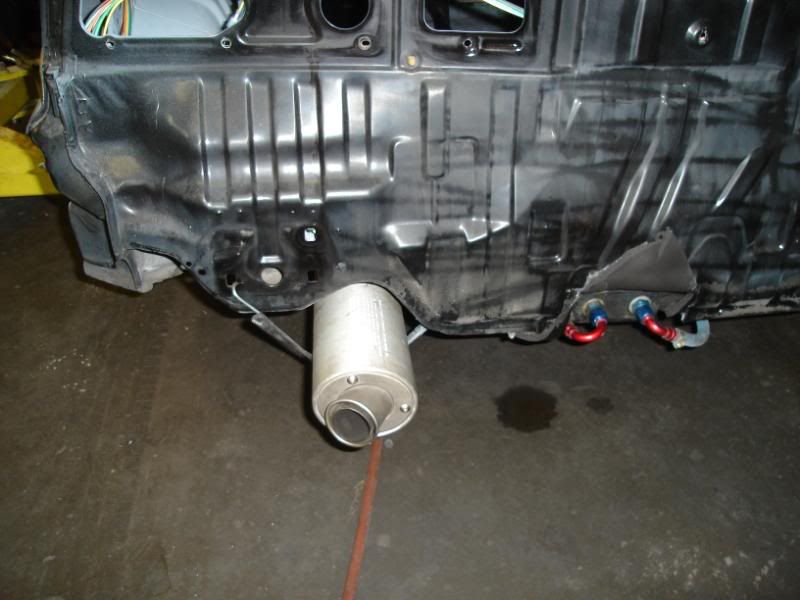
HAWK BLUE PADS
CUSTOM BRAKE DUCKTS
SUSPENTION:
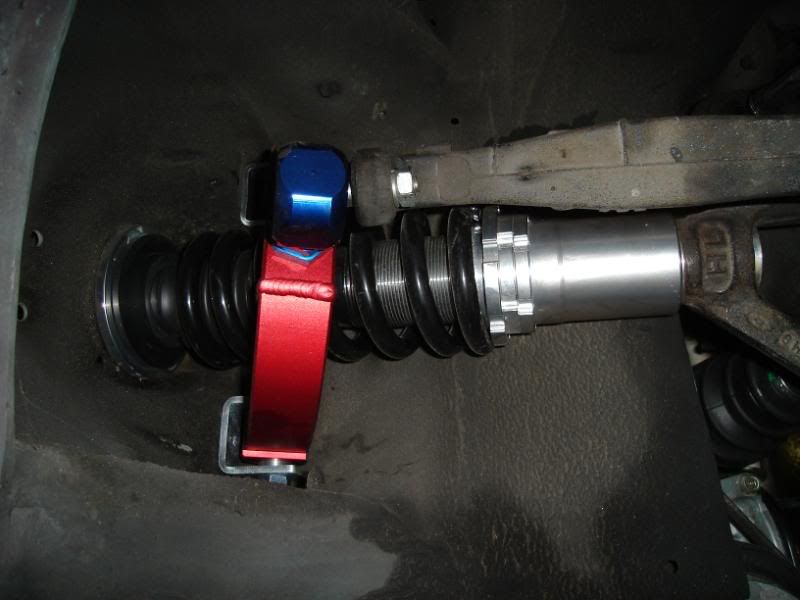
FULL BODIED COILOVERS 32 WAY ADJ
ST FULL SUSPENTION BUSHINGS
FRONT AND REAR INGALLS CAMBER ARMS
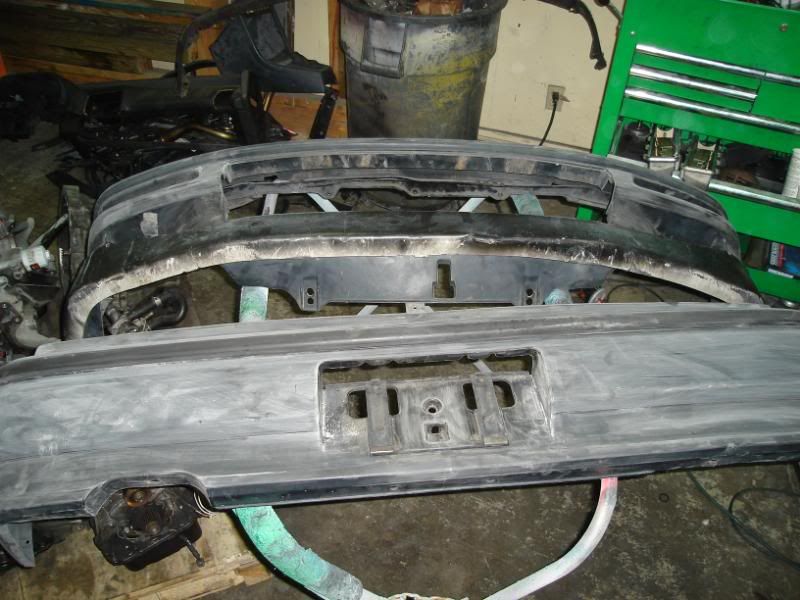
SWAY BAR BUSHINGS
FRONT STRUT BAR
BODY:
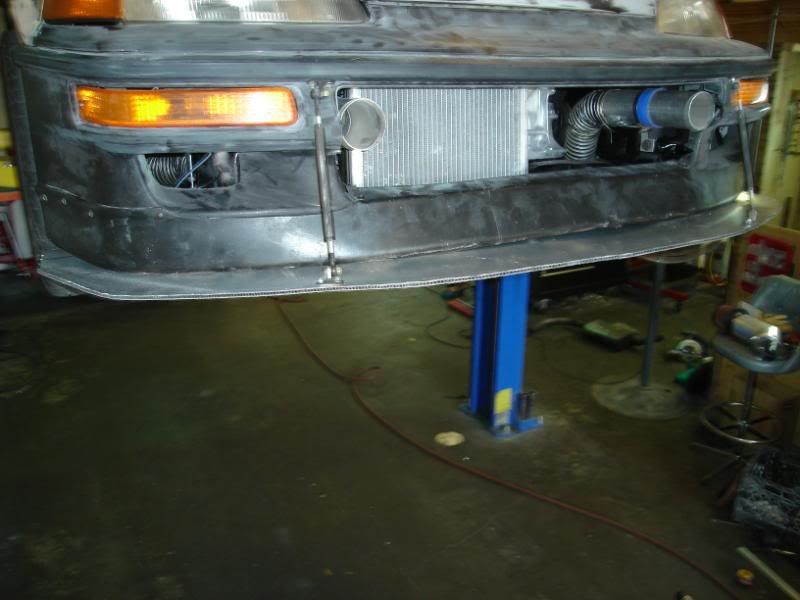
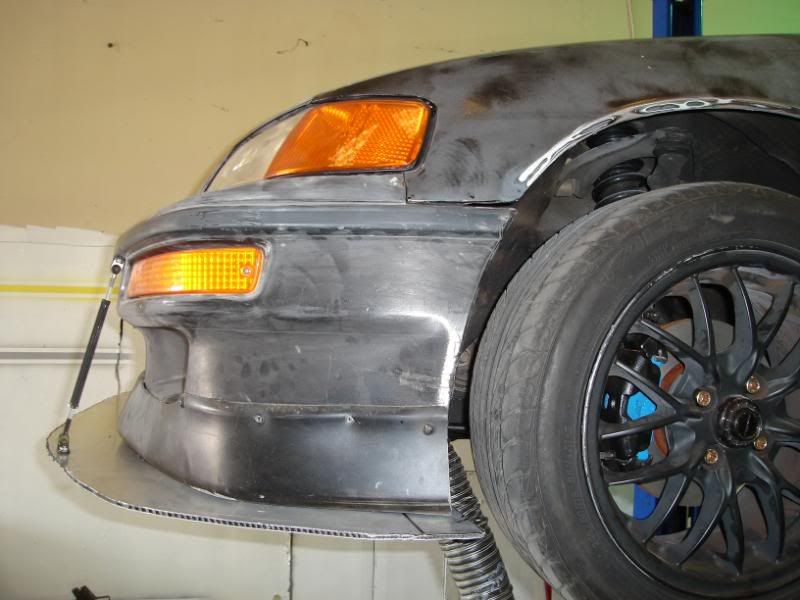
JDM FRONT END
FRONT LIP 3 INCH
FRONT SPLITER
SPORTS BIKE MIRRORS
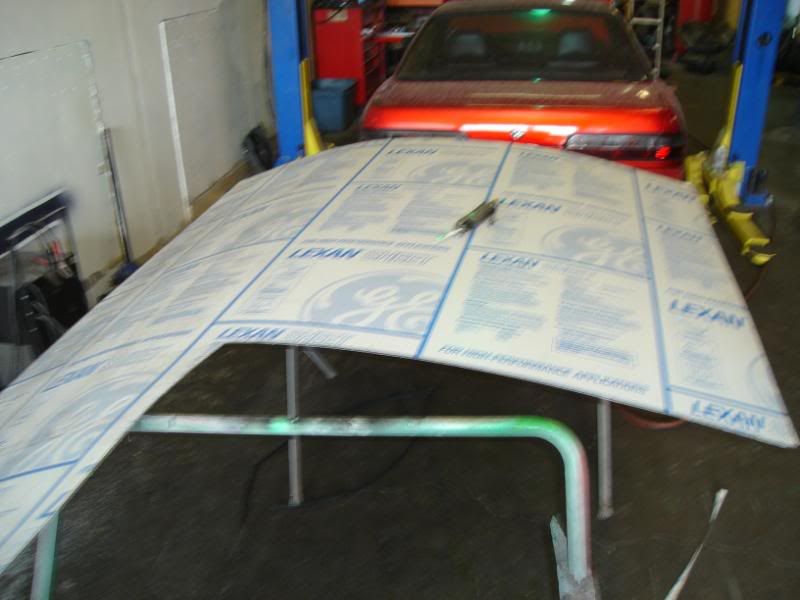
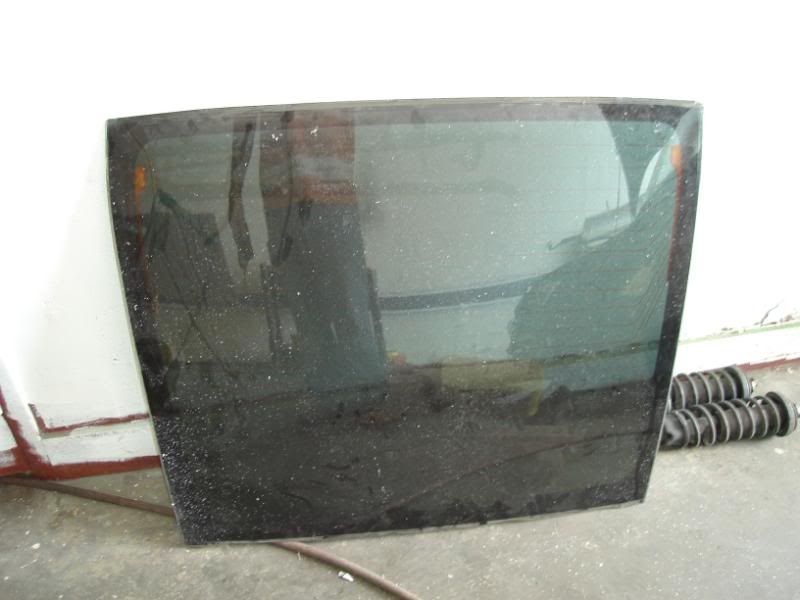
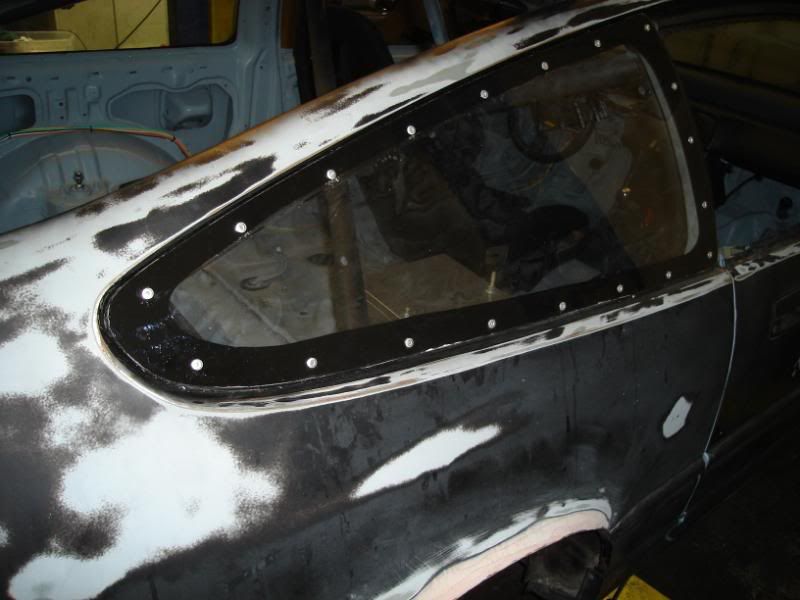
LEXAN WINDOWS
SPARCO FIBER GLASS DRIVER SEAT
SPARCO STEAL FRAMED SEAT
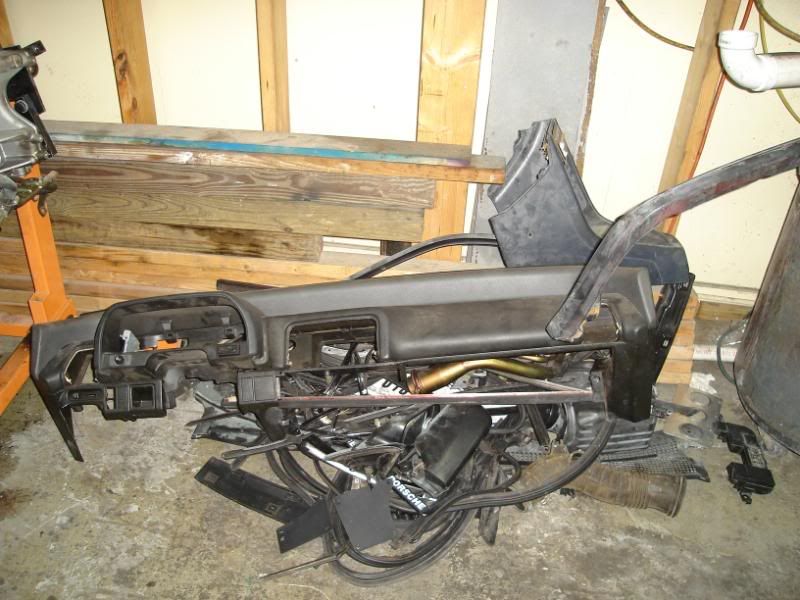
CUSTOM MADE DASH
FLARED REAR FENDERS
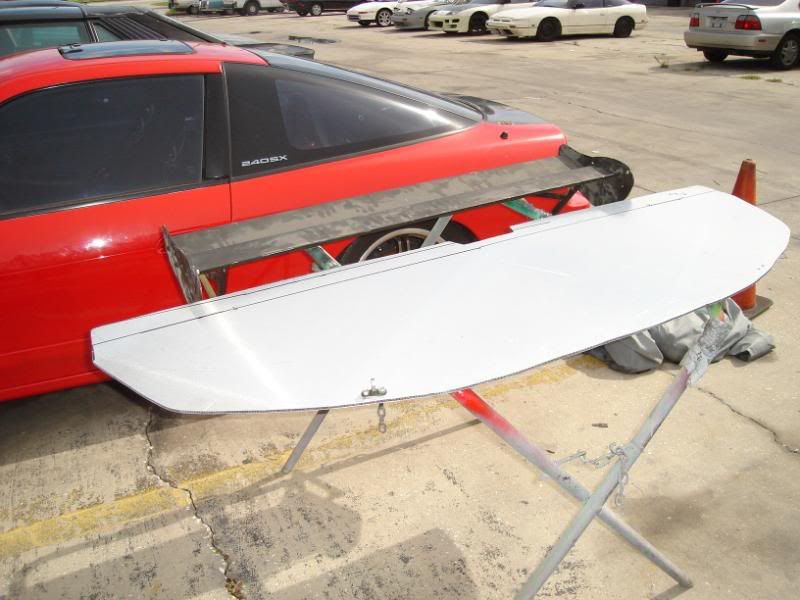
CUSTOM REAR WING
SIX POINT ROLL CAGE
RJS HARNESSES
HOOD PINS
UNDER BODY PANEL
REAR DIFFUSER
ELECTRONICS:
HONDATA S100
CUSTOM MADE ONE PIECE ENGINE HARNESS
AUTOMETER GAUGES, OIL PRESS, WATER TEMP, EGT, VACUUM
AEM UEGO WIDEBAND
PAINLESS 20 CIRCUIT BODY HARNESS
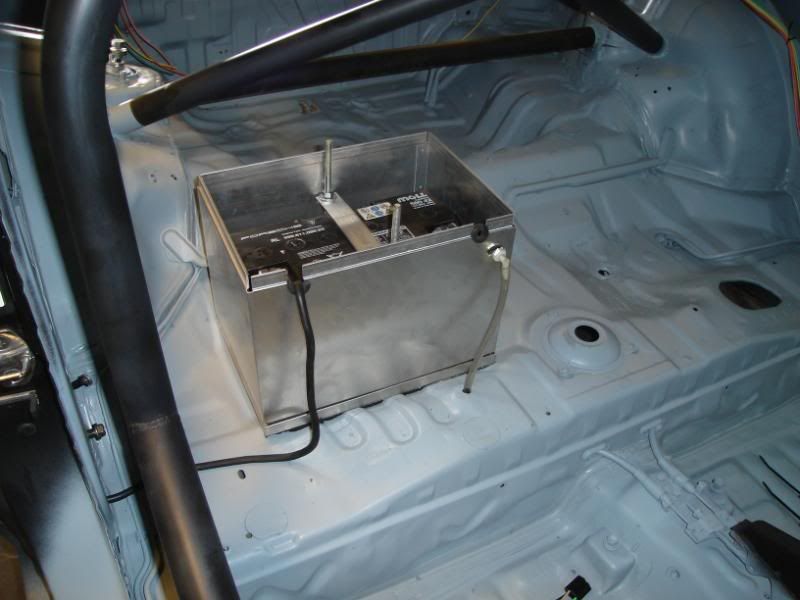
KILL SWITCH
TAYLOR BATTERY BOX
ODDESSY 10LBS BATTERY
FUEL SYSTEM:
WALBRO IN LINE FUEL PUMP 255 LPH
8 GALLON FUEL CELL
AUTOMETER FUEL PRESS GAUGE
B&M FUEL PRESS REGULATOR
SS FUEL LINES
-8 AN FITTINGS AND HOSES
WHEELS AND TIRES:
DRY:
JDM BLACK RACING WHEELS 15X7 +35 OFFSET, 11 LBS EACH
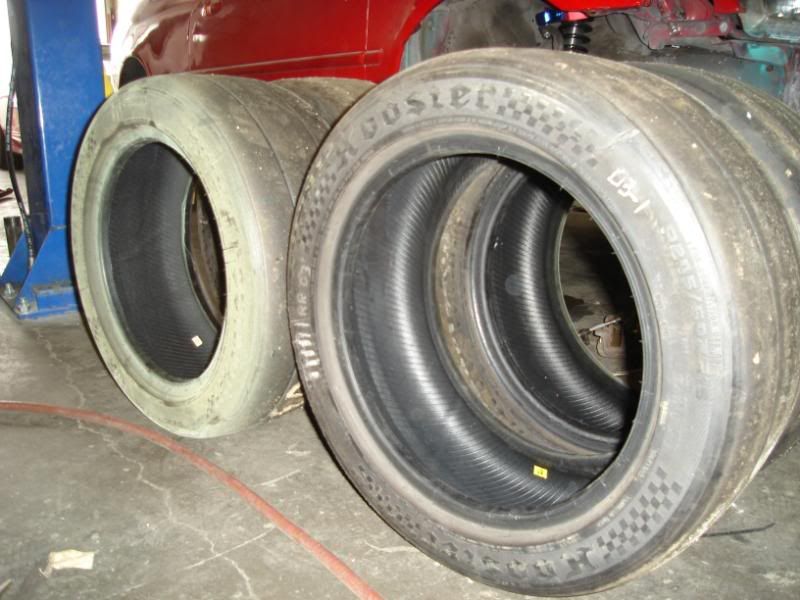
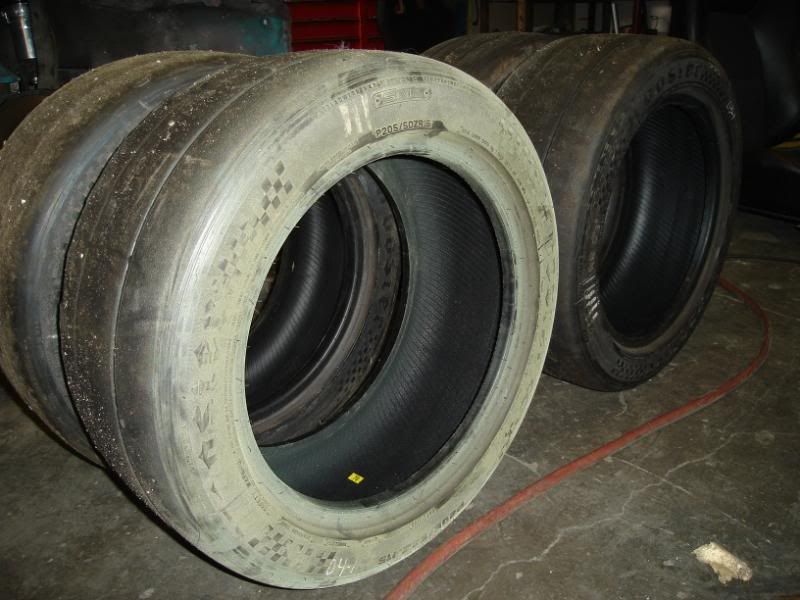
HOOSIER R6 FULL SLICK RACE TIRES 205/50R15
RAIN:
USDM ROTA WHEEL 16X7 +38 OFFSET 16 LBS EACH
BF-GOORICH RAIN TIRES 205/55R16
THANKS TO EVERYBODY FOR ANY HELP OR PARTS PROVIDED FOR THIS PROJECT.
1. This pics 1-10 are all taken with my rain tires and wheels.

2. Knock off Spoon mirror are not bad for their price, $35 shipped.

3. Traded a pair of sideskirts which i purchased for $30 for the Mugen valve vover already painted.

4. Nope, no fancy cam gears here nor a nicely cut out to see them.

5. Notice the sideskirts don't match. they are still black, no money to paint them They are attached by Dseus fasteners.

6.
7.

8.

9. The Air/fuel gauge is just a filler. I have a AEM uego but not on this pic.

10. Not an Sir but I liked the sticker so I left it.

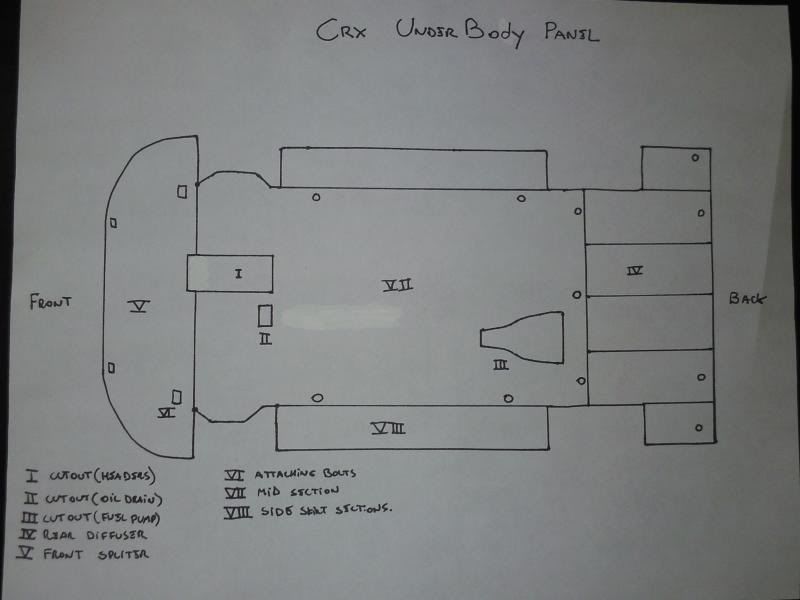
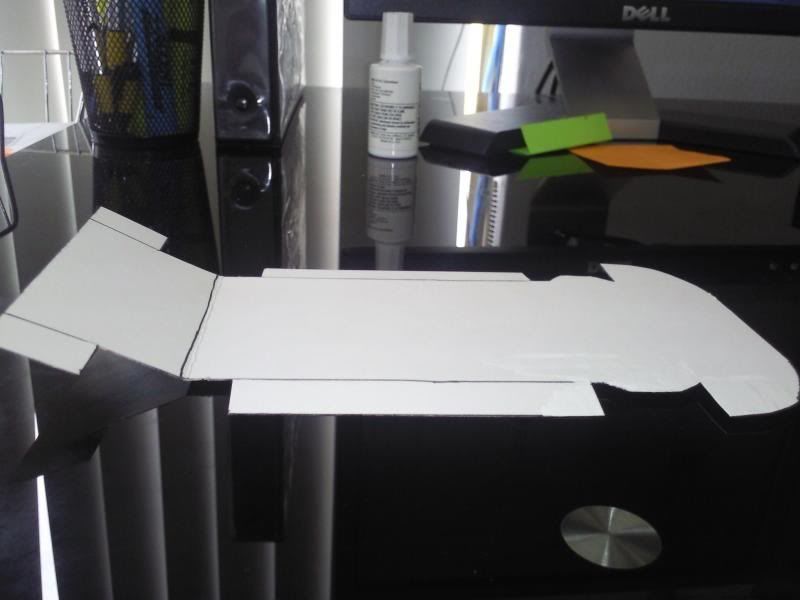
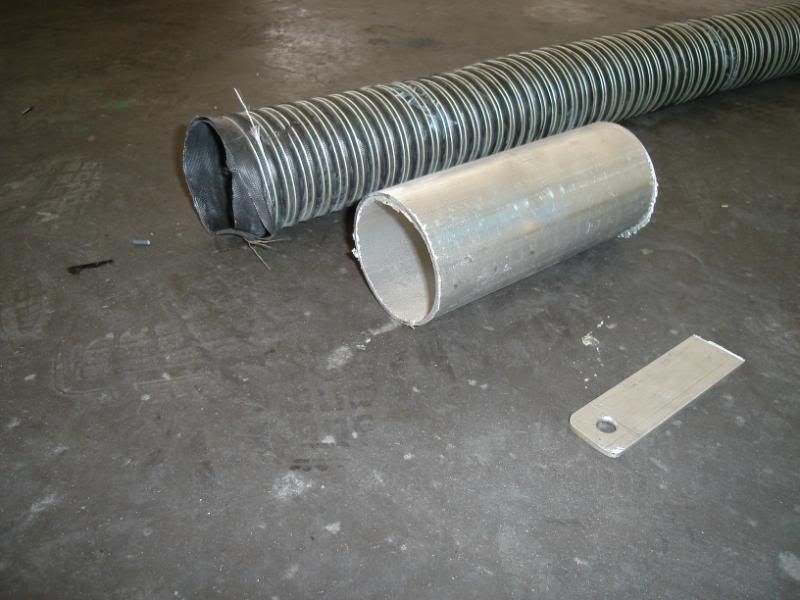
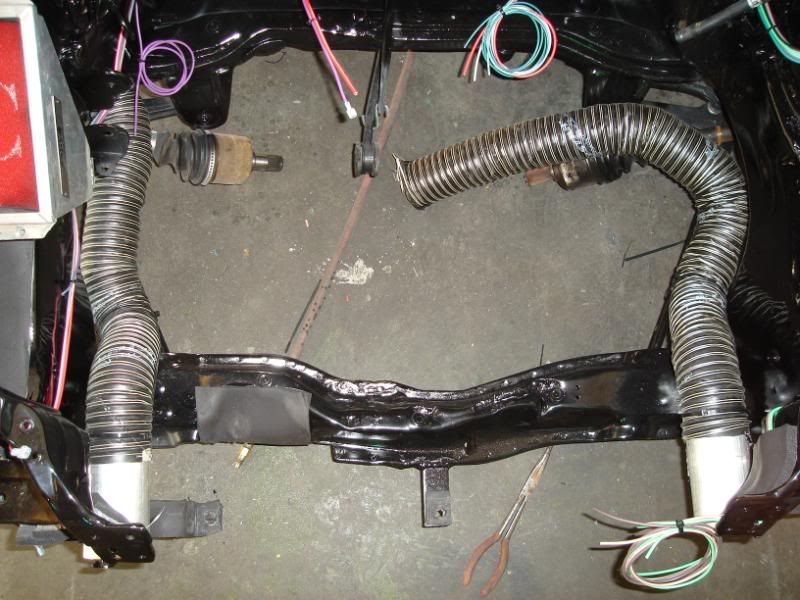
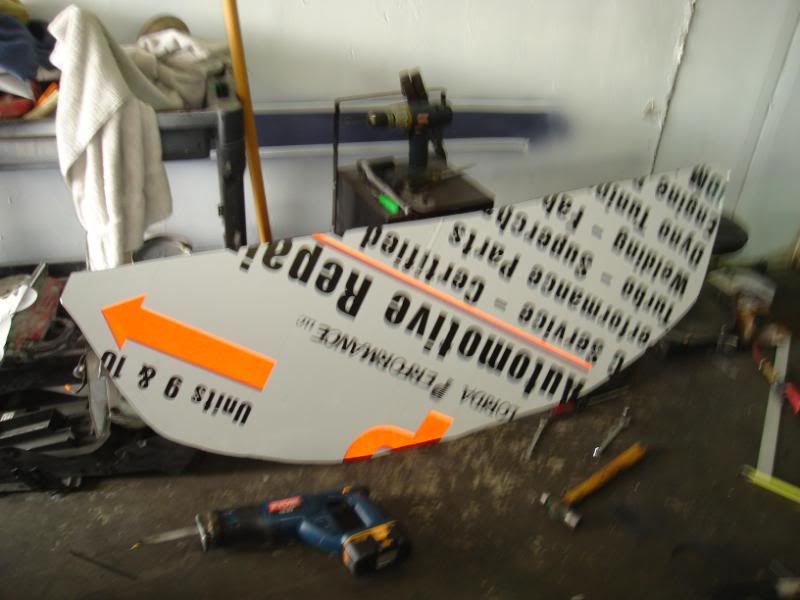
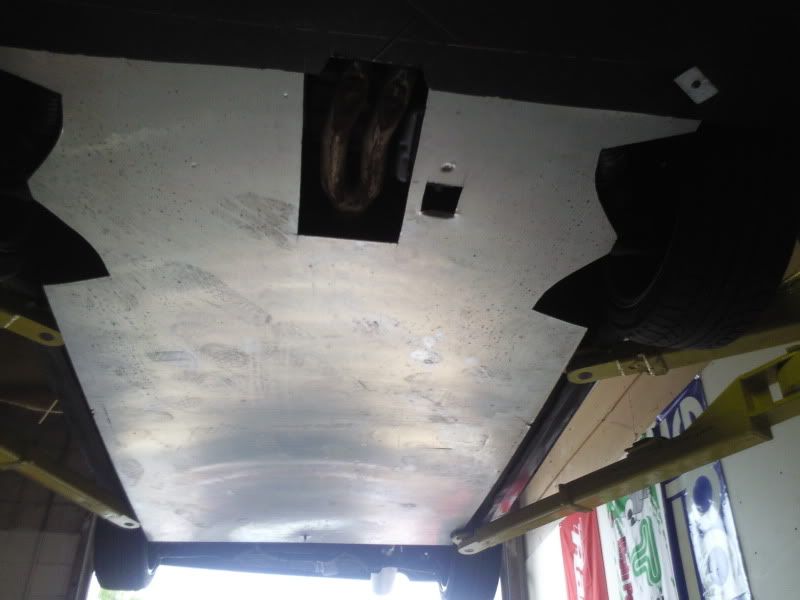
I'm now working on the under body panel and rear diffshared_user which is connected to the front spliter. I'm making it from the same material as the Spliter, (Alumalite)
By building this panels, I'll lower my (drag coefficient) turning my car into a more aerodynamic platform. Thus making it faster and more stable, as well as increasing its handling.
Total cost so far- $50.00
Total time so far- 4 hours.
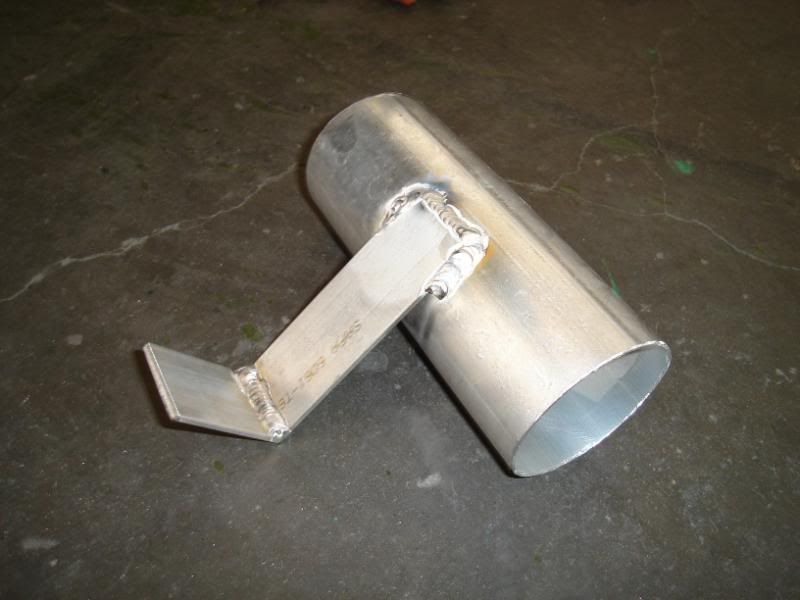
Here's what it should look like. Bottom view.
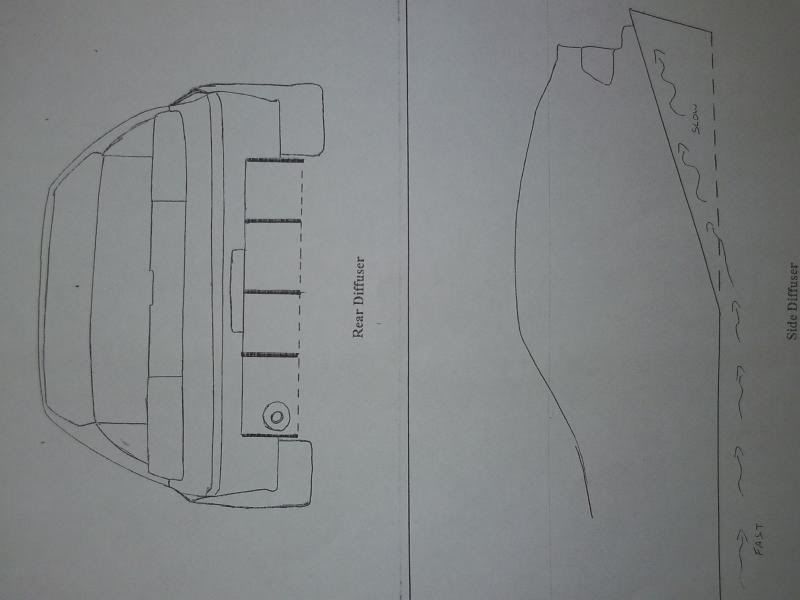
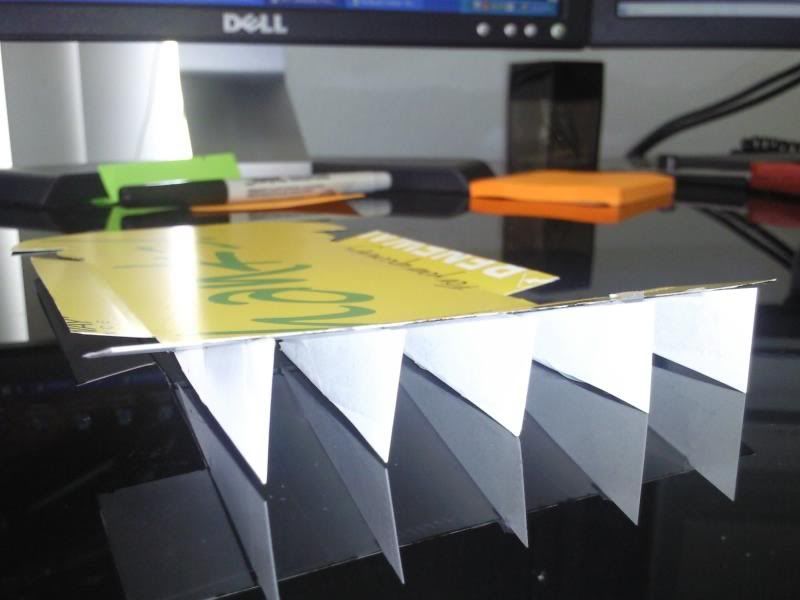
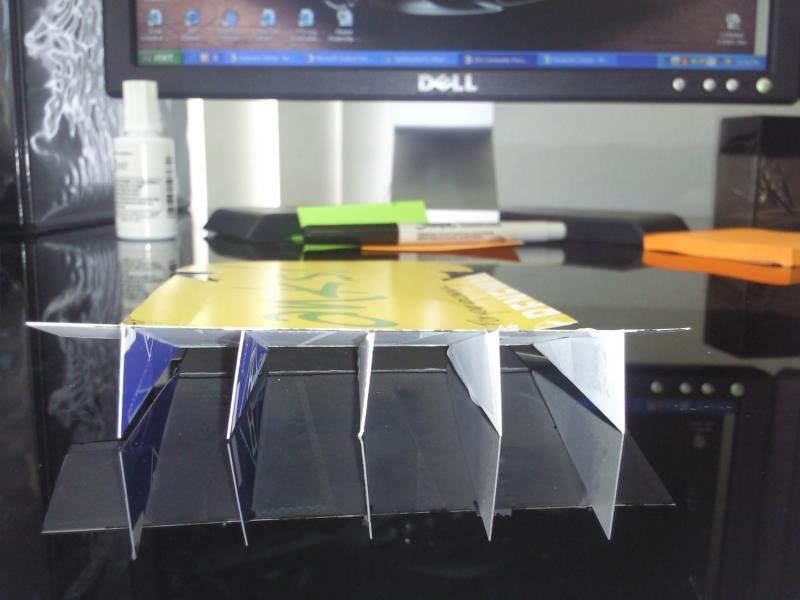
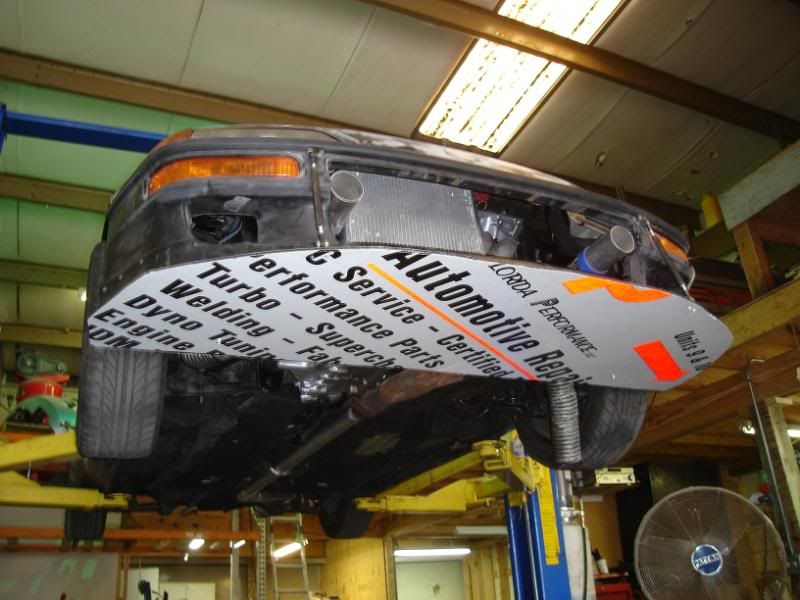
11. The Spliter and Underbody panel are both done. The diffshared_user still on the making b
b
12. I did this drawing by hand, not bad!!!!!
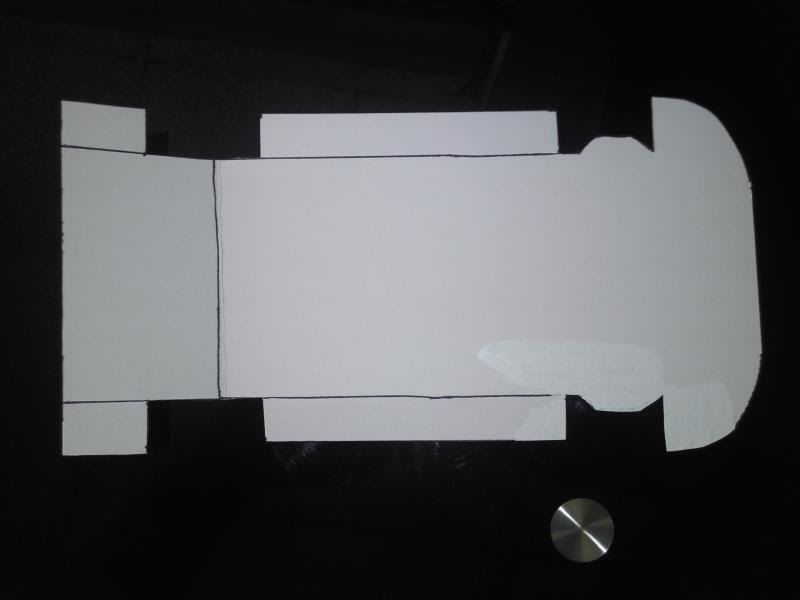
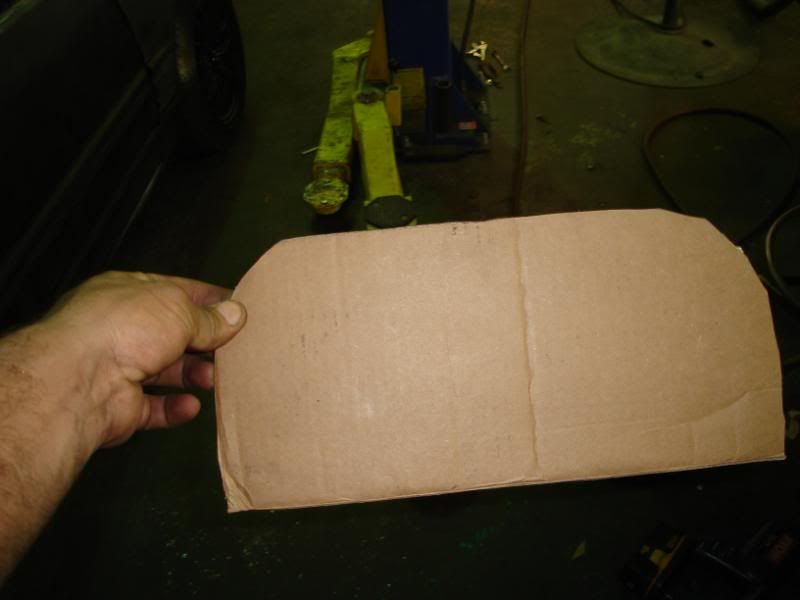
13. Got bored at work so decided to make prototype.
14.
15. The angle of the diffshared_user is to be set at 9 degres.

16
17
18
Here's 4 months worth of work. I'll tag them little by little.
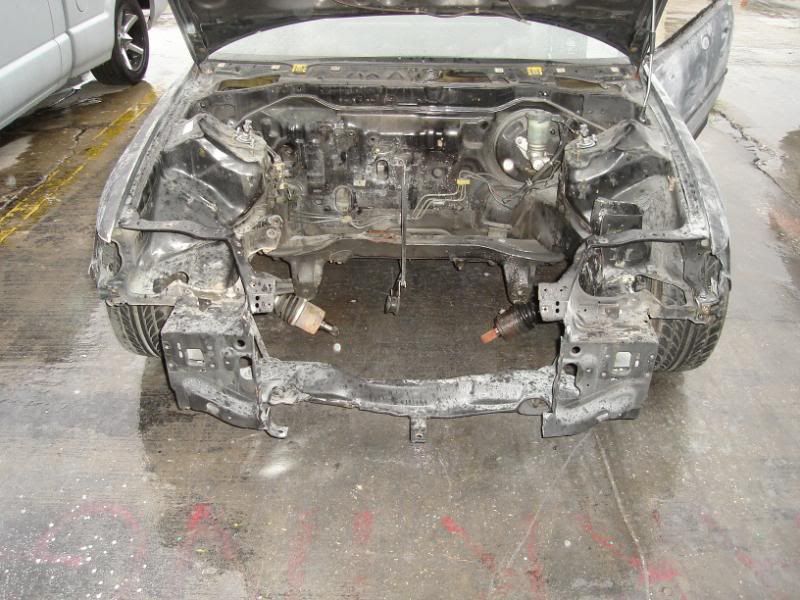
19. Striping the entire front end and getting ready for engine removal.

20. The Engine Harness goes under the knive!! Cut, solder, heat shrink!
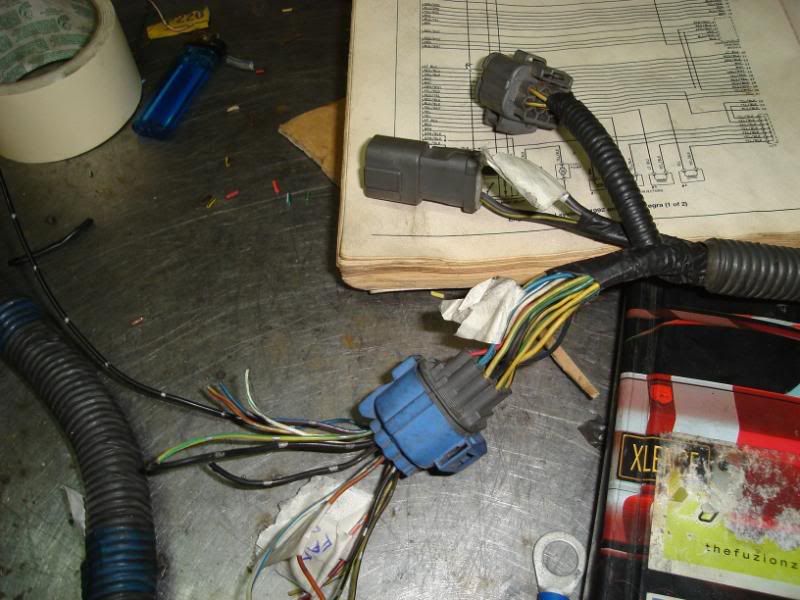
21. Uses only Honda plugs, and Used shielded wires where called for.

22. You can see one of 4 books I used to make the Harness, I now have a lot of respect for Wire harness specialists, after 17 Hours, finally done!!
23. Getting ready for paint job, notice the 45lbs exhaust still there, and all windows gone!

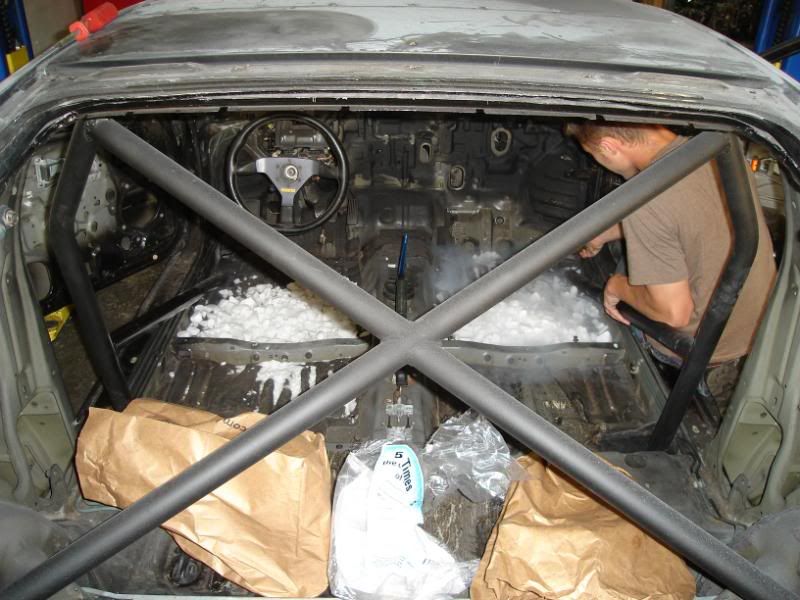
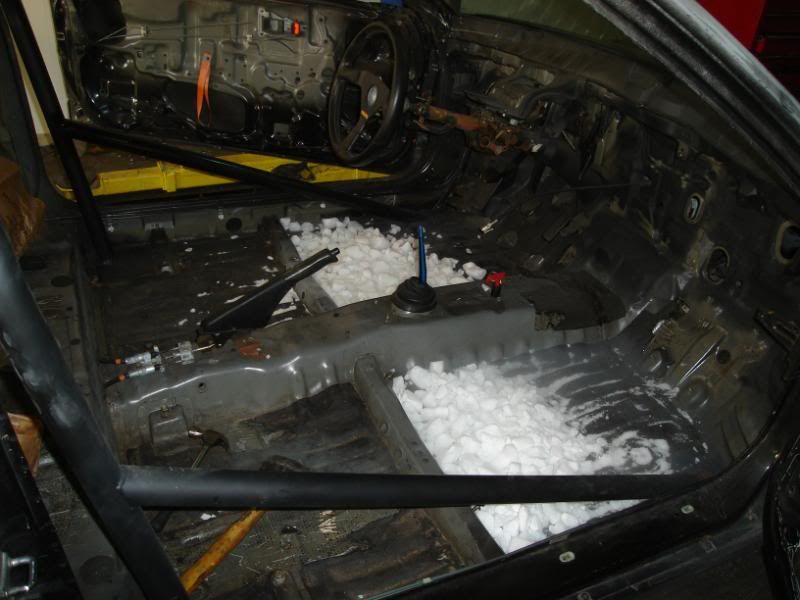
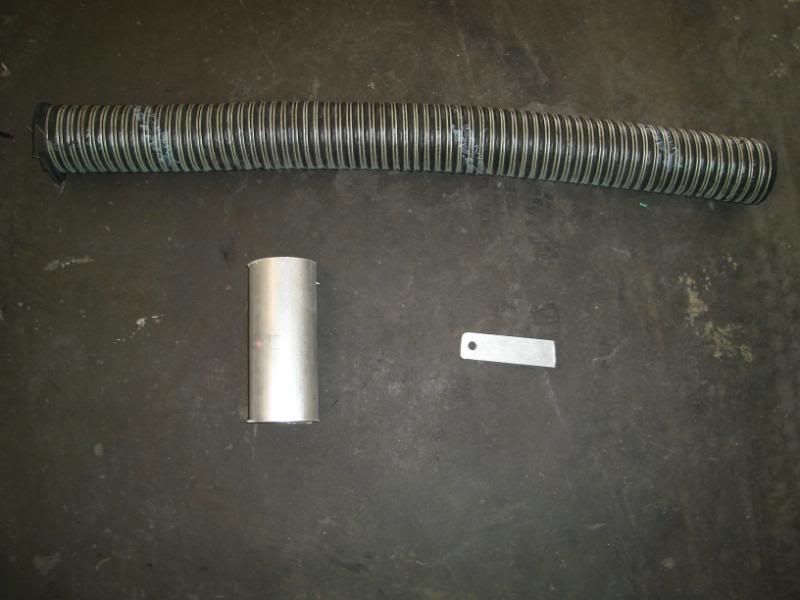
24. In the Dry Ice, OUT the sound deadning!!! Total cost $20 bucks!
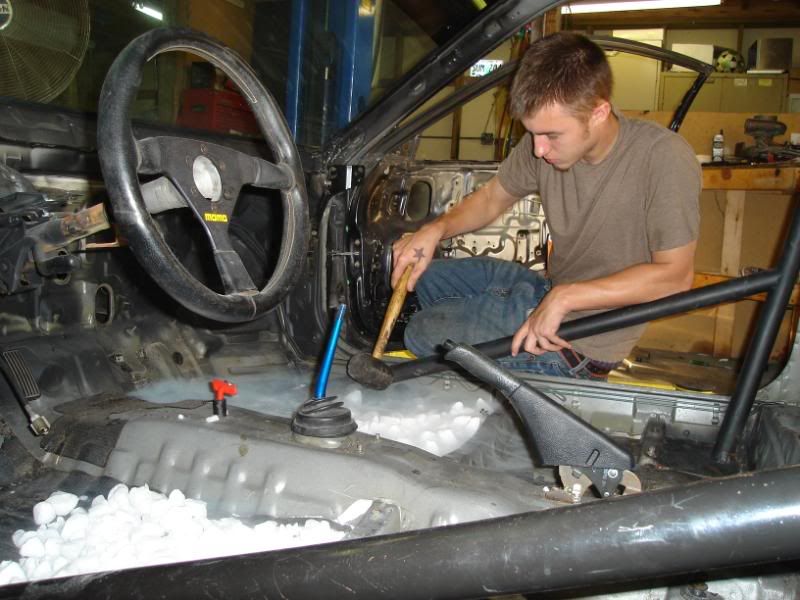
25. And about an hour worth of pounding, scraping and vacuuming. There goes about 15lbs.
26. JDM hood came with ricer fake hood pins!!! LMAO and a true honda emblem from a Type-R
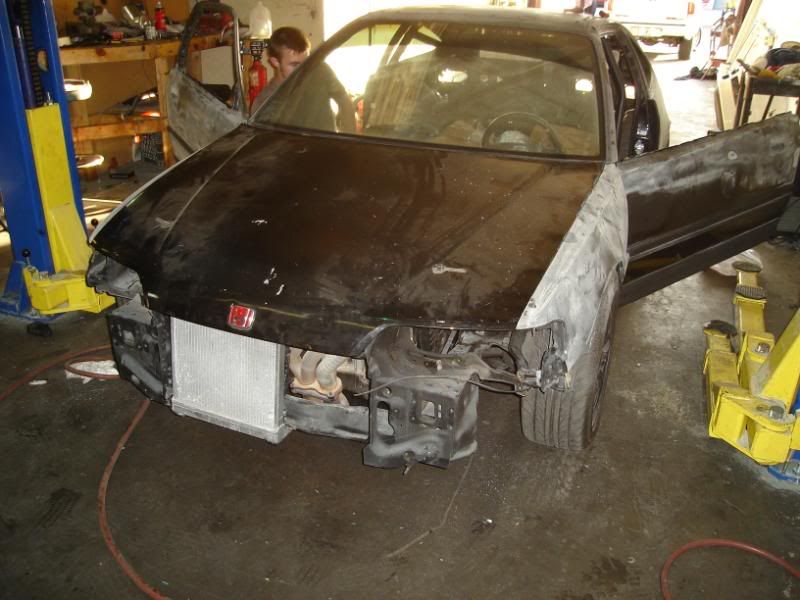
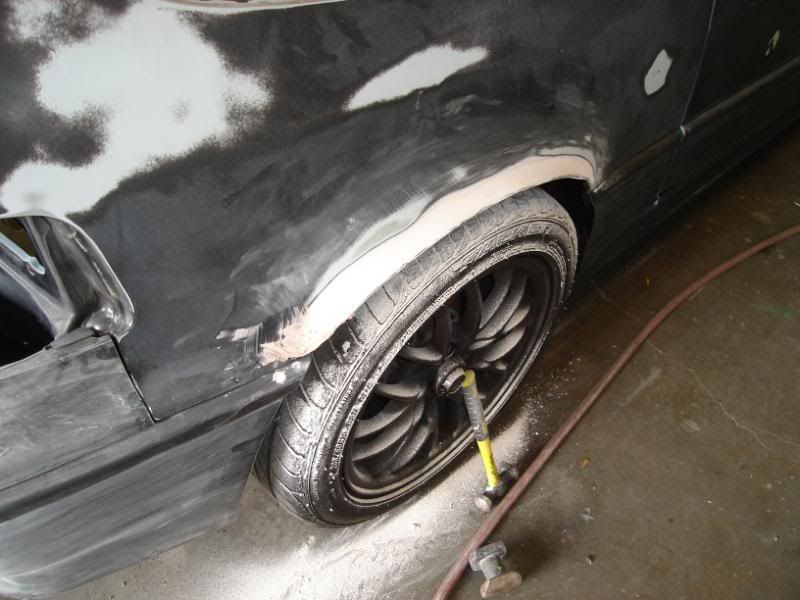
27. Found some rust on fender :shock: not happy, but a lil sand paper and bondo should do the trick, rest of car almost ready for paint. two tone, black on gray.

28.
29. Also found some rust here at back quarter panel, just a litlle. All windows out paint ready!

30. Vacuuming the left over from the sound deadning.

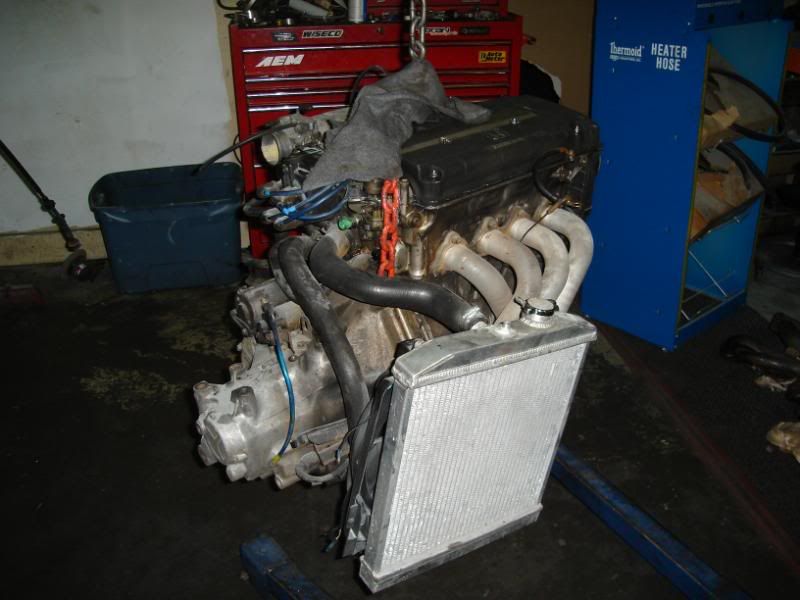
31.Engine almost ready to come out and get cleaned out, also need to wash engine bay, wet sand and paint.

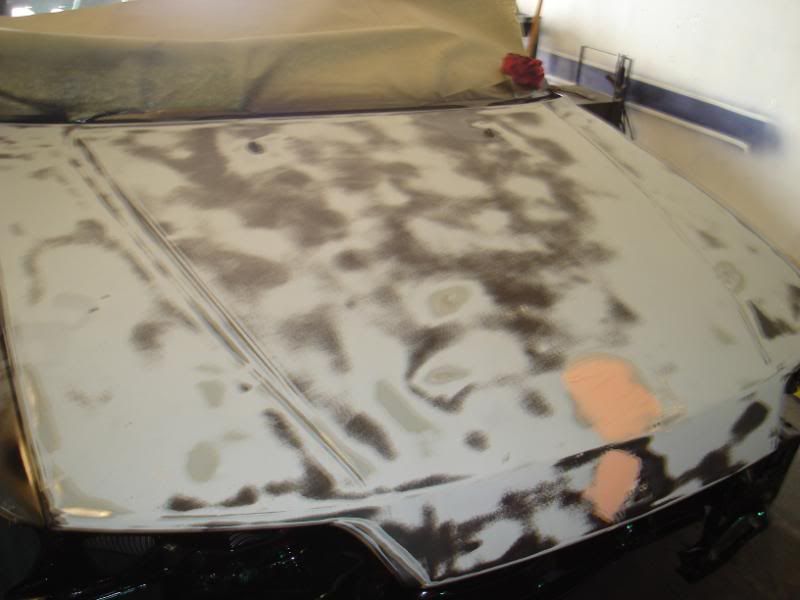
32. Sanded hood for an hour! it had two coats of rustoleom and one of faded factoy paint. Shaved the emblem off.

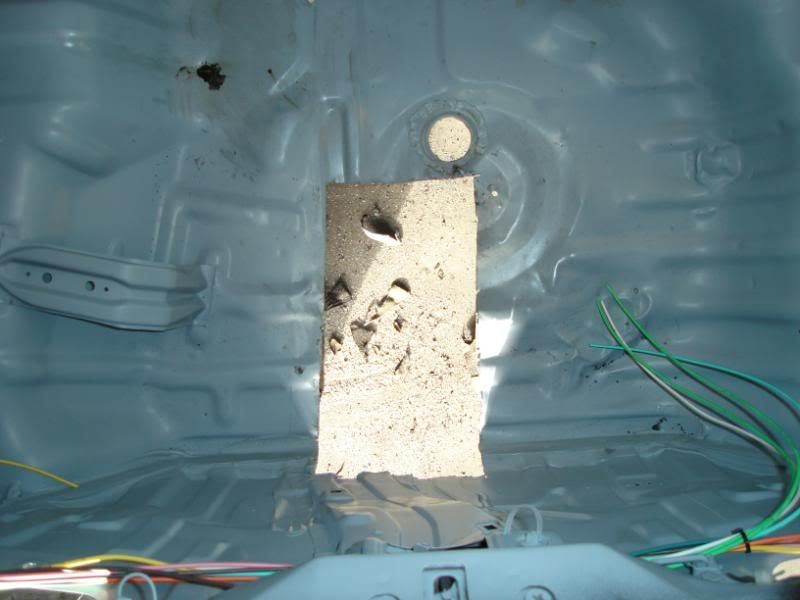
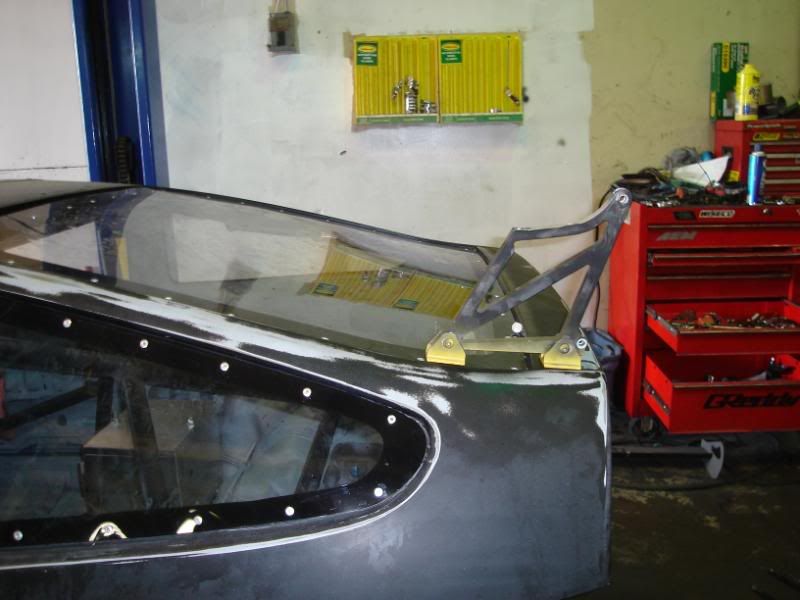
33. The factory sunroof was not very light and so I removed it and Insatll a thin sheetmetal piece with the same countor and shape of the sunroof thus keeping the same Aerodynamic shape thruout.

34. All done, now some degreaser and srubing and onto the paint room.

35.

36. Engine took about an hour to remove, its very greasy!! purchased new, water pump, thermstat, valve cover gasket, dizzy O-ring, coolant hoses, intake and exhaust gaskets. Also installed new LMAs and adjusted the valves after replacing Timing belt, front main seal, cam seals and tensioner.
37. Dirty, dirty, dirty!!! a litlle degreaser and a pressure washer will do the trick.

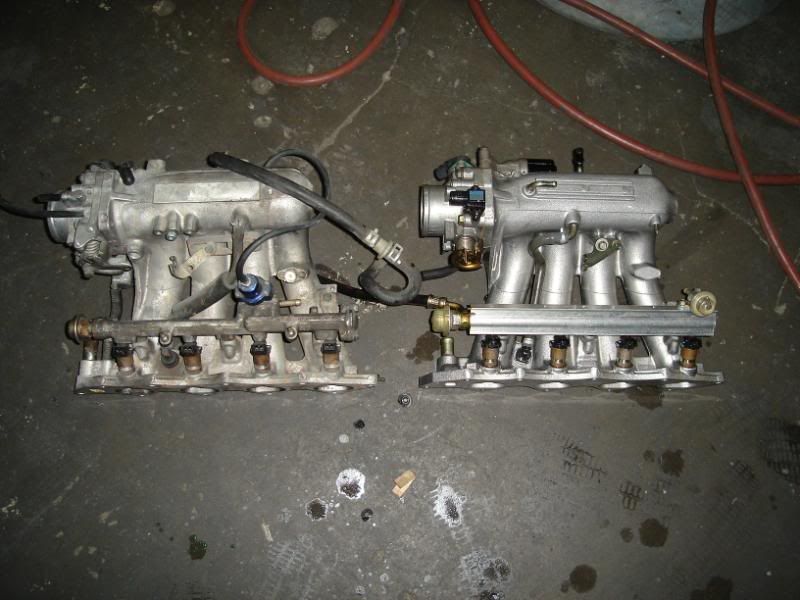
38. (Left) first gen B16 manifold, (right) 2000 civic si manifold.
39. Using bad gas and toothbrushes i was able to clean this beauty!!!

40. Here is the 45lbs muffler which i took off to replace with a custom built Aluminum unit. The new muffler weights 12lbs with the muffler inclided.

41. As the engine was out, I insatlled a Fidansa Aluminum flywhhel which i got for $45 and an ACT stage 2 clutch which was $150 pressure plate $125 for spring disc. Also changed the trowout bearing and added Royal Purple 80/90 gear oil.

42. Old school Hasport mounts have had their work cutout for them, a litlle Polyuretane should fix this.

43.

44.The no name heather fitted with dual O2 sensors works out great for me, one for Ecu and the other for Aem Uego.

45. Getting rady to remove cover and wash it. Also making seat breackets.
46. Bumpers all sanded down and also ready for paint.
47. All the extra stuff not needed for a race car makes its way to the dumpster!!! I can hear CRX owners bitching me out for trowing away Si parts :crazy:
48. Here's the factory body harness, it weights about 25 to 30lbs, new harness weights 10lbs.

49.
50.

51.
52.

53.

54.
55.
56.

57.
58.
59.

60.
61.

62.
63.

64.

65.
66.
67.
68.

69.
70.

71.
72.
73.

74.
75.
76.

77.

78.

79.
80.

81.

82.

83.

84.

85.
86.
87.
88.

89.

90.

91.

92.

93.

94.

95.

96.

97.
98.

99.
100.
101.
102.

103.
104.

105.

106.

107.

108.

109.

110.

111.

112.
113.
114.

115.

116.
117.

118.

119.

120.
121.

122.
123.
124.
125.
126.

127.
128.

129.

130.
131.
132.
133.

134.

135.
136.
137.
138.

139.
140.
141.

142.
143.
144.

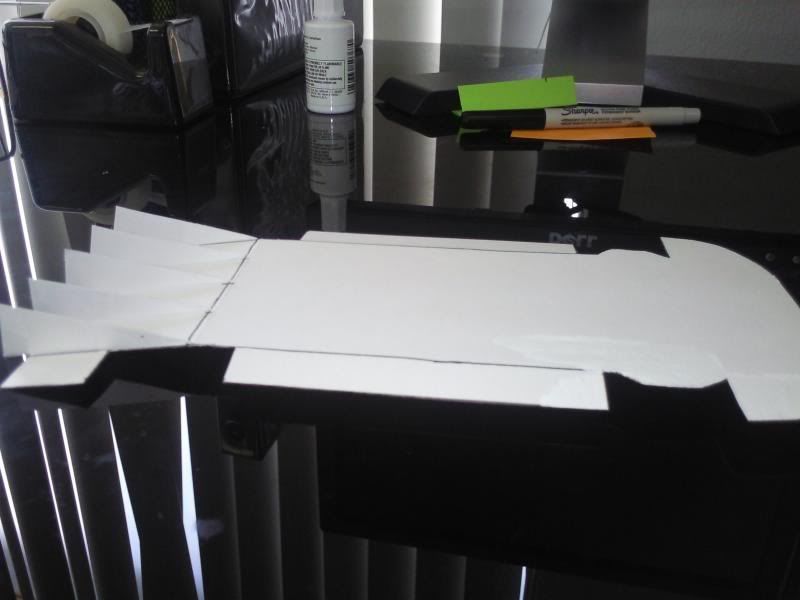
145. Here is the first underbody panel pic! Please tell me what you think!!!
The body harness is a 20 circuit painless harness which is not really painless. lol.
I completly removed any bit of wiring from the factory harness, even the engine harness. Then I cut all the pigtails to the body harness and engine harness that I needed for the car to run. I purchased an OBD1 ECU and had Hondata installed (S100) is what i needed but with boost, since next year I'm supercharging. After all that I went to the junkyard and purchased an OBD1 dizzy, Injectors, TB, IAC, IAT, VSS, ALT, and engine harness. Cut all the pigtails of the OBD1 Harness and I started making a one-piece engine harness. If you look at the pic with the switches, the one to the right is my self diagnostics switch, If I have a code,there's a yellow check engine light at the cluster, if it turns on, I press the yellow switch and it starts blinking the engine codes. :blah: .
The Body harness took me 8 hours to finish, blinkers, hazards, headligths and tailights, brake lighs, cooling fan, fuel pump, gauges, ignition coil, ecu, and sterter.
The Engine harness took me 17 hours to complete and lots of headakes :crazy: yes, crazy work. I happened to have had all the wiring diagrams. It's a task that requires lots of understanding on how electrics and electronics work.
Here's a listing of its mods.
ENGINE:
B16A STOCK
ARC INTAKE
DC HEADERS
ALUMINUM EXAHUST
HASSPORT MOUNTS
NEW OEM TIMING BELT
NEW LMA
NGK PLUGS AND WIRES
OBD2 INTAKE MANIFOLD
OBD2 FUEL RAIL
OBD2 INJECTORS
OBD2 T BODY
OBD2 DIZZY
DRIVETRAIN:
ACT STAGE II CLUTCH
6 LBS ALUMINUM FLYWHEEL
B16A TRANNY
SKUNK2 SHORT SHIFTER AND KNOB
POLY LINKAGE BUSHINGS
NEW OEM AXLES
NEW AXLE SEALS
SYNCROMESH
BRAKES:
OVERSIZED MASTER CYLINDER
RUSSELL SS BRAKE LINES
BREMBO BLANK ROTORS
MOTUL RBF FLUID
HAWK BLUE PADS
CUSTOM BRAKE DUCKTS
SUSPENTION:
FULL BODIED COILOVERS 32 WAY ADJ
ST FULL SUSPENTION BUSHINGS
FRONT AND REAR INGALLS CAMBER ARMS
SWAY BAR BUSHINGS
FRONT STRUT BAR
BODY:
JDM FRONT END
FRONT LIP 3 INCH
FRONT SPLITER
SPORTS BIKE MIRRORS
LEXAN WINDOWS
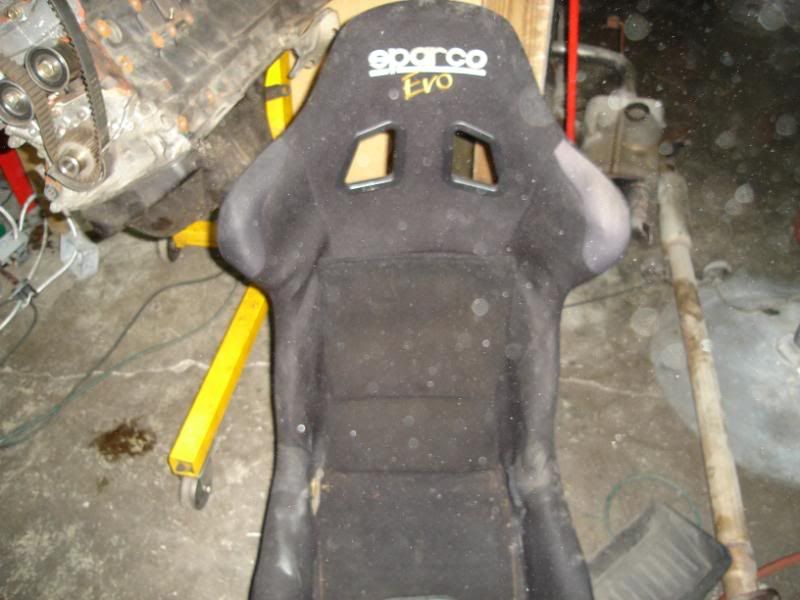
SPARCO FIBER GLASS DRIVER SEAT
SPARCO STEAL FRAMED SEAT
CUSTOM MADE DASH
FLARED REAR FENDERS
CUSTOM REAR WING
SIX POINT ROLL CAGE
RJS HARNESSES
HOOD PINS
UNDER BODY PANEL
REAR DIFFUSER
ELECTRONICS:
HONDATA S100
CUSTOM MADE ONE PIECE ENGINE HARNESS
AUTOMETER GAUGES, OIL PRESS, WATER TEMP, EGT, VACUUM
AEM UEGO WIDEBAND
PAINLESS 20 CIRCUIT BODY HARNESS
KILL SWITCH
TAYLOR BATTERY BOX
ODDESSY 10LBS BATTERY
FUEL SYSTEM:
WALBRO IN LINE FUEL PUMP 255 LPH
8 GALLON FUEL CELL
AUTOMETER FUEL PRESS GAUGE
B&M FUEL PRESS REGULATOR
SS FUEL LINES
-8 AN FITTINGS AND HOSES
WHEELS AND TIRES:
DRY:
JDM BLACK RACING WHEELS 15X7 +35 OFFSET, 11 LBS EACH
HOOSIER R6 FULL SLICK RACE TIRES 205/50R15
RAIN:
USDM ROTA WHEEL 16X7 +38 OFFSET 16 LBS EACH
BF-GOORICH RAIN TIRES 205/55R16
THANKS TO EVERYBODY FOR ANY HELP OR PARTS PROVIDED FOR THIS PROJECT.
1. This pics 1-10 are all taken with my rain tires and wheels.
2. Knock off Spoon mirror are not bad for their price, $35 shipped.
3. Traded a pair of sideskirts which i purchased for $30 for the Mugen valve vover already painted.
4. Nope, no fancy cam gears here nor a nicely cut out to see them.
5. Notice the sideskirts don't match. they are still black, no money to paint them
They are attached by Dseus fasteners.6.
7.
8.
9. The Air/fuel gauge is just a filler. I have a AEM uego but not on this pic.
10. Not an Sir but I liked the sticker so I left it.
I'm now working on the under body panel and rear diffshared_user which is connected to the front spliter. I'm making it from the same material as the Spliter, (Alumalite)
By building this panels, I'll lower my (drag coefficient) turning my car into a more aerodynamic platform. Thus making it faster and more stable, as well as increasing its handling.
Total cost so far- $50.00
Total time so far- 4 hours.
Here's what it should look like. Bottom view.
11. The Spliter and Underbody panel are both done. The diffshared_user still on the making
b 12. I did this drawing by hand, not bad!!!!!
13. Got bored at work so decided to make prototype.
14.
15. The angle of the diffshared_user is to be set at 9 degres.
16
17
18
Here's 4 months worth of work. I'll tag them little by little.
19. Striping the entire front end and getting ready for engine removal.
20. The Engine Harness goes under the knive!!
21. Uses only Honda plugs, and Used shielded wires where called for.
22. You can see one of 4 books I used to make the Harness, I now have a lot of respect for Wire harness specialists, after 17 Hours, finally done!!
23. Getting ready for paint job, notice the 45lbs exhaust still there, and all windows gone!
24. In the Dry Ice, OUT the sound deadning!!! Total cost $20 bucks!
25. And about an hour worth of pounding, scraping and vacuuming. There goes about 15lbs.
26. JDM hood came with ricer fake hood pins!!! LMAO and a true honda emblem from a Type-R
27. Found some rust on fender :shock: not happy, but a lil sand paper and bondo should do the trick, rest of car almost ready for paint. two tone, black on gray.
28.
29. Also found some rust here at back quarter panel, just a litlle. All windows out paint ready!
30. Vacuuming the left over from the sound deadning.
31.Engine almost ready to come out and get cleaned out, also need to wash engine bay, wet sand and paint.
32. Sanded hood for an hour! it had two coats of rustoleom and one of faded factoy paint. Shaved the emblem off.
33. The factory sunroof was not very light and so I removed it and Insatll a thin sheetmetal piece with the same countor and shape of the sunroof thus keeping the same Aerodynamic shape thruout.
34. All done, now some degreaser and srubing and onto the paint room.
35.
36. Engine took about an hour to remove, its very greasy!! purchased new, water pump, thermstat, valve cover gasket, dizzy O-ring, coolant hoses, intake and exhaust gaskets. Also installed new LMAs and adjusted the valves after replacing Timing belt, front main seal, cam seals and tensioner.
37. Dirty, dirty, dirty!!! a litlle degreaser and a pressure washer will do the trick.
38. (Left) first gen B16 manifold, (right) 2000 civic si manifold.
39. Using bad gas and toothbrushes i was able to clean this beauty!!!
40. Here is the 45lbs muffler which i took off to replace with a custom built Aluminum unit. The new muffler weights 12lbs with the muffler inclided.
41. As the engine was out, I insatlled a Fidansa Aluminum flywhhel which i got for $45 and an ACT stage 2 clutch which was $150 pressure plate $125 for spring disc. Also changed the trowout bearing and added Royal Purple 80/90 gear oil.
42. Old school Hasport mounts have had their work cutout for them, a litlle Polyuretane should fix this.
43.
44.The no name heather fitted with dual O2 sensors works out great for me, one for Ecu and the other for Aem Uego.
45. Getting rady to remove cover and wash it. Also making seat breackets.
46. Bumpers all sanded down and also ready for paint.
47. All the extra stuff not needed for a race car makes its way to the dumpster!!! I can hear CRX owners bitching me out for trowing away Si parts :crazy:
48. Here's the factory body harness, it weights about 25 to 30lbs, new harness weights 10lbs.
49.
50.
51.
52.
53.
54.
55.
56.
57.
58.
59.
60.
61.
62.
63.
64.
65.
66.
67.
68.
69.
70.
71.
72.
73.
74.
75.
76.
77.
78.
79.
80.
81.
82.
83.
84.
85.
86.
87.
88.
89.
90.
91.
92.
93.
94.
95.
96.
97.
98.
99.
100.
101.
102.
103.
104.
105.
106.
107.
108.
109.
110.
111.
112.
113.
114.
115.
116.
117.
118.
119.
120.
121.
122.
123.
124.
125.
126.
127.
128.
129.
130.
131.
132.
133.
134.
135.
136.
137.
138.
139.
140.
141.
142.
143.
144.
145. Here is the first underbody panel pic! Please tell me what you think!!!
Thread Starter
CFP was...
Joined: Jan 2004
Posts: 242
Likes: 0
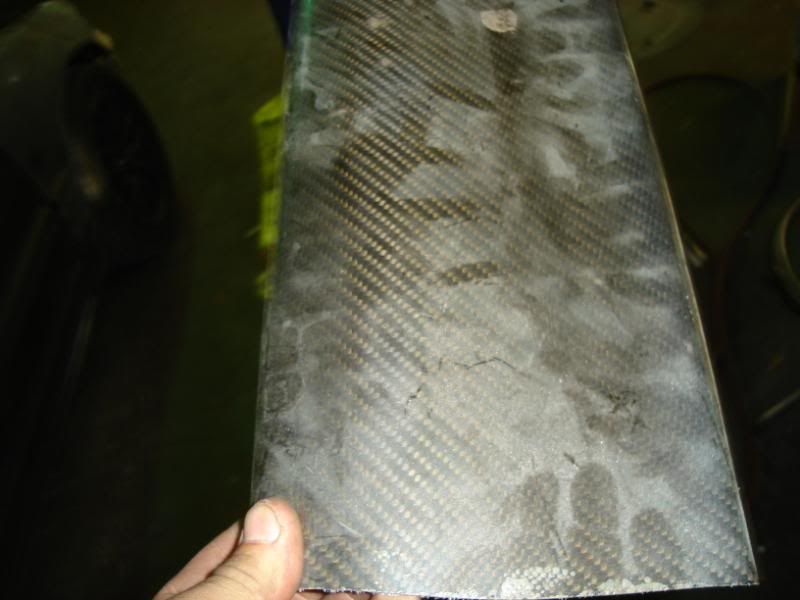
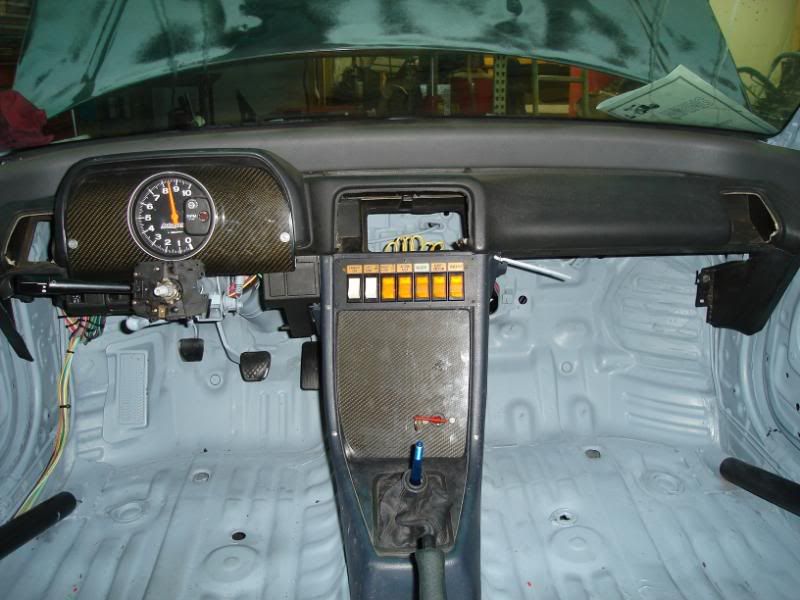
146. All panels are made of real Carbon Fiber, from left to right, Autometer water temp, tachometer, oil pressure, EGT, fuel level, vacuum, and Aem Wideband. Also notice the Razo pedals

147.

148.

149.

150.

147.
148.
149.
150.


pass the dutch
Joined: Nov 2004
Posts: 1,363
Likes: 0
nice work man !
__________________
shared_pm me for great prices on hydro and organic garden setups aswell as all the goods you need to grow cheaper than the big guys. built for youre needs. save money on fruits and vegetables. i dont sell any illegal products goods or services just fully ready to grow closets and rooms.
shared_pm me for great prices on hydro and organic garden setups aswell as all the goods you need to grow cheaper than the big guys. built for youre needs. save money on fruits and vegetables. i dont sell any illegal products goods or services just fully ready to grow closets and rooms.


