
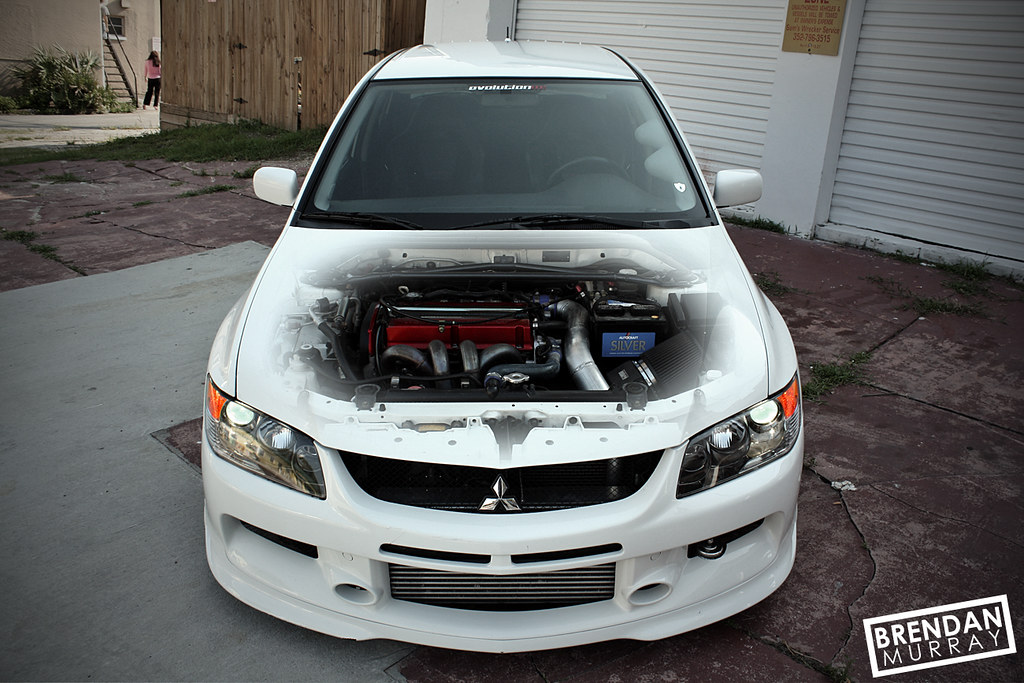
How-To: See-Thru hood photo.


Thread Starter
Registered User
Joined: Jan 2007
Posts: 2,801
Likes: 0
I have some time to kill right now, so I decided to make a quick tutorial on how to do this. This can work for any other part of the car that you'd want to give this effect for, just make the selection different. Note that I am editing these photos when they are 1300px wide. If your photo is larger you may need to increase the feather, if it is smaller you may need to decrease the feather. Don't know what feather is? Then keep reading... 
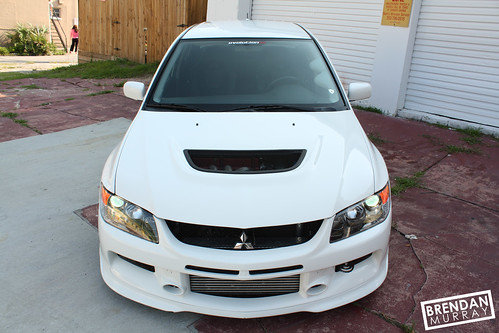
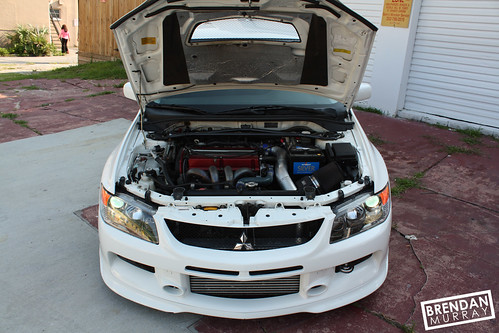
1). First things first, here are our two beginning images. Both were taken on a tripod with CONTROLLED settings. This means all the settings were the same when each shot was taken, so make sure to shoot in Manual mode.
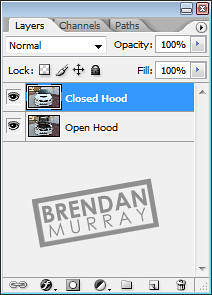
2). Your going to want to open both images in Photoshop. Copy the Closed hood photo and paste it ontop of the open hood photo. If you did it correctly the layers will be in this order:
3). Next is to use the Elliptical Marquee Tool to select the area you'd like the engine to show through. The trick to this is the feather in the settings toolbar. Feather is simply a fade effect, where it will transition from the non-deleted area to the deleted. You have to fool around with this depending on the image size to get it just right. For this I got away with 30px.


4). Simply select an area on the Closed hood layer, press delete once or twice and Voila! I hit delete twice because it gave a better effect.

5). Now after some photoshopping to give it a little extra zing.


2). Your going to want to open both images in Photoshop. Copy the Closed hood photo and paste it ontop of the open hood photo. If you did it correctly the layers will be in this order:
3). Next is to use the Elliptical Marquee Tool to select the area you'd like the engine to show through. The trick to this is the feather in the settings toolbar. Feather is simply a fade effect, where it will transition from the non-deleted area to the deleted. You have to fool around with this depending on the image size to get it just right. For this I got away with 30px.
4). Simply select an area on the Closed hood layer, press delete once or twice and Voila! I hit delete twice because it gave a better effect.
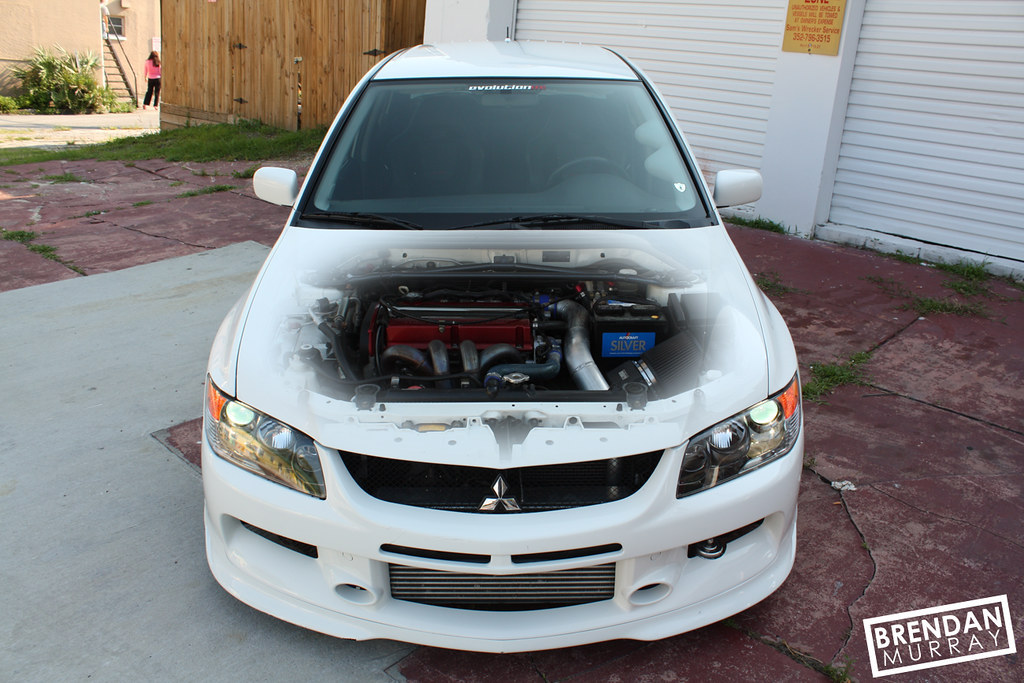
5). Now after some photoshopping to give it a little extra zing.
Last edited by HoosierDaddy; Jul 16, 2009 at 12:50 PM.

Aka Barry Madikiner
Joined: Mar 2005
Posts: 1,385
Likes: 0
I was always very curious about this.
Thanks! Repped!
Thanks! Repped!


Macro Enthusiast
Joined: Jul 2009
Posts: 304
Likes: 0
Great tutorial! In the topic where this was in question i gave a basic idea of how to do this but you definitely did a great in depth tutorial. Awesome job, i'm sure this has inspired many people to try this.
+Rep
+Rep

Digital Rican!!!
Joined: Aug 2008
Posts: 512
Likes: 0
good stuff
__________________
Canon 7d * 28/135mm * 50mm 1.8 * 430exII * My Eyes * 16x16 Soft Box * Cacus v4 trigger * ABR800
http://www.flickr.com/photos/damnrican/
Canon 7d * 28/135mm * 50mm 1.8 * 430exII * My Eyes * 16x16 Soft Box * Cacus v4 trigger * ABR800
http://www.flickr.com/photos/damnrican/


