
SR20VET build up...


Thread Starter
S one 4
Joined: Jun 2005
Posts: 1,095
Likes: 0
I had a chance to get some work done on the car today and last Friday. My girl was in town all week and I spent most of my time playing with her...
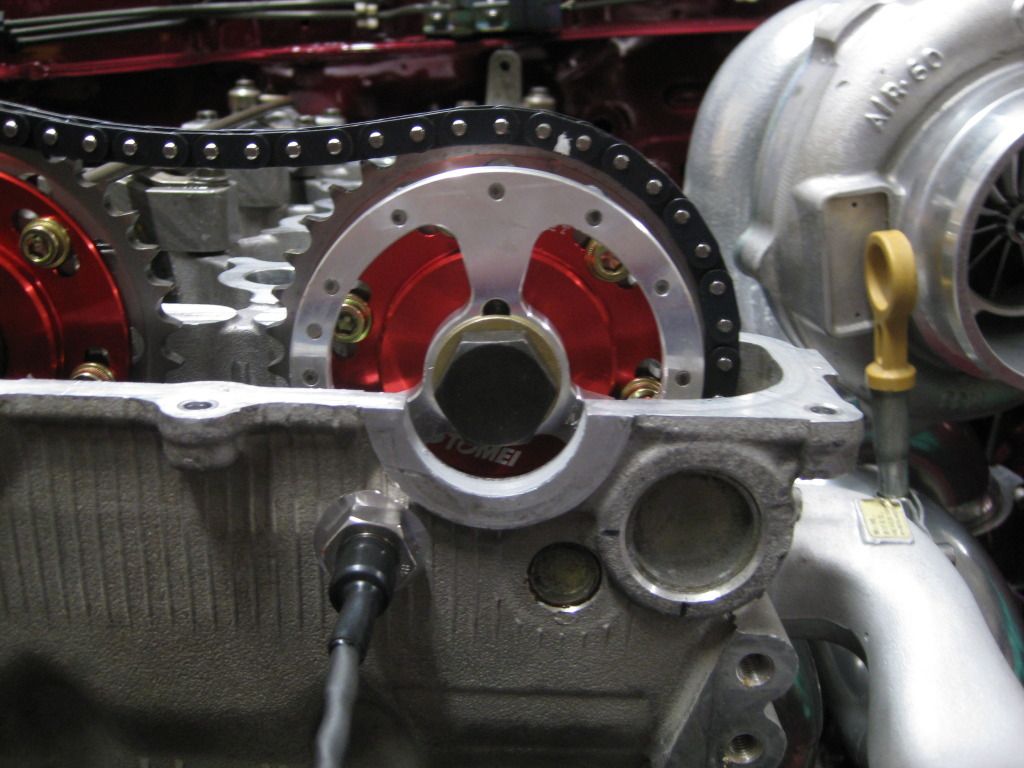
As stated in the last installment, I had to order a special tool to mill an area flat on the front of the head for the sensor pickup. My buddy runs a CNC machine shop that produces parts for the F22 Raptor and for other military contracts. I gave him a call asking about the tool and he new exactly what I needed and ordered it for me. It is a 1" counter bore that has a pilot arbor adapter to use in a cordless drill/press/what have you. This allowed me to get it milled, tapped, and the sensor taped with teflon so there weren't any oil leaks and installed.


Once I finished with the sensor, I went on to making an aluminum bracket to mount my VVL solenoid block to the passenger strut tower. I wanted to hide the block as much as possible, so this was the final mounting location. I actually had to flip the bracket 180 because once the IACV was mounted on the underside of the manifold, it wouldn't allow the manifold to bolt up to the head. I ended up with an 1/8 gap between the IACV and the solenoid block when the IM is bolted into place. Then I ran the feed/purge lines to their respective ports.
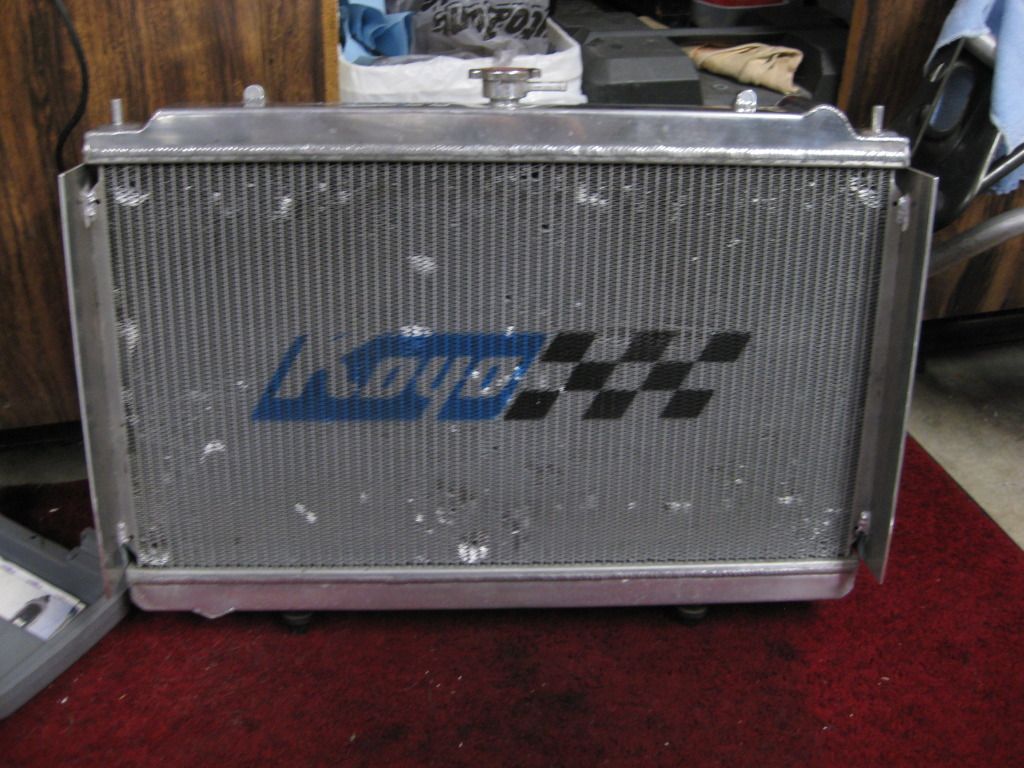
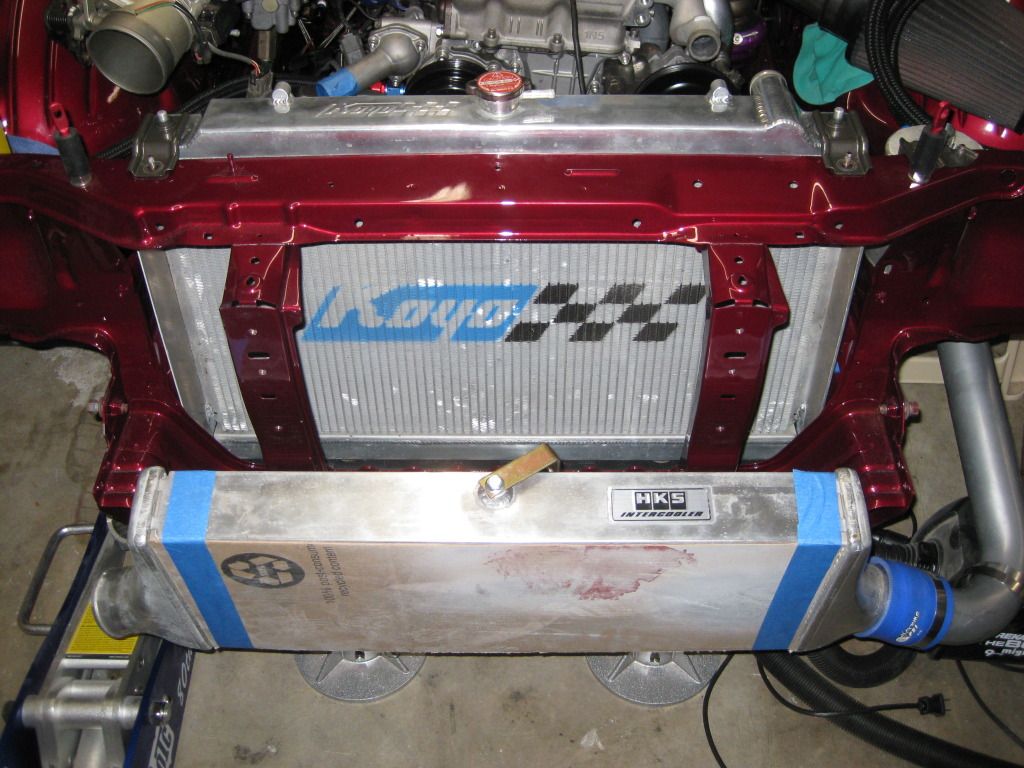
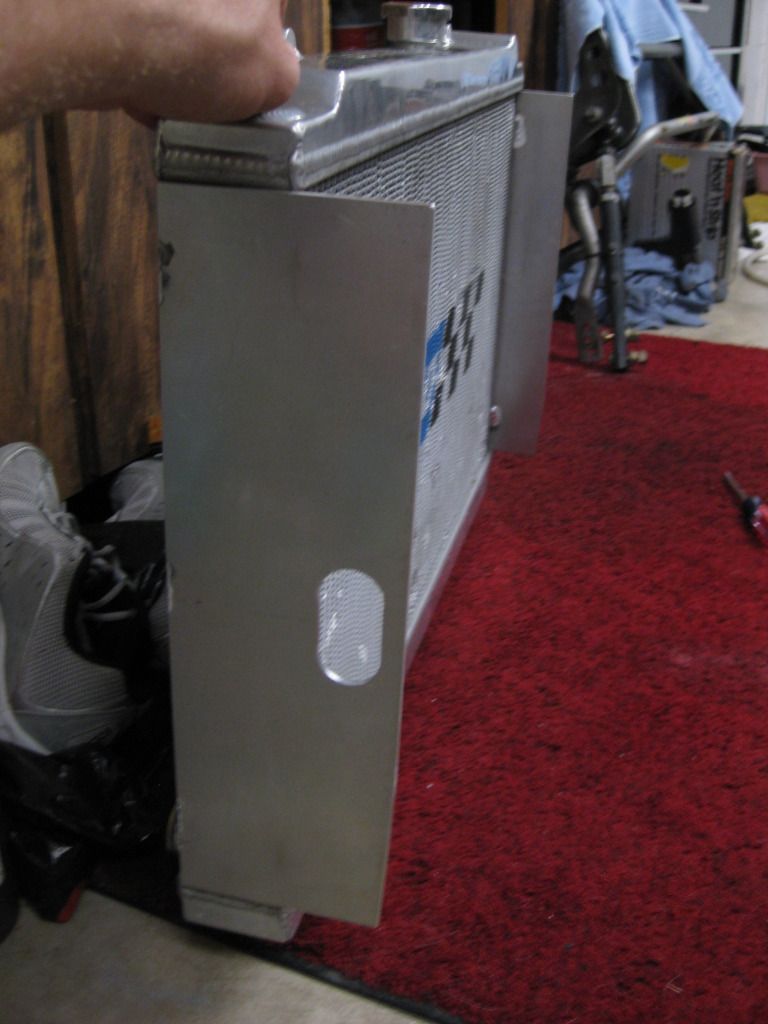
We all know that when you remove the condenser from an s-chassis it leaves a huge void on the sides of the radiator. So, with the little time I did have available I made some airdams for the sides of the radiator. It's 1/8 aluminum, we have an abundance of it at work, so I cut what I needed. Air obviously travels in the path of least resistance, so leaving those holes unattended would've lowered my cooling efficieny. SR's have a tendancy to run hot, so this was a little bit of insurance. I will be sealing the tighter areas with some weather stripping, but this is a cheap and effective mod and will serve it's purpose. Dont mind the bent fins, I'll be straightening the majority of them out. I've had this radiator since 06' and it's treated me well.

I'm hoping to finish up my catch can lines sometime this week. I'm making some new pieces because of heat damage next to the turbo. I also converted my open atmosphere can to a closed system and will be pulling vacuum on it from an exhaust venturi. I'll also be working on my oil cooler/relocation lines and getting my oil cooler mounted up. Stay tuned...
As stated in the last installment, I had to order a special tool to mill an area flat on the front of the head for the sensor pickup. My buddy runs a CNC machine shop that produces parts for the F22 Raptor and for other military contracts. I gave him a call asking about the tool and he new exactly what I needed and ordered it for me. It is a 1" counter bore that has a pilot arbor adapter to use in a cordless drill/press/what have you. This allowed me to get it milled, tapped, and the sensor taped with teflon so there weren't any oil leaks and installed.
Once I finished with the sensor, I went on to making an aluminum bracket to mount my VVL solenoid block to the passenger strut tower. I wanted to hide the block as much as possible, so this was the final mounting location. I actually had to flip the bracket 180 because once the IACV was mounted on the underside of the manifold, it wouldn't allow the manifold to bolt up to the head. I ended up with an 1/8 gap between the IACV and the solenoid block when the IM is bolted into place. Then I ran the feed/purge lines to their respective ports.
We all know that when you remove the condenser from an s-chassis it leaves a huge void on the sides of the radiator. So, with the little time I did have available I made some airdams for the sides of the radiator. It's 1/8 aluminum, we have an abundance of it at work, so I cut what I needed. Air obviously travels in the path of least resistance, so leaving those holes unattended would've lowered my cooling efficieny. SR's have a tendancy to run hot, so this was a little bit of insurance. I will be sealing the tighter areas with some weather stripping, but this is a cheap and effective mod and will serve it's purpose. Dont mind the bent fins, I'll be straightening the majority of them out. I've had this radiator since 06' and it's treated me well.
I'm hoping to finish up my catch can lines sometime this week. I'm making some new pieces because of heat damage next to the turbo. I also converted my open atmosphere can to a closed system and will be pulling vacuum on it from an exhaust venturi. I'll also be working on my oil cooler/relocation lines and getting my oil cooler mounted up. Stay tuned...
Registered User
Joined: May 2005
Posts: 3,191
Likes: 0
looking good man
__________________
 My shit still slow
618 whp 492 ft/lbs at 22 psi (Low Boost)on pump gas ,
stock block ,more power coming soon ,stay tuned
Tuned by Alpha @ Induction Performance
My shit still slow618 whp 492 ft/lbs at 22 psi (Low Boost)on pump gas ,
stock block ,more power coming soon ,stay tuned
Tuned by Alpha @ Induction Performance
P.O.S S14
Joined: Feb 2004
Posts: 228
Likes: 0
I have love/hate feeling towards you and this build.
__________________
Fender roller for rent w/ heat gun $35. If you want to take it home, you have to put up the full price of the tool as a deposit $300, and $25 a day.Deposit refundable upon inspection of the tool. If you damage or lose it you buy it. Located in Tampa.
Fender roller for rent w/ heat gun $35. If you want to take it home, you have to put up the full price of the tool as a deposit $300, and $25 a day.Deposit refundable upon inspection of the tool. If you damage or lose it you buy it. Located in Tampa.
P.O.S S14
Joined: Feb 2004
Posts: 228
Likes: 0
love the way this build is coming out, it's awesome. Hate that i don't have friends like you around !!!!!! LOL.
__________________
Fender roller for rent w/ heat gun $35. If you want to take it home, you have to put up the full price of the tool as a deposit $300, and $25 a day.Deposit refundable upon inspection of the tool. If you damage or lose it you buy it. Located in Tampa.
Fender roller for rent w/ heat gun $35. If you want to take it home, you have to put up the full price of the tool as a deposit $300, and $25 a day.Deposit refundable upon inspection of the tool. If you damage or lose it you buy it. Located in Tampa.
Registered User
Joined: Jan 2012
Posts: 56
Likes: 0
Sweet mother of god...
This is going to be a monster.
This is going to be a monster.
__________________
Brotip #28
Be careful what you wish for, bro. Remember, Simba "just couldn't wait to be king", then his dad got fucking DEALT with.
Brotip #28
Be careful what you wish for, bro. Remember, Simba "just couldn't wait to be king", then his dad got fucking DEALT with.

Thread Starter
S one 4
Joined: Jun 2005
Posts: 1,095
Likes: 0
170k- So many people neglect to address their cooling issues on this cars, until they show their ugly head. It's amazing how something so simple, can cause such a huge headache. Just a little bit of ducting goes a long way...
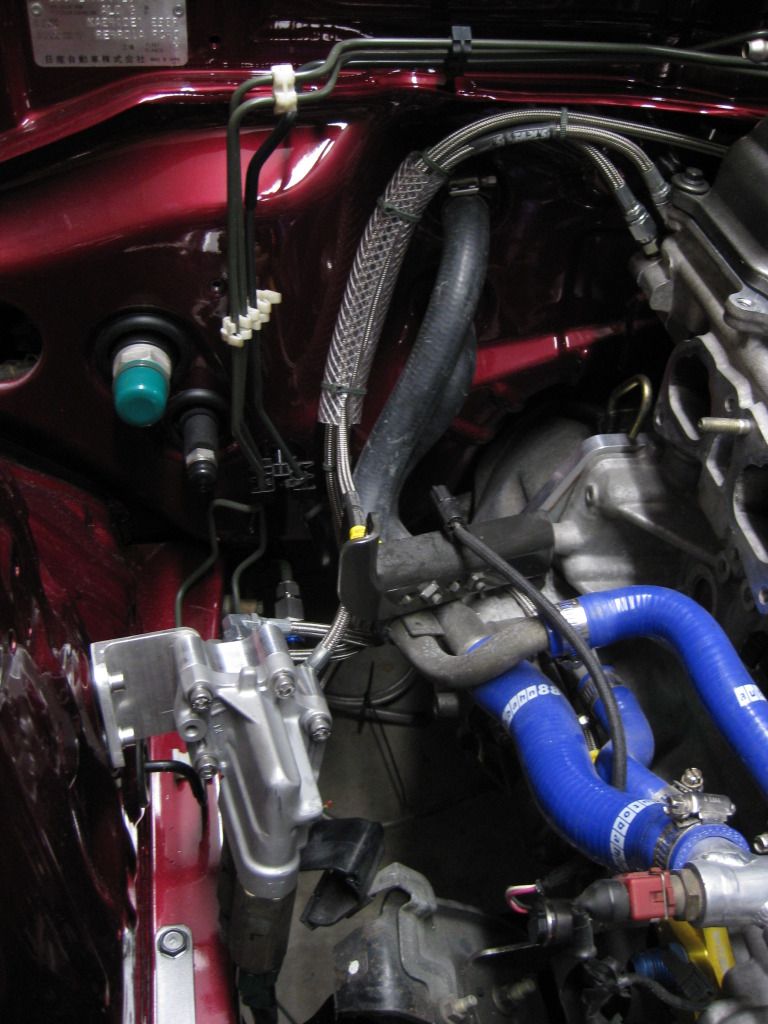
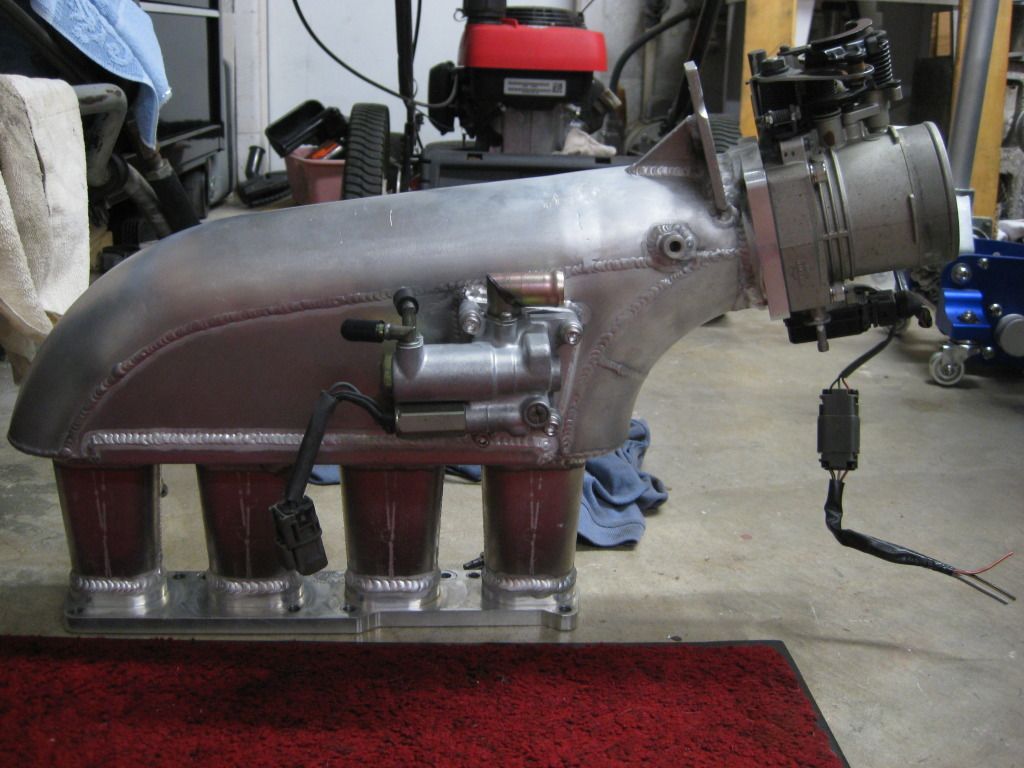
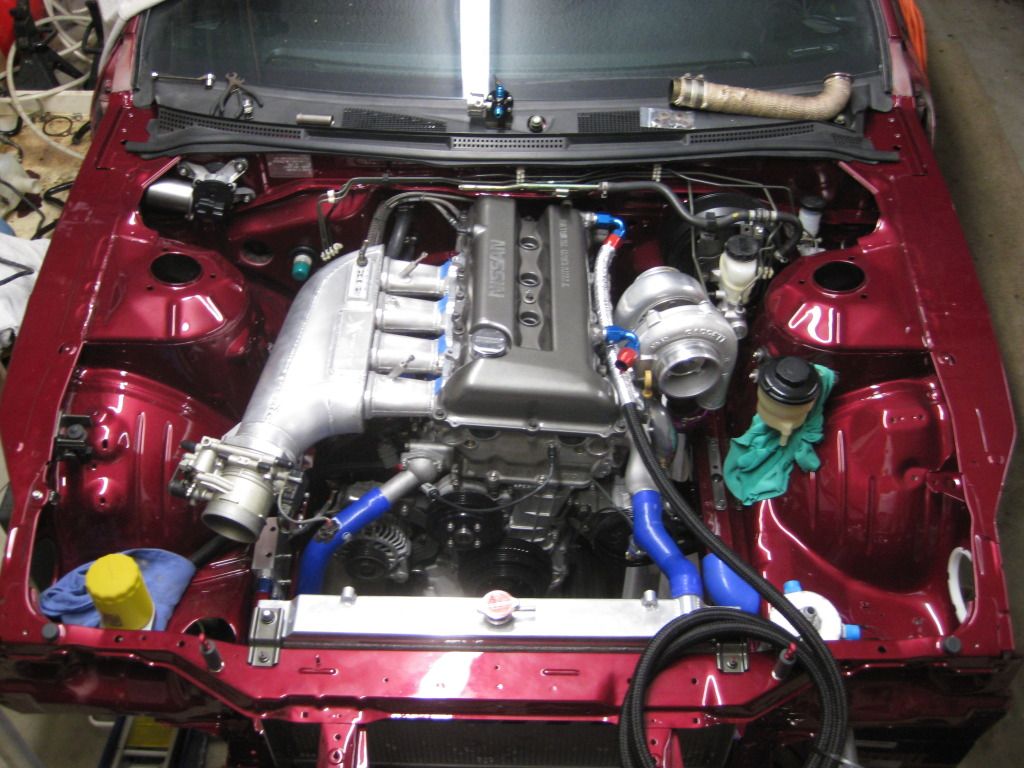
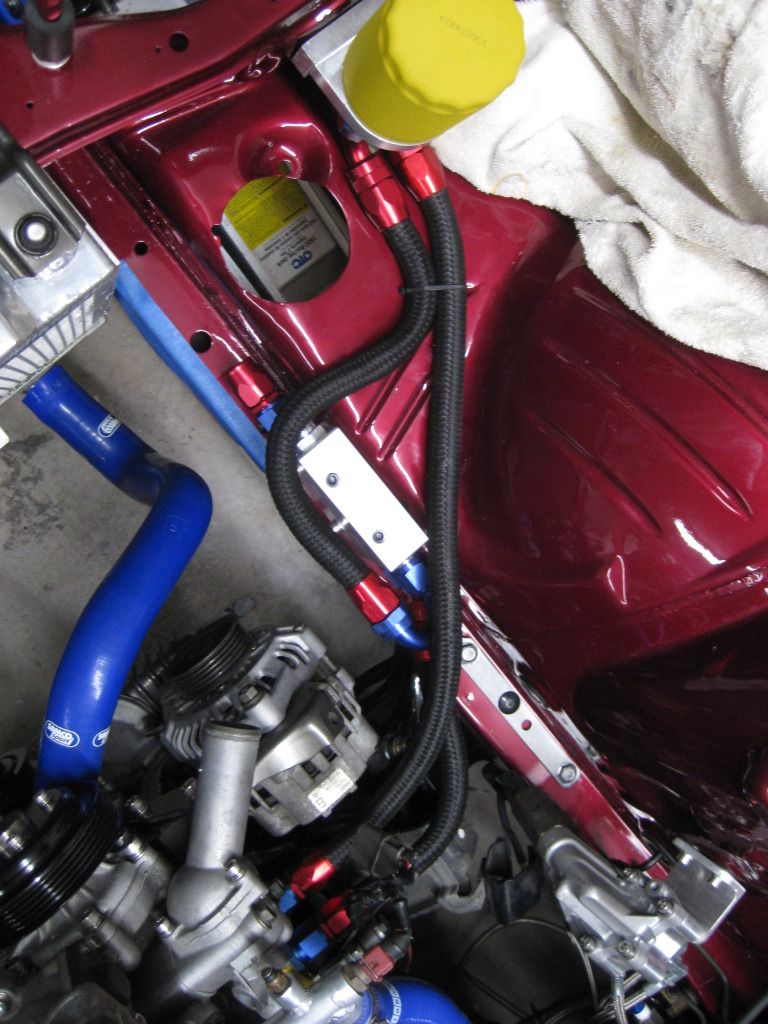
So, I've been tinkering away at items in the bay. I've completed my VC -AN lines to the catch can, my engine to oil filter to thermostat lines, installed my new throttle cable assembly, and I'm sure there's more I just can't think of them right now. As always, still a bunch of stuff to do, but I can see the light at the end of the tunnel on finishing the install of the motor/components. I am going to relocate my fuse/relay box to the trunk, I'm sure that's going to be a blast, but I don't have room for it and I believe it'll ruin the overall appearance of the engine bay. I'm looking into buying a Carbing strut tower brace to get rid of the two piece Cusco I have now and some Shakkito plates to cover/hide the wiper assembly and the clutch master. I also have on order my Status Ring seat in Charcoal and Status mounts. They'll be quite a ways out, so I figured I'd atleast get it on the way. Anyway, pictures!!!
Since I plan on having my oil cooler located in the grill opening, I had to create a pass through for the lines. A simple hole saw and some time and this is what you get...
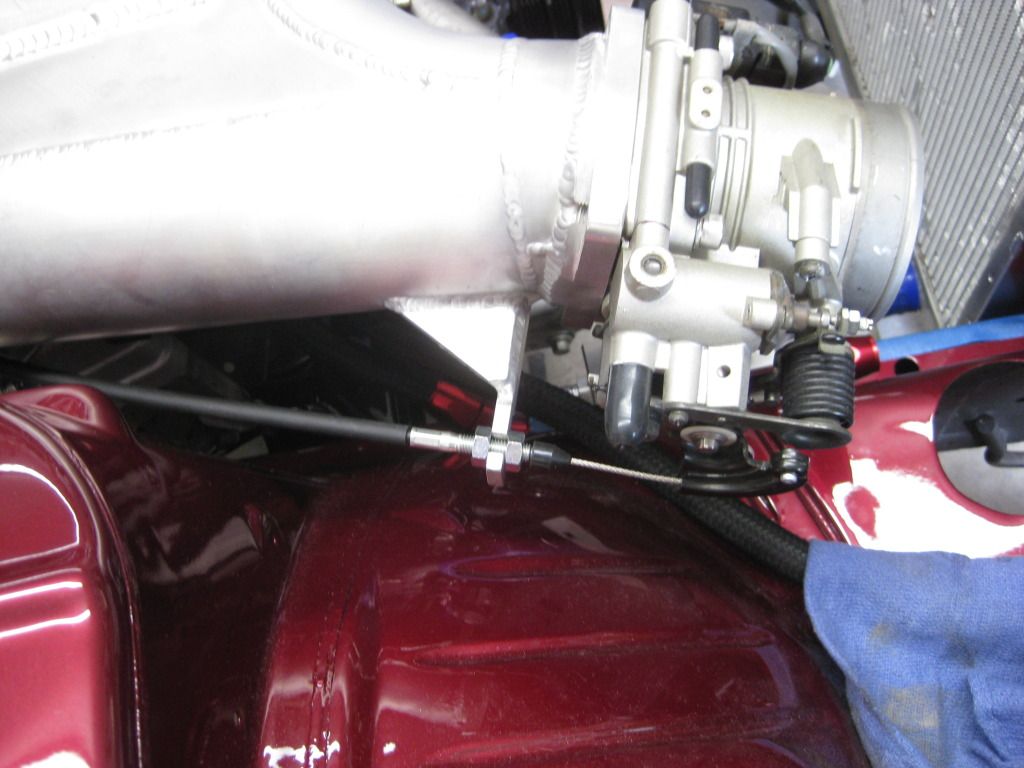
Throttle cable ran. Fits beautifully and is pretty much hidden until it pokes out to land in the bracket...
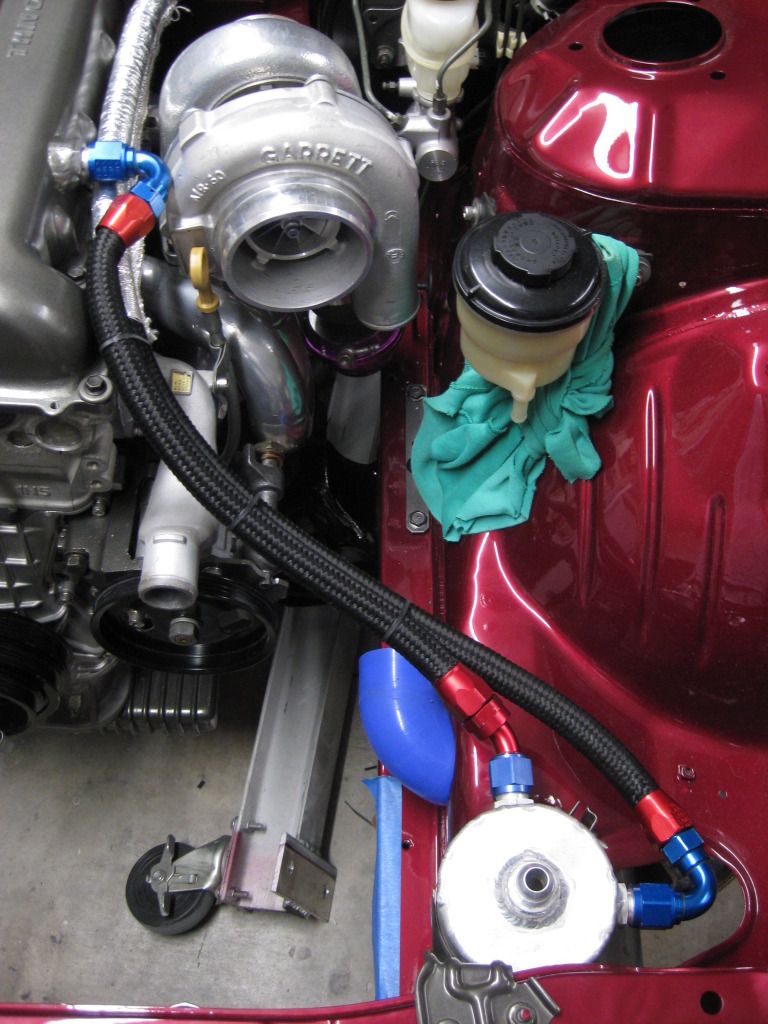
Rewrapped downpipe. I'll probably have to remove it to weld in my e-vac bung/nipple, however I need to get it installed first so I can find a good placement to install the e-vac bung...

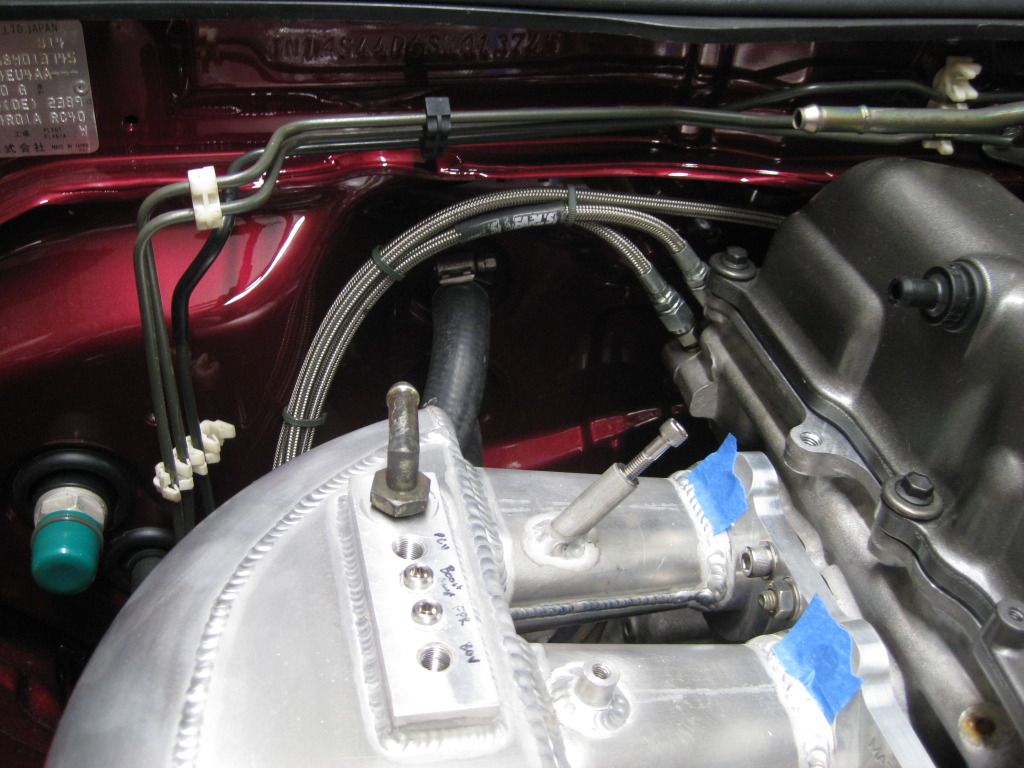
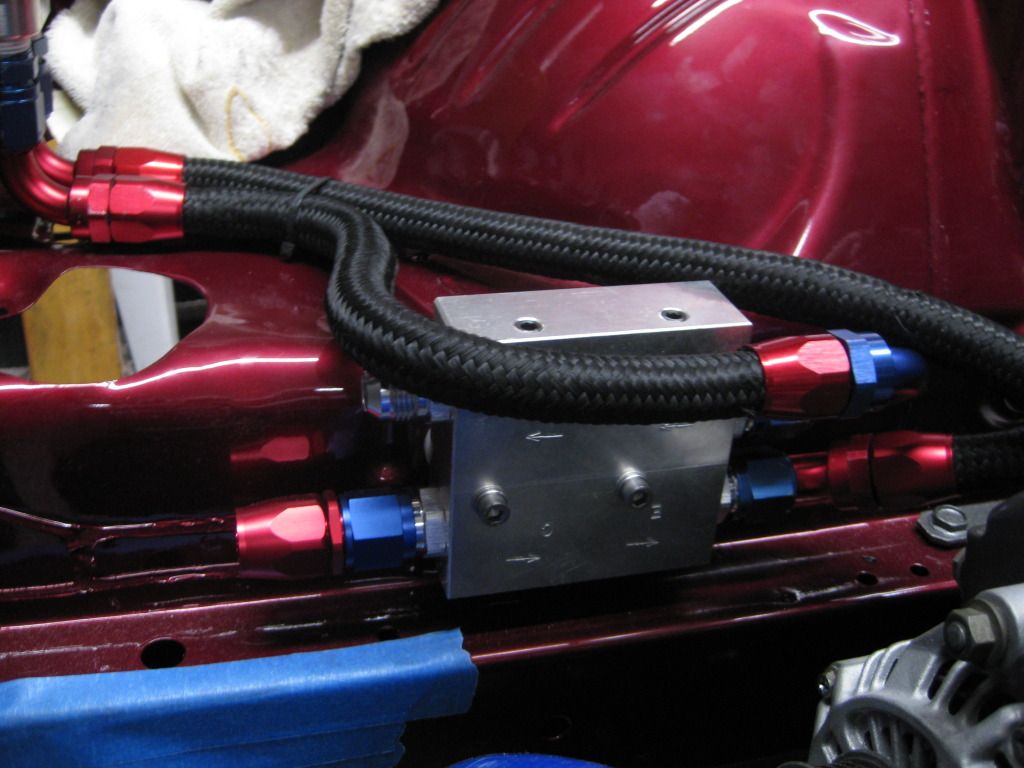
So, I found a great spot to mount the thermostat for the oil cooler, however, it makes running the lines a bit of a pain in the ass... It's not exactly the most organized, but it gets the job done and function of form anyday...
That's all for now, thanks for looking as always...
So, I've been tinkering away at items in the bay. I've completed my VC -AN lines to the catch can, my engine to oil filter to thermostat lines, installed my new throttle cable assembly, and I'm sure there's more I just can't think of them right now. As always, still a bunch of stuff to do, but I can see the light at the end of the tunnel on finishing the install of the motor/components. I am going to relocate my fuse/relay box to the trunk, I'm sure that's going to be a blast, but I don't have room for it and I believe it'll ruin the overall appearance of the engine bay. I'm looking into buying a Carbing strut tower brace to get rid of the two piece Cusco I have now and some Shakkito plates to cover/hide the wiper assembly and the clutch master. I also have on order my Status Ring seat in Charcoal and Status mounts. They'll be quite a ways out, so I figured I'd atleast get it on the way. Anyway, pictures!!!
Since I plan on having my oil cooler located in the grill opening, I had to create a pass through for the lines. A simple hole saw and some time and this is what you get...
Throttle cable ran. Fits beautifully and is pretty much hidden until it pokes out to land in the bracket...
Rewrapped downpipe. I'll probably have to remove it to weld in my e-vac bung/nipple, however I need to get it installed first so I can find a good placement to install the e-vac bung...
So, I found a great spot to mount the thermostat for the oil cooler, however, it makes running the lines a bit of a pain in the ass... It's not exactly the most organized, but it gets the job done and function of form anyday...
That's all for now, thanks for looking as always...
Original status
Joined: Aug 2008
Posts: 1,106
Likes: 0
outstanding. so much time spent in the little areas as well as the big ones. this is something i can not wait to see finished, and your thread is packed with clear pics. you make me wanna take my sr out and do things a little differently, very inspiring
__________________
Tsuda-Ichi
Tsuda-Ichi


