The pumps feature an internal check valve for use in staged systems, which is critical in a three-pump setup being driven on the street as well as the track. It would do no good to have one or two pumps working, only to have the disengaged pump allowing a pressure loss due to backflow.
Fore advertises its triple-pump setup as capable of supporting 1,600 to 1,700 rear-wheel horsepower on E85. So, our measly (by comparison) goal of 1,000 wheel horsepower should be no problem for this pump setup. To make this a streetable setup, we used the Fore FC3 triple-pump staged controller. The controller itself comes wired with a 15-foot, 4-gauge power wire, and a 3-foot, 4-gauge ground wire.
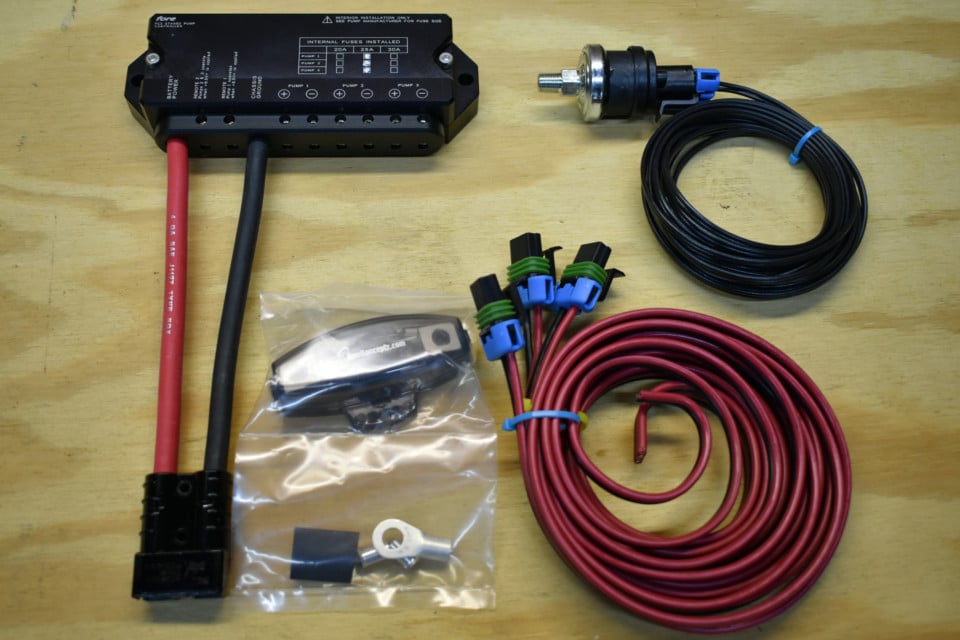
The Fore FC3 triple-pump controller simplifies the wiring involved with stating the pumps. In addition to the controller, Ivan opted for a mechanical 5 psi boost-pressure switch to trigger the secondary pump (upper-right corner).
Designed as an all-in-one controller, the FC3 is essentially an intelligent power distribution module that takes a single high-current feed and uses it to control the individual pumps. With a capacity of 30 amps per pump, the FC3 has internal, replaceable fuses for each individual pump.
The controller allows either one or two pumps to be run full time, with the remaining pump(s) activated by a simple 12-volt positive trigger. The idea behind staging pumps is that on the street or in low-load situations there is no need for all three pumps to be running at the same time creating excess heat, as a majority of the fuel would be returned to the tank under low load.
Since Ivan will be driving on the street in a low-load situation quite a bit, it was decided to run two pumps consistently and have the third be staged, for several reasons. First, in case of failure of a pump at any point in the engine’s range of operation, the engine should still be safe running on just one pump up to 5 psi and at full-boogie, two pumps. Two of the three pumps at maximum output should be able to support 1,000 horsepower for a short time, which will prevent the engine from detonating.
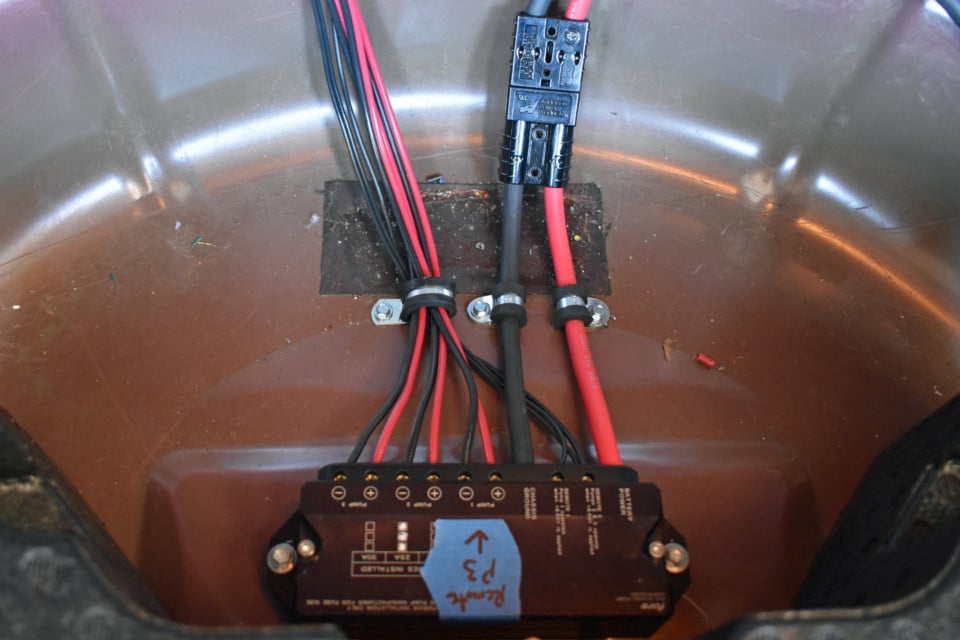
Wiring the FC3 unit is extremely easy, thanks to the included harnesses. Main power to the unit through the 4-gauge leads, then two pumps selected as constant-on functionality, then the third selected as the supplemental-on pump. Finally, the 12-volt positive wire from the mechanical boost switch is wired into the trigger terminal.
Second, in case of a failure of the secondary activation method (a 5-psi mechanical switch, in this case) in the heat of the moment, there will still be enough fuel to keep the engine safe. While running on only two pumps isn’t ideal, as they would be at their limits, running two of the pumps constantly and one staged is the best balance of limiting excess heat in the fuel and safety in a failure mode.
The pump-activation can be triggered by a multitude of different switches, like standalone fuel pressure, RPM, or boost pressure switches. Or you can configure an output from an ECU, which takes all those factors into consideration. For our application, we have the controller set up to drive two of the 450-lph pumps constantly, with the third pump activating whenever boost hits 5 psi.
We accomplish that through the use of a Honeywell 5-psi pressure switch sold by Fore. With a boost-reference line plumbed to the switch, as soon as the mechanical diaphragm in the switch sees 5 psi, it closes the contacts, sending a 12-volt trigger signal to the FC3 to turn on the third pump.
Plumbing Isn’t Just for the Mario Brothers
The biggest, baddest fuel pumps in the world aren’t worth much if you can’t efficiently and safely get the fuel to the engine. For that, we turned once again to our friends at DeatschWerks. While well-known for its line of fuel injectors, DeatschWerks also has its own line of fuel hoses and fittings to handle a variety of fuels and performance applications.
Fuel line sizing can be slightly confusing since it’s not something the average person ever thinks about being a limiting factor in making power. Luckily, DeatschWerks offers a hose-size guide for different fuels. While AN-8 hose is listed as capable of 1,400 horsepower on E85, we didn’t want to impart any restrictions on fuel flow since our pump setup is capable of more than 1,400 horsepower of flow.
To that end, we chose to run AN-10 fittings and hose on the output side of the pump hat, and AN-8 as the return. With those two primary sizes determined at the fuel hat, it was just a matter of drawing a flow map and determining the path of the fuel with the help of DeatschWerks.
A quick overview of the routing of the lines is: from the pumps, we used -10 line to an FF160 10-micron fuel filter, to a single -10 in, dual -8 out, Y-block mounted on the fender well. Two -8 lines run from the Y-block on the fender well to feed the fuel rails. On the return-side of the fuel rails are a pair of -8 lines which feed into the DWR2000 fuel pressure regulator, and an AN-8 line from the return port back to the return fitting on the pump hat.
For the fuel line, we opted for DeatschWerks nylon-braided Chlorinated Polyethylene (CPE) hose throughout. DeatschWerks also offers a stainless-braided version, as well as nylon- and stainless-braided PTFE lines. But, for our application, the CPE line was sufficient and notably easier to work with than the PTFE variant.
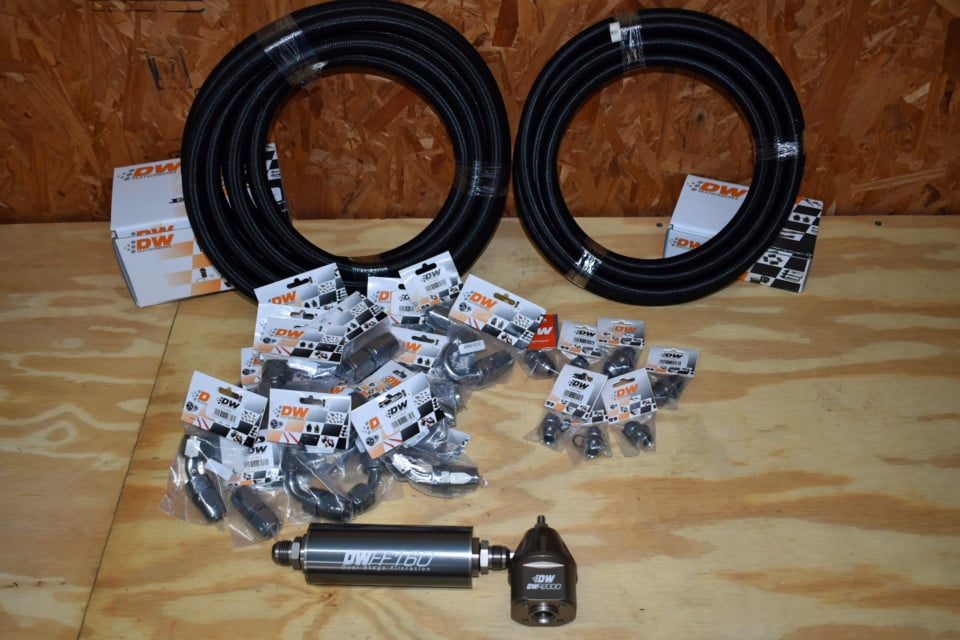
With DeatschWerks offering a full line of hoses and fittings, plumbing the new fuel pumps and building a return-style system was about as easy as an automotive plumbing job gets. We chose DeatschWerks nylon-braided CPE lines for their light weight and clean look.
The CPE nylon-braided line has a pressure rating of 350 psi, which is more than enough for our fuel supply. It also happens to be the lowest-rated of DeatschWerks lines, as the stainless-braided CPE line is rated to 500 psi, and both PTFE lines will hold a whopping 1,000 psi.
The CPE line is compatible with standard pump gas, E85, and most race fuels, which is perfect for Ivan, as he is planning on a steady diet of
Renegade Pro E85 Unleaded. The nylon-braided version is lightweight and has an operating temperature of -40 to 300 degrees Fahrenheit. It is the most cost-effective option, and also offers quick-and-easy installation of hose ends and fittings.
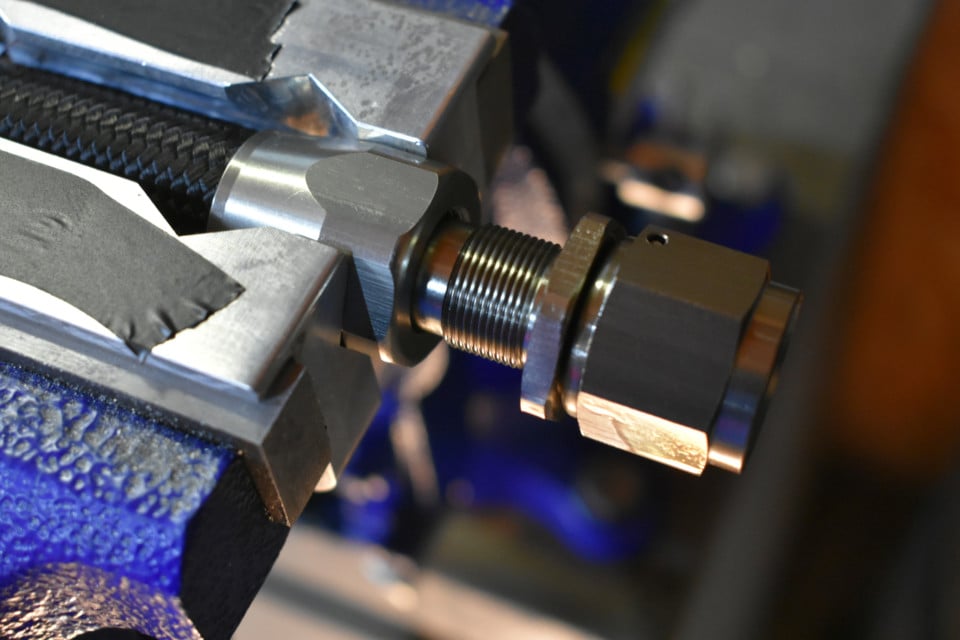
One of the big differences between the CPE hose and PTFE hose is the ease of installing fittings. DeatschWerks makes fittings specific to each type of hose, but the CPE hose and fittings are significantly easier to assemble.