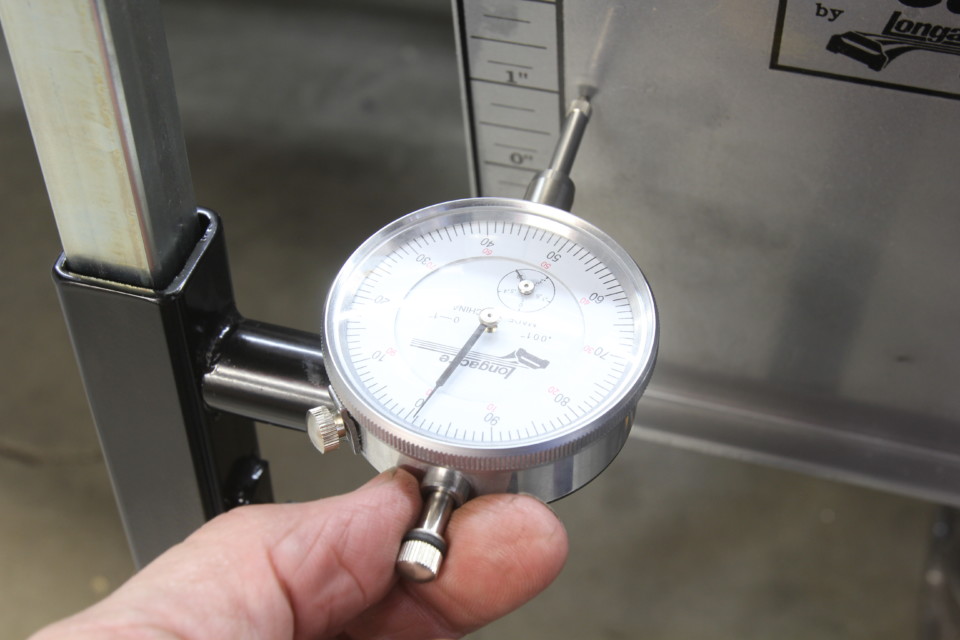
When changing suspension height, pay close attention to the direction the dial indicator needle moves. Because the dial indicator is located on the leading edge of the hub, increasing dial indicator movement (toward the inboard side of the wheel) measures toe-in, while indicator movement outward is toe-out. This can become a point of confusion the first few times you perform this test, so it’s best to be vigilant. You can pull on the plunger to verify its movement.
The good news for our chassis was that we measured a maximum of 0.020 inch of bump over 2 inches of compression and rebound, with 0.010 inch of toe out for 1 inch of travel. The first inch of suspension travel in both compression and rebound is the critical range, since that’s where the car will spend a majority of its time.
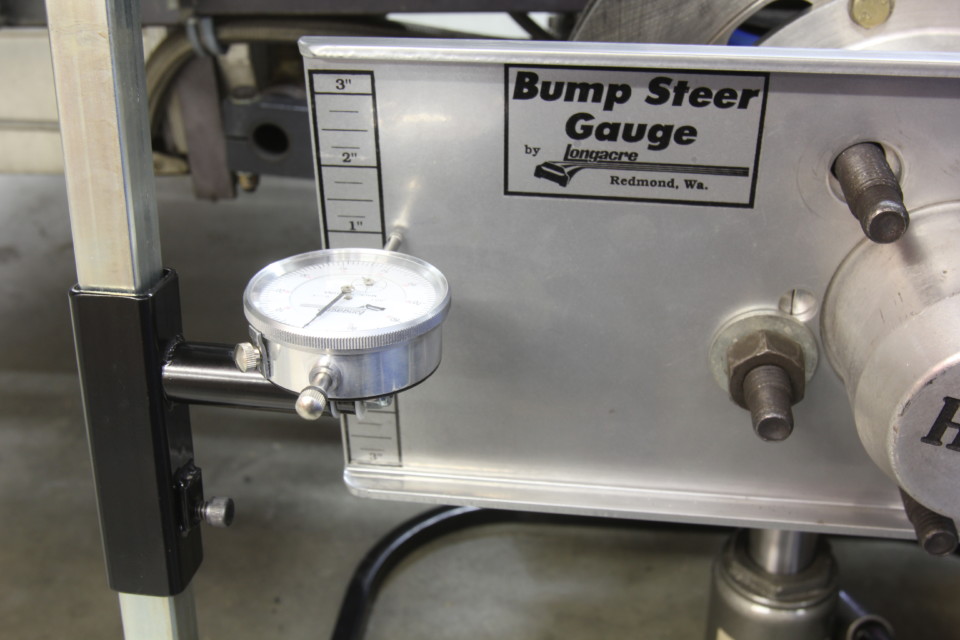
This is 1 inch of rebound (1 inch above the 0 line) and while it’s difficult to see in this photo, the dial indicator has barely moved off 0. That’s what we were hoping to see. We had previously installed new custom spindles and upper control arms from Travis Bryans at
Bryans Racing Enterprises (BRE) and this was the test to establish the bumpsteer curve.
It’s possible that your bumpsteer curve will not be what you desire and may need some attention. We’ve created a small chart showing bumpsteer problems and their potential solutions as well as some graphs that show curves that are not ideal.
BUMPSTEERProblemSolutionToe-out in compression / toe-in on reboundLower inner tie-rod endToe-in in compression / toe-out on reboundRaise the inner tie rodToe-in on compression and reboundLengthen tie rodToe-out on compression and reboundShorten tie rod
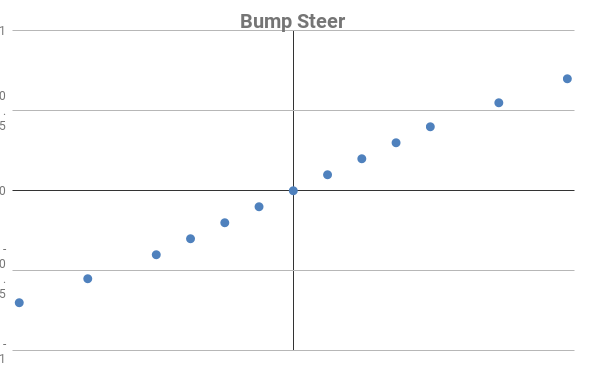
This graph shows a rather ugly curve that reveals how this front suspension drifts from nearly ¾ inch of toe-in at 2 inches of rebound to nearly the same amount of toe-out at 2 inches of compression. That’s a total bumpsteer movement of nearly 1.5 inches! This is an actual street car bump curve.
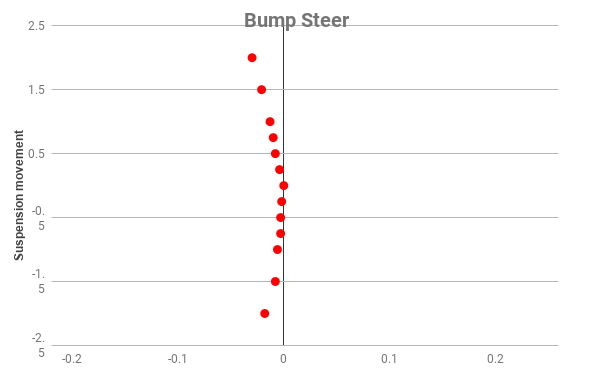
This curve illustrates a much cleaner curve, but one that produces toe-in on both compression and rebound. An ideal curve would be the opposite with the curve on the opposite (or the toe-out) quadrants on the right side of the graph.
There is far more detail on how to affect changes to the various bump curve problems, but as mentioned earlier, they all come down to creating the same arc of movement of the steering link with the spindle. When they scribe near identical arcs, bumpsteer becomes manageable.
Measuring bumpsteer isn’t difficult, but it does require patience and attention to detail. Once you record the numbers, the rest of the process is merely adjusting the suspension until the bump curve is what you desire. In our case, we achieved a much cleaner curve by investing in custom spindles. But you won’t know what to do until you dive in and measure the car on both sides.