Johnny Cash Mustang project


Registered User
Thread Starter
Join Date: Oct 2007
Posts: 6,052
Likes: 0
Received 0 Likes
on
0 Posts
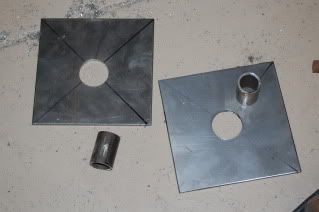
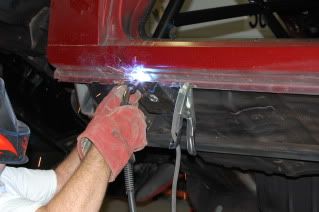
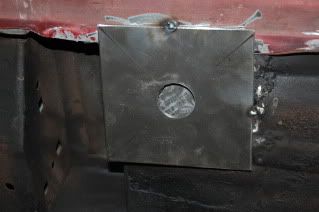
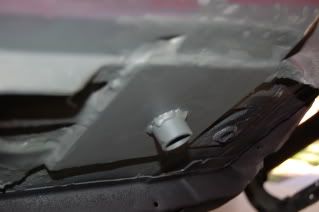
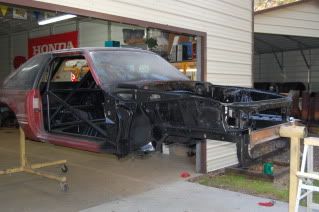
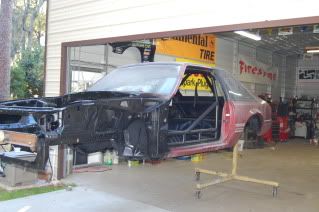
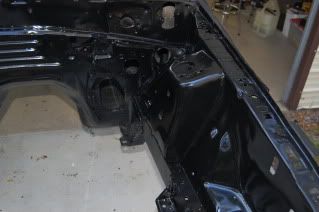
I finished the chassis of the mustang today, of course there is always detail work to be done but the fabrication is mostly over. First off, I always hate it when you can't find a decent place to jack the car up so I made my own hard points. I cut some 1/8 inch plate, drilled 1-1/2 inch holes in them, and cut up 1-1/4 tubing. I placed the tubing as close as I could to the bottom of the roll bar, tack welded them, and placed the plate over that and welded up the whole deal. To make up some of the space between the floor pan and the plate, I used some scrap metal and welded it in. Now the car has four hard points to jack the car up and place jack stands.
The fabricated plates:
After all of that I painted the chassis and engine compartment.
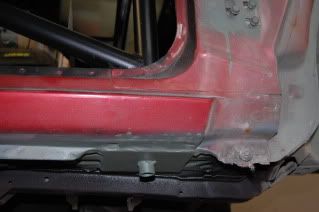
The bottom of the car, you can see the hard points if you look close.
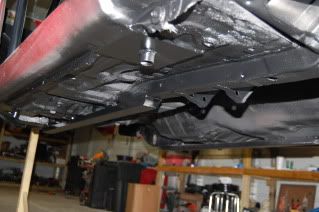
The fabricated plates:
After all of that I painted the chassis and engine compartment.
The bottom of the car, you can see the hard points if you look close.
Last edited by blacksheep-1; 01-20-2012 at 05:34 PM.
Registered User
Thread Starter
Join Date: Oct 2007
Posts: 6,052
Likes: 0
Received 0 Likes
on
0 Posts
I had the neighbor come over with his John Deere tractor, we placed the forks on the lift and slid them under the car. To make sure the car did not fall we strapped the rollcage to the tractor. We then lowered the car onto furniture rollers so I could still push the car around.
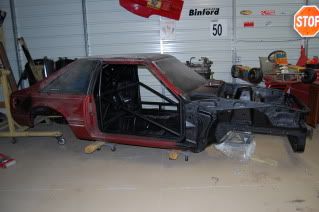
Here's a pic of the Granatelli subframe slid into place. I had to have surgery for a hernia in the intestinal wall, so I will be out a few days.
Here's a pic of the Granatelli subframe slid into place. I had to have surgery for a hernia in the intestinal wall, so I will be out a few days.
Registered User
Thread Starter
Join Date: Oct 2007
Posts: 6,052
Likes: 0
Received 0 Likes
on
0 Posts
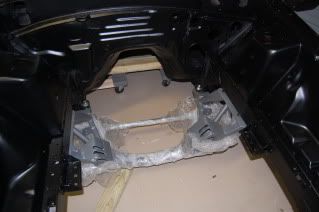
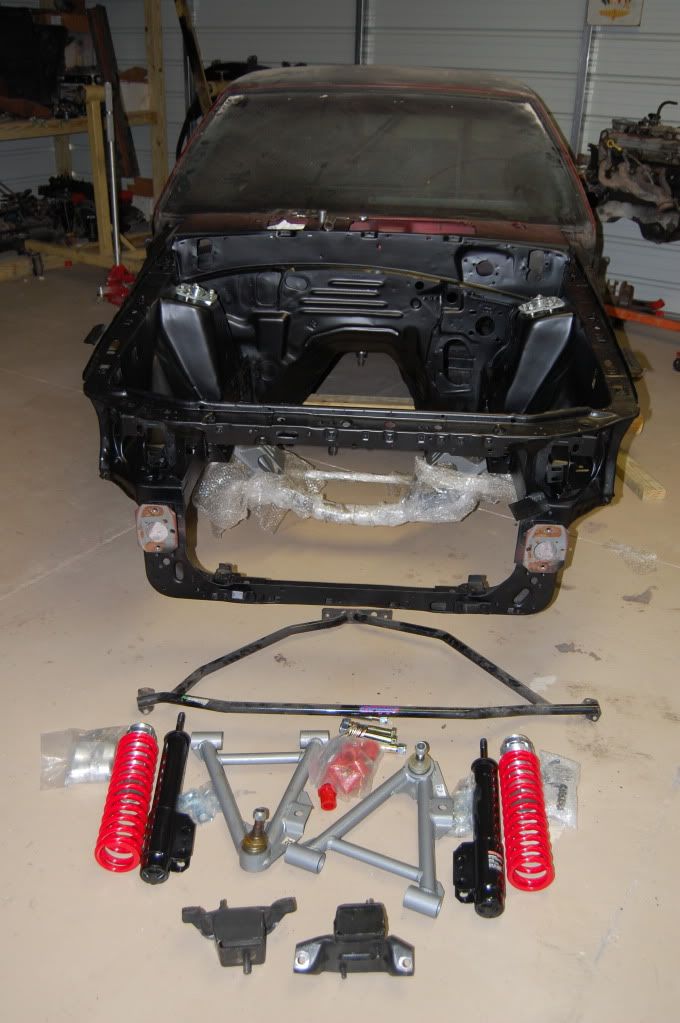
More parts......
Granatelli a-arms, and coil overs, they will be going on Monroe struts for now, eventually I hope to pony up for some adjustable Bilsteins but they're kind of pricey right now. Gripp "Export brace" (that's old school, now they're called strut tower braces )and solid motor mounts, that should tighten up the front end. The strut mounts are UPR.
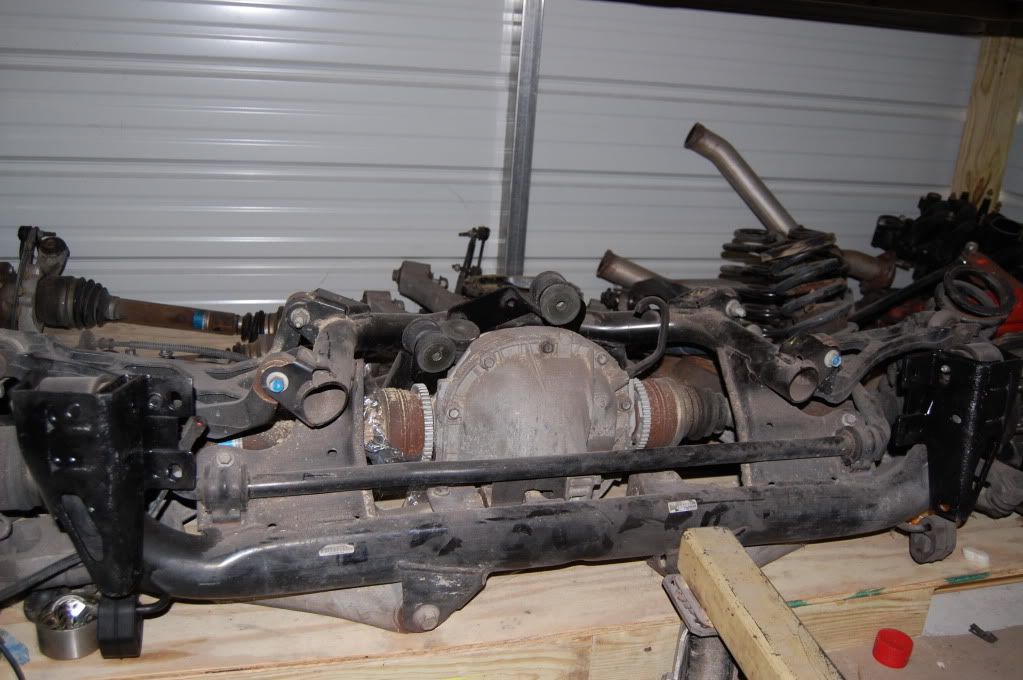
Here's the IRS out of a 99 cobra, somewhere in that pile is a 4.11 pumpkin that will be going in it
Granatelli a-arms, and coil overs, they will be going on Monroe struts for now, eventually I hope to pony up for some adjustable Bilsteins but they're kind of pricey right now. Gripp "Export brace" (that's old school, now they're called strut tower braces )and solid motor mounts, that should tighten up the front end. The strut mounts are UPR.
Here's the IRS out of a 99 cobra, somewhere in that pile is a 4.11 pumpkin that will be going in it
Last edited by blacksheep-1; 02-02-2012 at 10:08 AM.
Engine Armor Coating

Join Date: Mar 2011
Posts: 54
Likes: 0
Received 0 Likes
on
0 Posts
If you are looking for Shocks/struts talk to Alex at T & A Shocks (ww.tandashocks.biz). I just got a set of custom valved Bilsteins for my American Sedan Mustang. These guys build everything from budget friendly Bilsteins to top $$$ Penske. Several of their cars have won SCCA National Championships.
__________________
Scott
Engine ArmorPerformance Coatings
http://www.enginearmorcoating.com
813-685-8333
Scott
Engine ArmorPerformance Coatings
http://www.enginearmorcoating.com
813-685-8333

Registered User
Thread Starter
Join Date: Oct 2007
Posts: 6,052
Likes: 0
Received 0 Likes
on
0 Posts
So, in order to use the lo-buck Monroe sensitrac shocks they had to be modified, the dust cover was removed, then a small 3/8 inch by (about) 1 inch piece of metal was cut out, polished and welded to the shock mount. THIS IS IMPORTANT! IF you do this do not weld to the actual shock tube!! this will damage the shock, keep any heat on the actual bracket that surrounds the shock and supports the spindle, This will allow you to use the cheapo shocks with the Coil over shocks. I will try to have a photo on this in the future.
Now back to the shocks, the instructions say to remove the coating from the springs in order to get them to fit. What they should have said was to "Polish the living hell out of the spring to get it to seat acceptably"
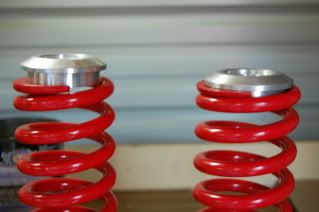
The first photo shows the spring on the adjuster before polishing/grinding / etc.
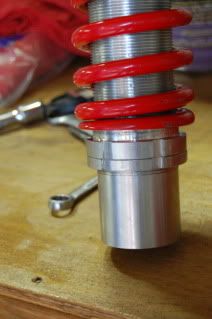
and after..........
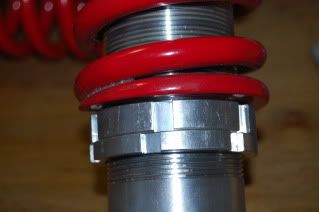
The same with the top mount.....
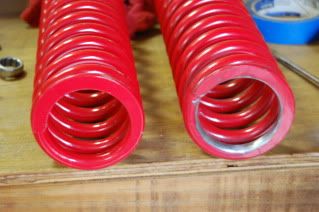
and this was how much we had to grind off, especially the end of the spring itself...
Now the spring can actually be adjusted quite easily, instead of binding and tearing up the aluminum adjuster.
I've spent most of today trying to line up the K-member, more tomorrow.
Now back to the shocks, the instructions say to remove the coating from the springs in order to get them to fit. What they should have said was to "Polish the living hell out of the spring to get it to seat acceptably"
The first photo shows the spring on the adjuster before polishing/grinding / etc.
and after..........
The same with the top mount.....
and this was how much we had to grind off, especially the end of the spring itself...
Now the spring can actually be adjusted quite easily, instead of binding and tearing up the aluminum adjuster.
I've spent most of today trying to line up the K-member, more tomorrow.
Last edited by blacksheep-1; 02-06-2012 at 05:00 PM.
Registered User
Thread Starter
Join Date: Oct 2007
Posts: 6,052
Likes: 0
Received 0 Likes
on
0 Posts
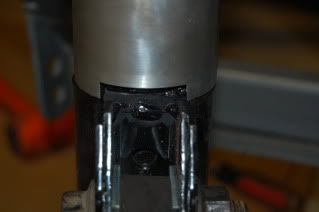
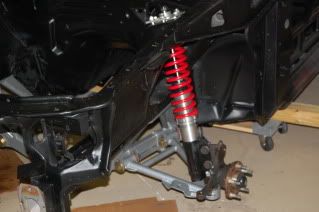
Her'e the photo of the tab I made in order to use the cheapo shocks with the coilovers. Again DO NOT weld to the shock tube, weld to the bracket that supports the spindle and keep the shock tube cool.
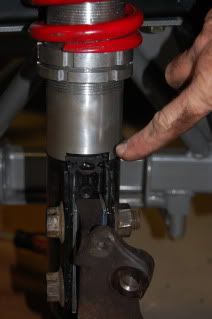
Here's an unobstructed view and shows how the coil over kit indexes on it....
and the complete front end..
Here's an unobstructed view and shows how the coil over kit indexes on it....
and the complete front end..
Last edited by blacksheep-1; 02-07-2012 at 06:33 PM.


