
Welding your diff.

Thread Starter
(OO\____/OO)
Joined: Oct 2008
Posts: 5,612
Likes: 0
Well i got my diff professionally welded by my buddy Josh Napoli of J&K Machine shop today to my specs, and since it was the PROPER way or at least PROCESS of prep cleaning and welding, i figured since i was having it done right, I'd take pics and maybe show the new guys how to clean/weld their diffs my way, as well as many others.
I'll keep this short and to the point with pics and captions, sorry for the lower quality but i didn't think I'd do a write up.
Step 1. Clean your Diff. let it drain completely, if you're in your garage, use brake parts cleaner (the kind that doubles as a flame throwing spider killer), and thoroughly clean the spider gears, and as much of the inner housing as possible. as shown, it's in a parts washer.

Clean on the inside clean on the outside, clean on the inside clean on the....

finish it up with brake parts cleaner (make sure to hit both sides thoroughly)

in my case, i chose to run with gusset plates for added insurance.

bing bing, one on right was trimmed after this photo.

Step 3. SECURE THE DIFF!!

also secure the ring set as shown, tack weld the top of each spider gear on both sides, make sure tack, turn, tack turn, or you'll overheat the bearings.

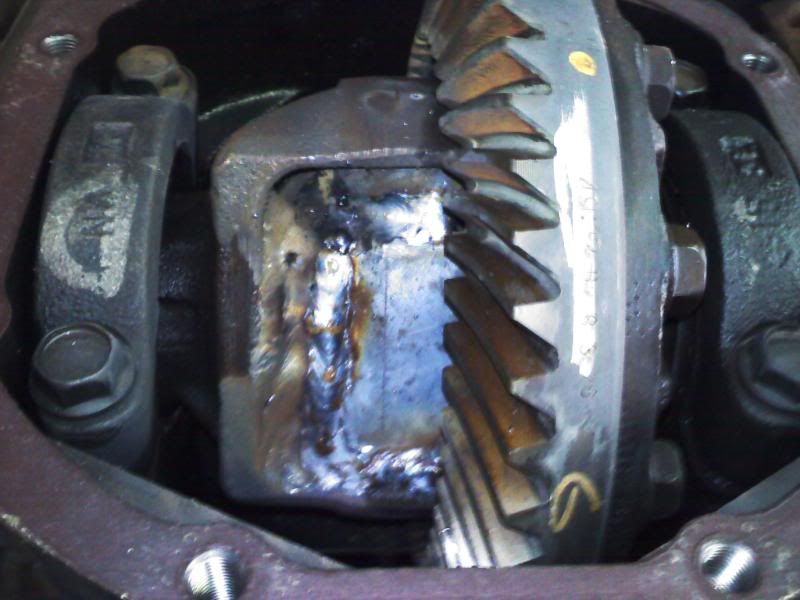
Step 3. WELD!

usually you can just fill in the ring set, but as shown, i chose to run gussets, you can see the fill around it, do so similar without the gussets, weld, turn, weld, turn
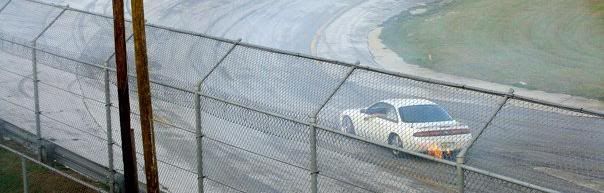
Allow cool down as necessary, i chose to let it cool with the all the filler, so while it did, i got to ride this sketchy bitch for about 45 minutes....
Why Bar Stool?.................... Because Racecar.

then, throw in 2.5 quarts of the cheapest 75w90 you can find, install it and rape face (on the track).
Once again, thanks go out to Josh Napoli of J&K Machine shop, they do full machine work and are top quality, also to my girlfriend for putting up with me and my "drift car".
Fin.
I'll keep this short and to the point with pics and captions, sorry for the lower quality but i didn't think I'd do a write up.
Step 1. Clean your Diff. let it drain completely, if you're in your garage, use brake parts cleaner (the kind that doubles as a flame throwing spider killer), and thoroughly clean the spider gears, and as much of the inner housing as possible. as shown, it's in a parts washer.
Clean on the inside clean on the outside, clean on the inside clean on the....
finish it up with brake parts cleaner (make sure to hit both sides thoroughly)
in my case, i chose to run with gusset plates for added insurance.
bing bing, one on right was trimmed after this photo.
Step 3. SECURE THE DIFF!!
also secure the ring set as shown, tack weld the top of each spider gear on both sides, make sure tack, turn, tack turn, or you'll overheat the bearings.
Step 3. WELD!
usually you can just fill in the ring set, but as shown, i chose to run gussets, you can see the fill around it, do so similar without the gussets, weld, turn, weld, turn
Allow cool down as necessary, i chose to let it cool with the all the filler, so while it did, i got to ride this sketchy bitch for about 45 minutes....
Why Bar Stool?.................... Because Racecar.
then, throw in 2.5 quarts of the cheapest 75w90 you can find, install it and rape face (on the track).
Once again, thanks go out to Josh Napoli of J&K Machine shop, they do full machine work and are top quality, also to my girlfriend for putting up with me and my "drift car".
Fin.
Registered User
Joined: Apr 2005
Posts: 2,162
Likes: 0
Let me know how that works out once its in the car. Im curious cause I took mine completely apart for fear that something might warp. But there are those pressed on bearings that I cant take off anyway, so it kinda defeats the purpose of disassembling first.
I already have a welded in teh car but its fucked up...and Im still on the fence about welding this other one.
I already have a welded in teh car but its fucked up...and Im still on the fence about welding this other one.
__________________

Thread Starter
(OO\____/OO)
Joined: Oct 2008
Posts: 5,612
Likes: 0
i personally welded my last one, i used the "garage" route as above with a smaller gas welder, didn't run gussets, but if you fill, turn, fill turn, it allows the heat to evenly spread, even allow for smoke breaks for some cool down in between turns. the turning is not only for cooling, but to keep the diff spinning between welds, it will seize up if you run it too hot, like always, just make sure you have good penetration.....
I'll be using it at CFRC on the 8th, driving down on it, and back, I'll let you know how it goes.
I'll be using it at CFRC on the 8th, driving down on it, and back, I'll let you know how it goes.
Registered User
Joined: Jul 2008
Posts: 1,829
Likes: 0
Brake Cleaner = Phosgene Article
Cleaning parts with brake parts cleaner then welding those parts makes a gas called arsenic!!!
It could only kill you is all!!!
Buy welders part cleaner next time!!!
Cleaning parts with brake parts cleaner then welding those parts makes a gas called arsenic!!!
It could only kill you is all!!!
Buy welders part cleaner next time!!!

Last edited by supreams14; Jul 2, 2011 at 01:15 AM.
Thread Starter
(OO\____/OO)
Joined: Oct 2008
Posts: 5,612
Likes: 0
Brake Cleaner = Phosgene Article
Cleaning parts with brake parts cleaner then welding those parts makes a gas called arsenic!!!
It could only kill you is all!!!
Buy welders part cleaner next time!!!
Cleaning parts with brake parts cleaner then welding those parts makes a gas called arsenic!!!
It could only kill you is all!!!
Buy welders part cleaner next time!!!
Registered User
Joined: Jul 2008
Posts: 1,829
Likes: 0
Just a heads up. Dieing over some dumb shit is gay

Thread
Thread Starter
Forum
Replies
Last Post


